Online Spreadsheet
Spreadsheets not only handle data processing and analysis in daily work but also provide a convenient and efficient one-stop office experience.
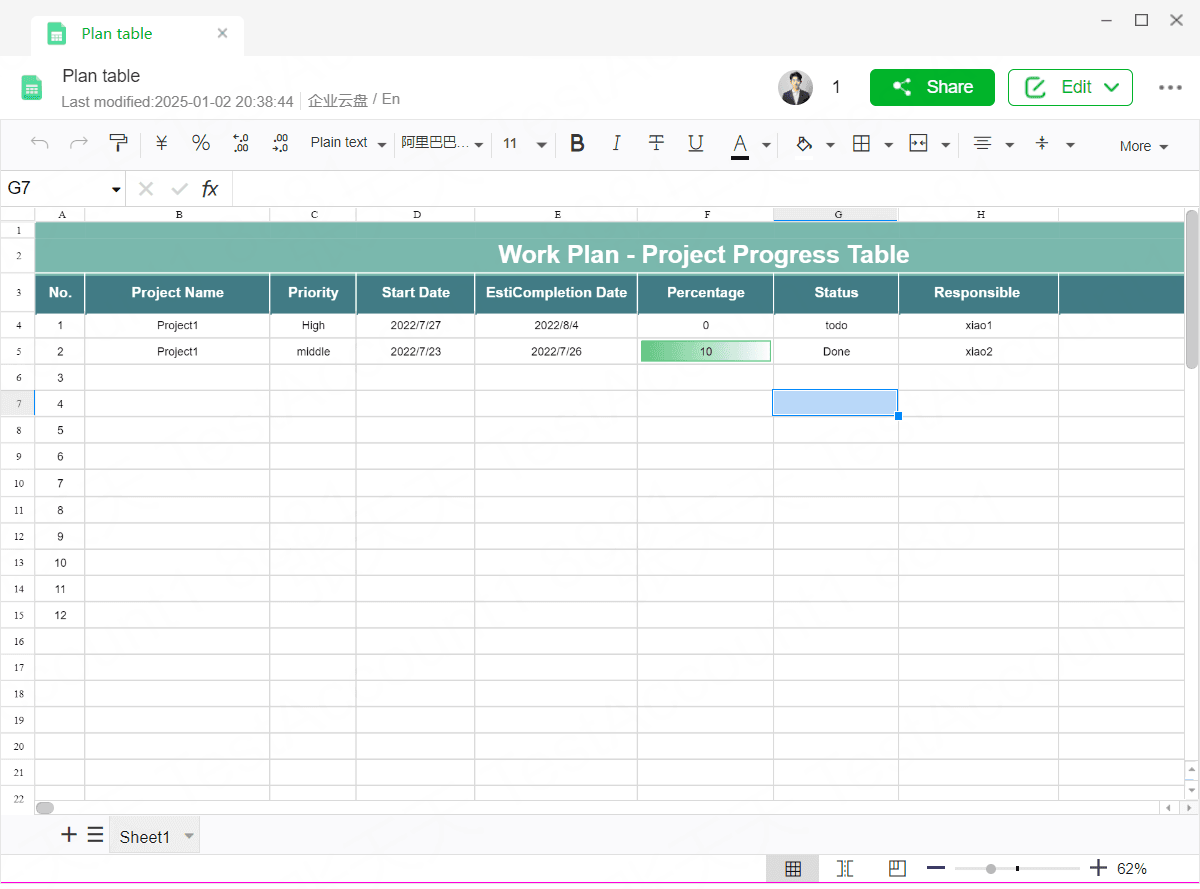
1.Creating a Spreadsheet
Depending on whether historical data exists, Duli offers two ways to create a spreadsheet: creating a blank spreadsheet or importing an existing one as an online spreadsheet.
1.1 New Blank Spreadsheet
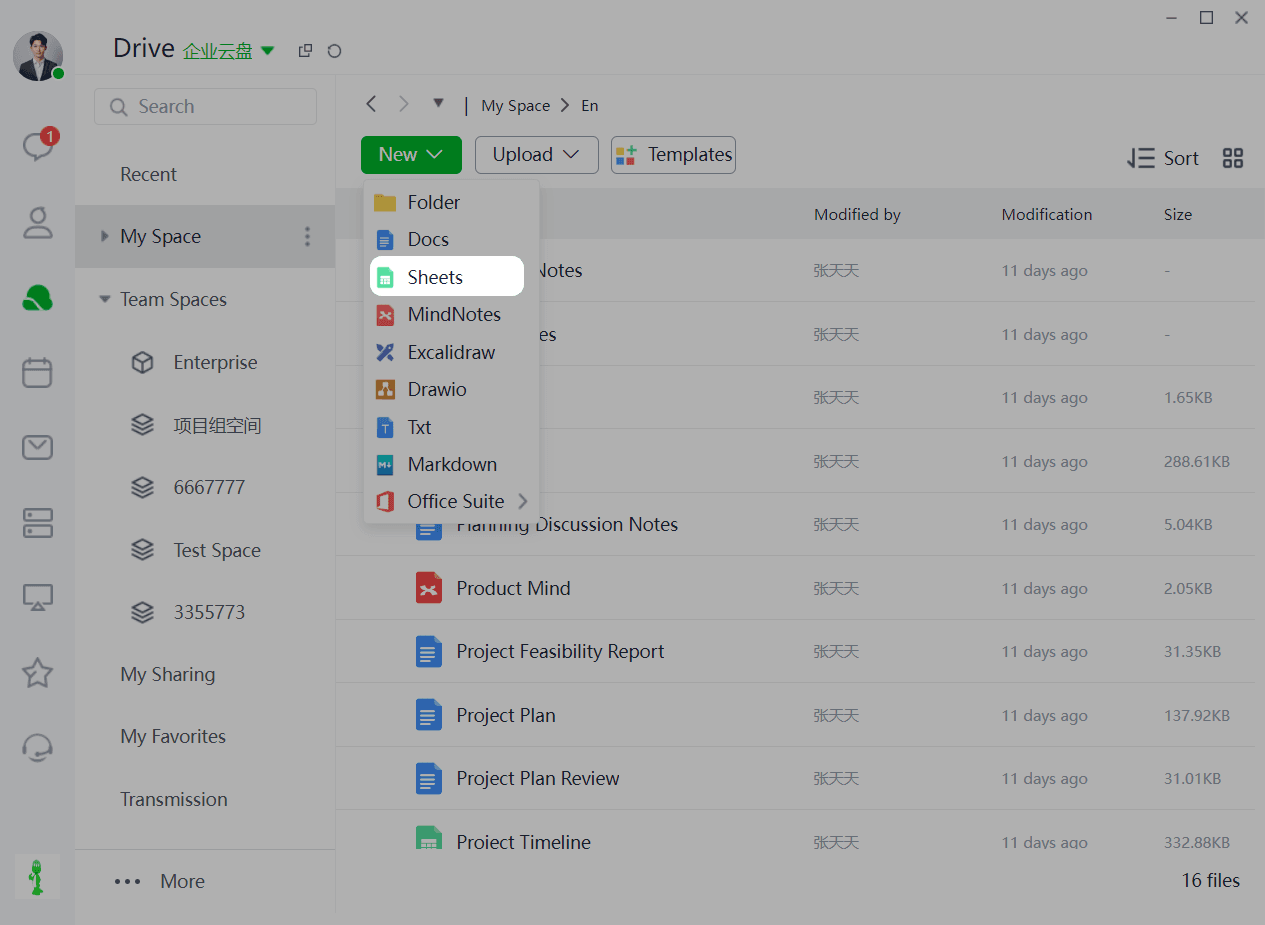
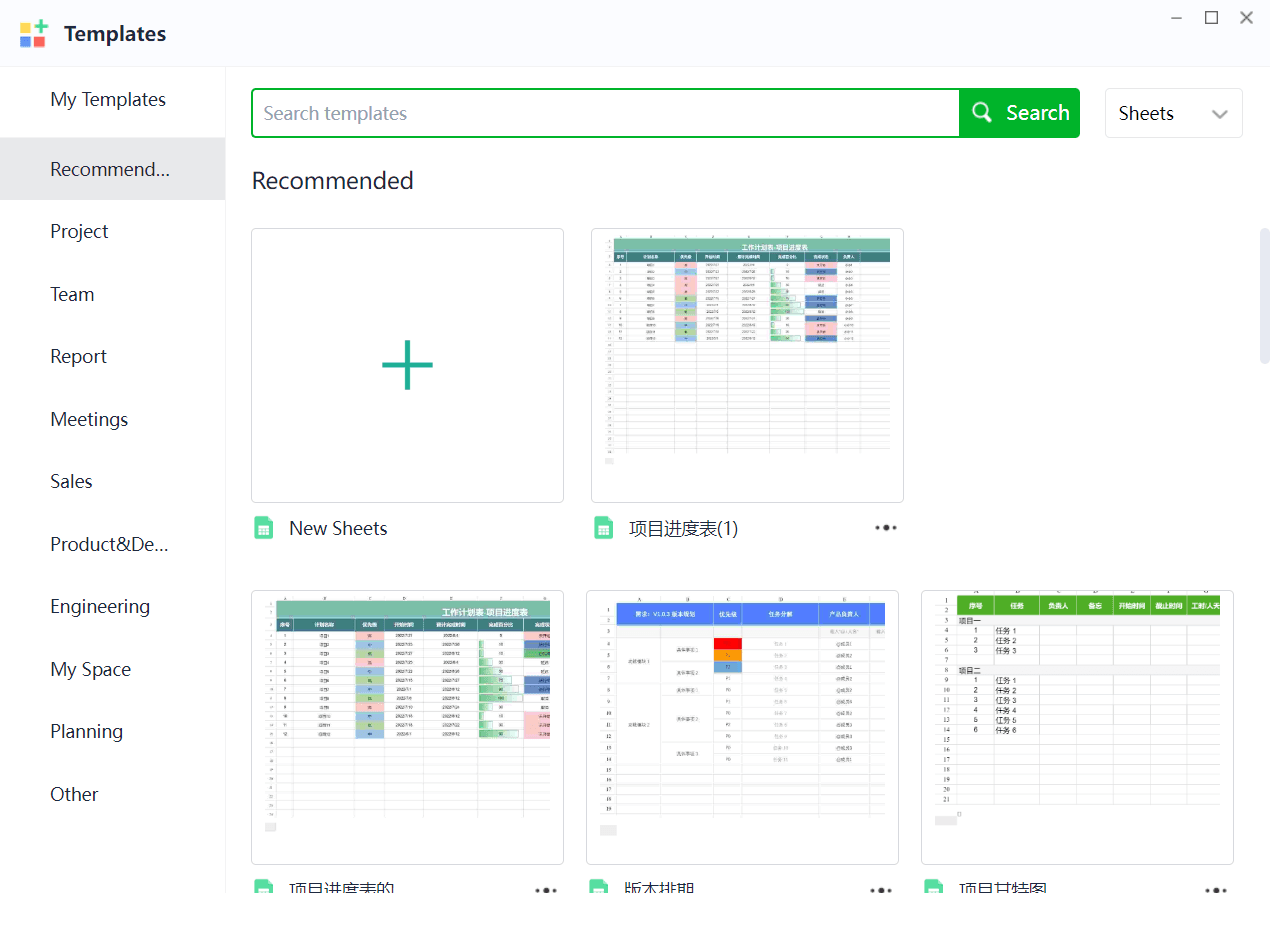
On the homepage of the cloud drive, in My Spreadsheets/Shared Space, click New > Online Spreadsheet to create a completely blank spreadsheet or one based on a template. Duli provides various spreadsheet templates to meet the needs of project management, weekly/daily reports, meetings, etc. You can also try searching for keywords to find a template that better suits your needs.
1.2 Migrating Historical Data
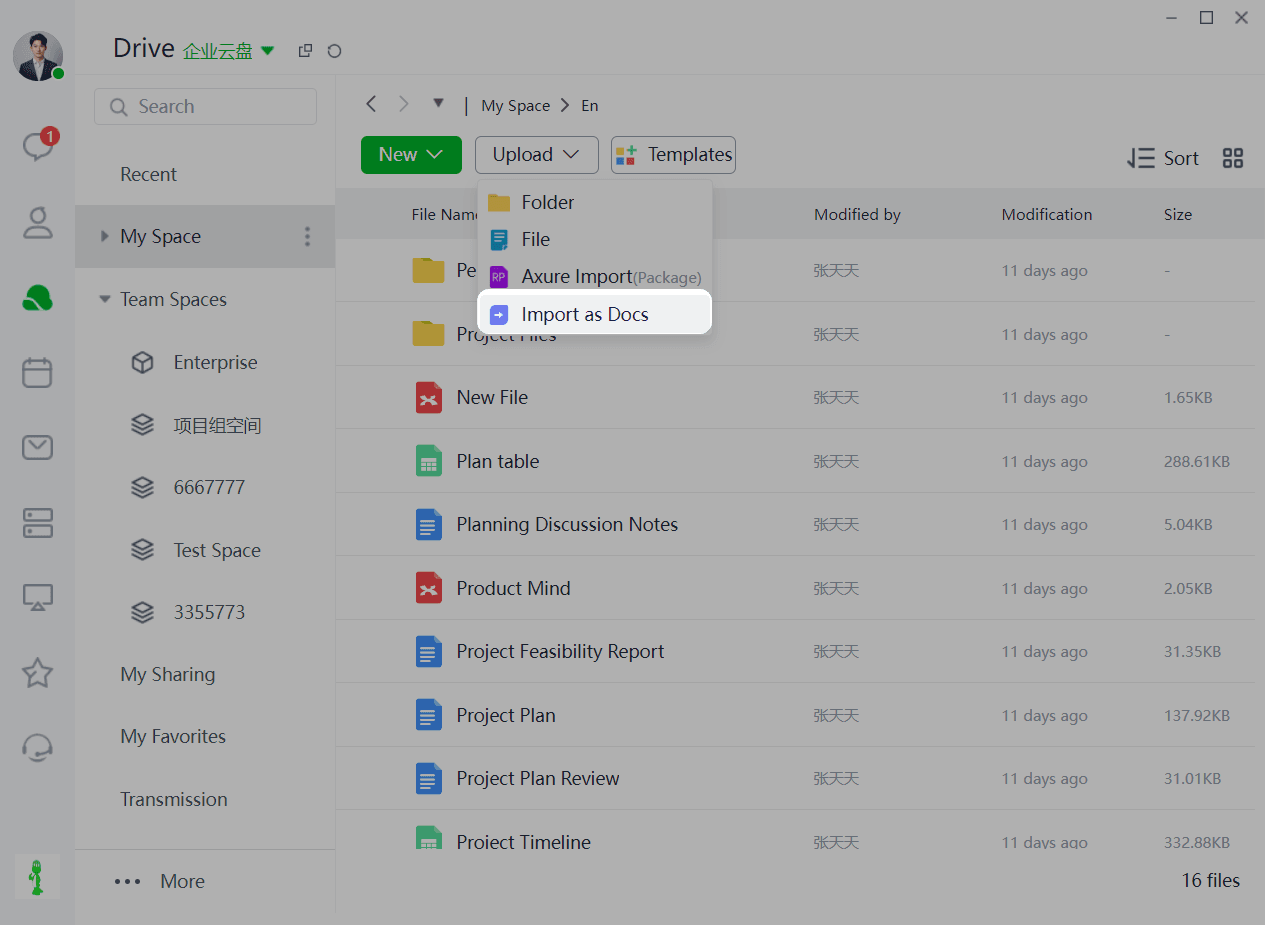
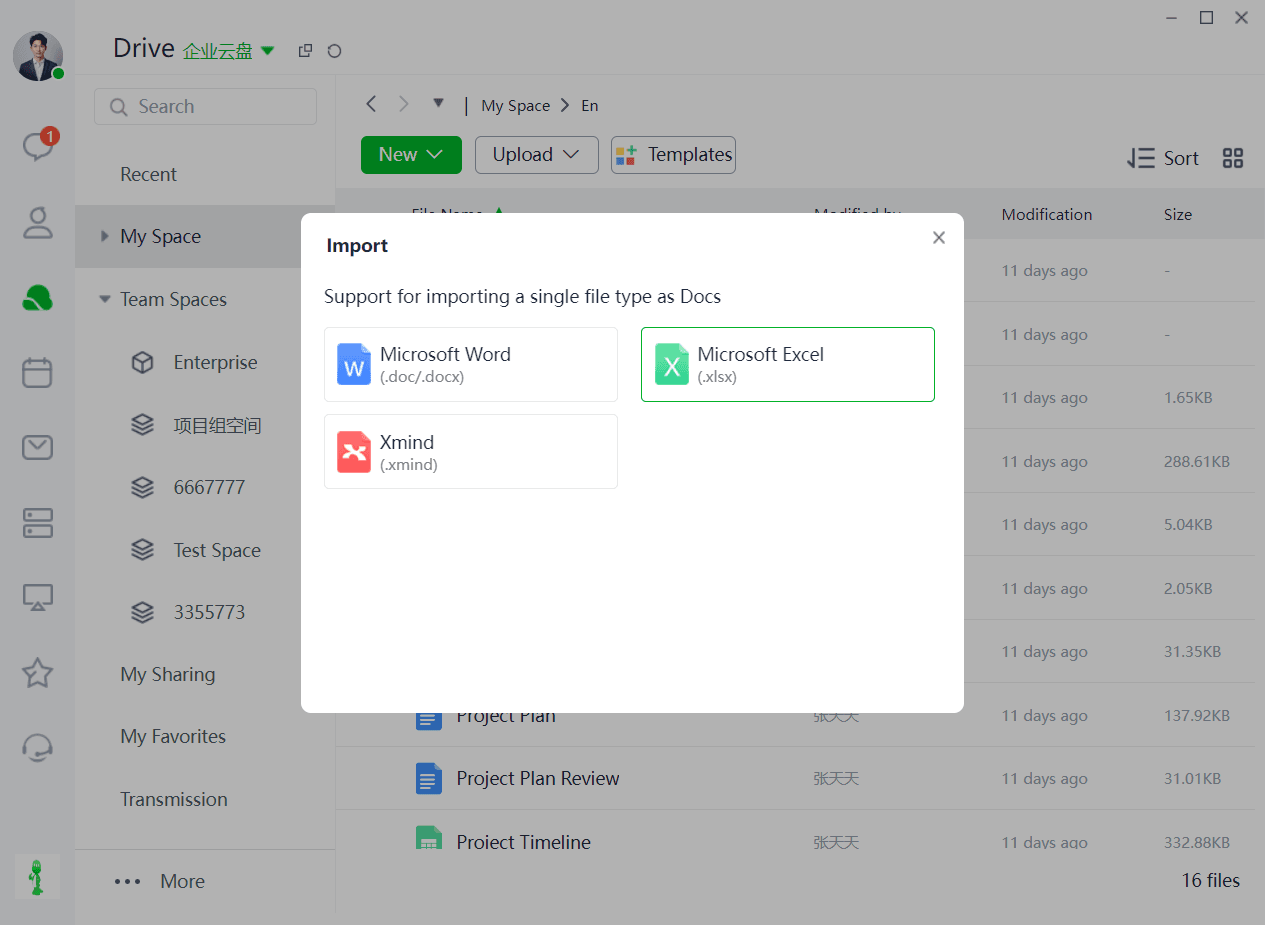
If you want to migrate existing .xlsx data to Duli, go to the cloud drive homepage, click Upload > Import as Online Spreadsheet, and select the corresponding file format.
2.Online Collaboration
Once the spreadsheet is successfully created, you can view and edit it together with colleagues.
2.1 Sharing the Spreadsheet
Method 1: Authorize within the Spreadsheet
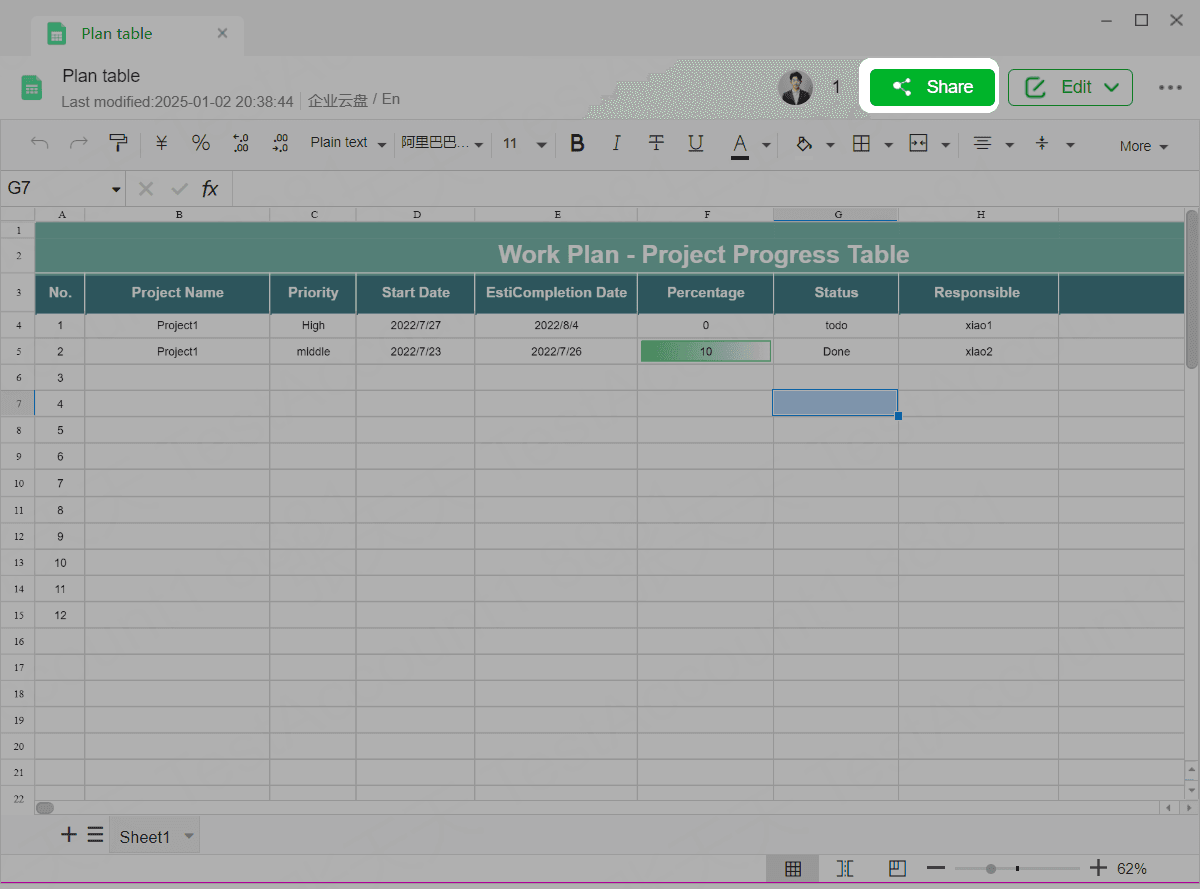
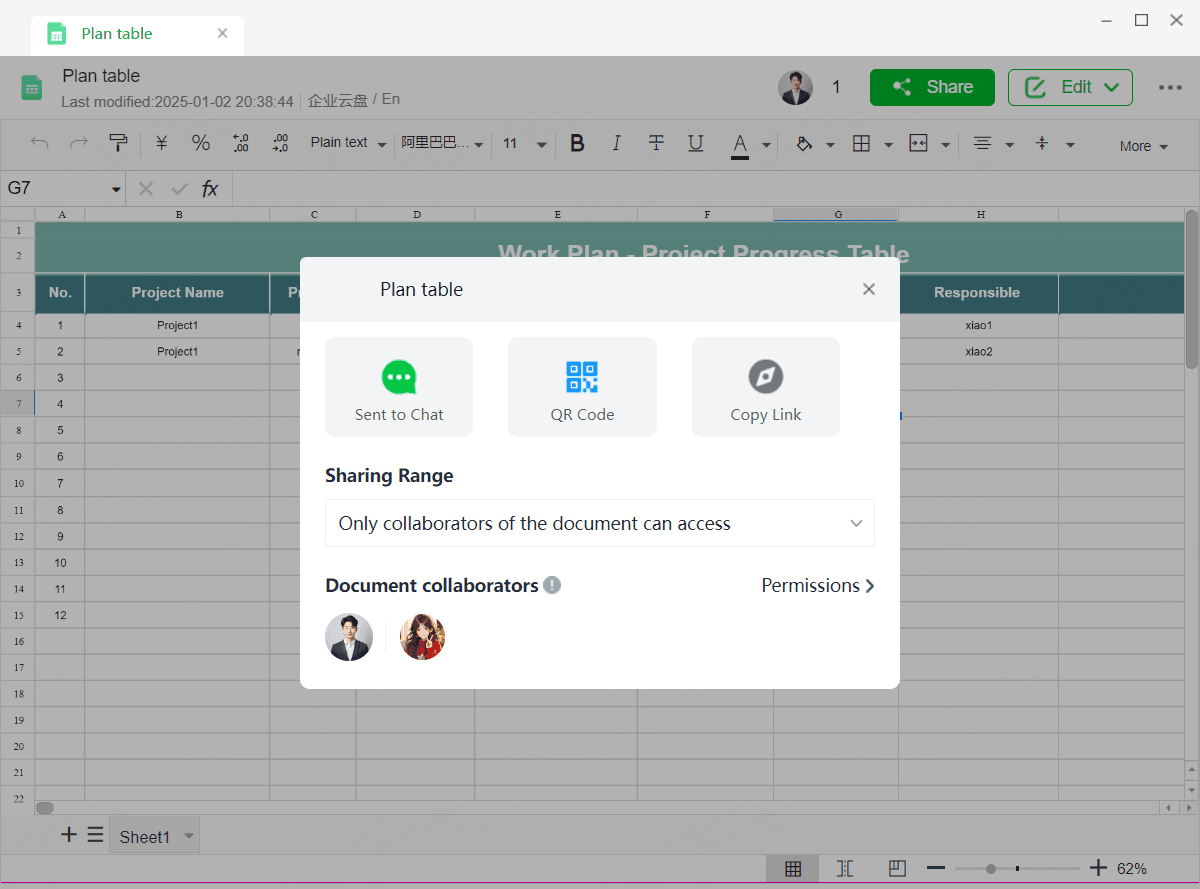
Click the Share button in the top right corner of the spreadsheet, add corresponding users in permission management, set their permissions, and they will gain collaborator access to the spreadsheet.
Method 2: Share from Outside the Spreadsheet
Right-click the spreadsheet you want to share, select Share, add corresponding users in permission management, set their permissions, and they will gain collaborator access to the spreadsheet.
2.2 Collaborating in the Spreadsheet
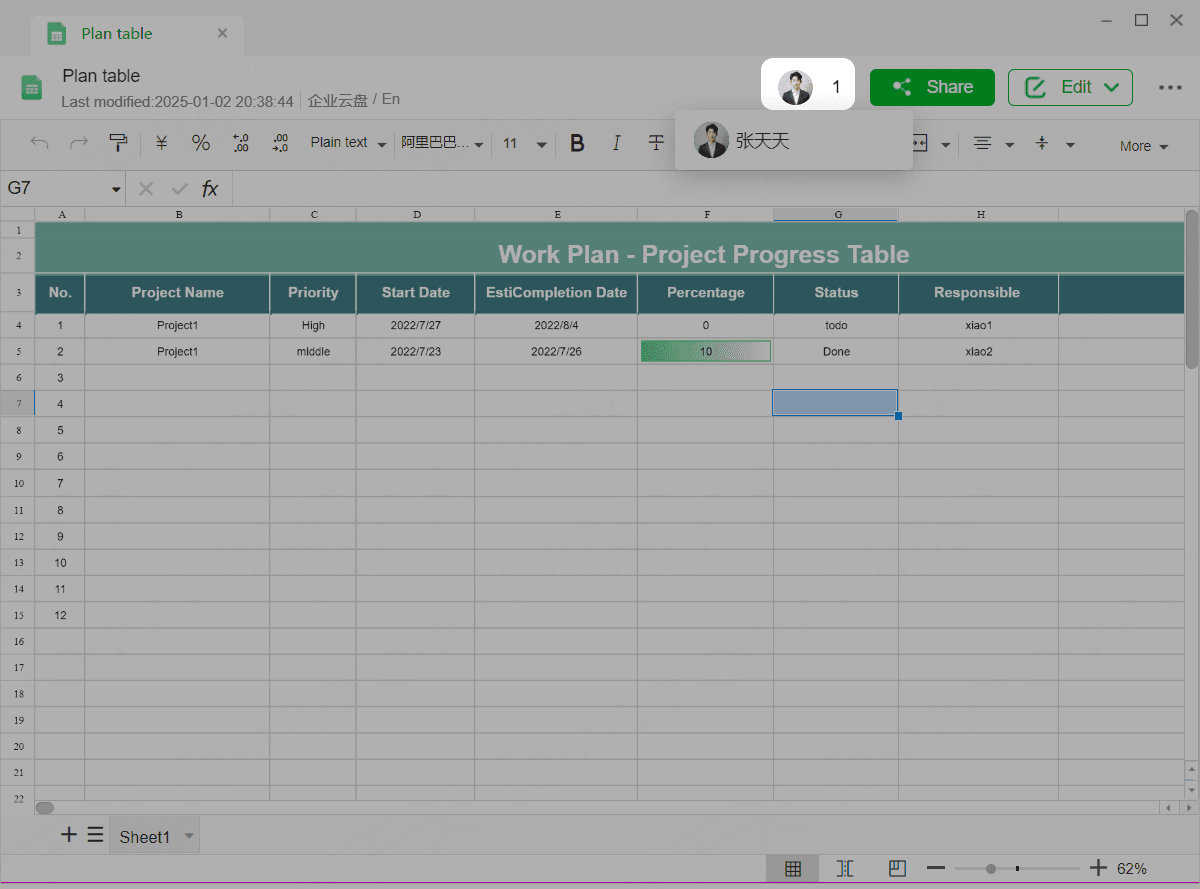
Once permissions are granted, you can read or edit the same spreadsheet with colleagues. When collaborating, other collaborators' names and the positions they are editing will be highlighted. In the top right corner of the spreadsheet, you can see the avatars and number of collaborators currently working on the spreadsheet. Clicking it will display a dropdown list of all collaborators' names and avatars.
3.1Basic Editing
3.1.1 Editing Cells
Double-click a cell to enter text, numbers, formulas, etc., and further set:
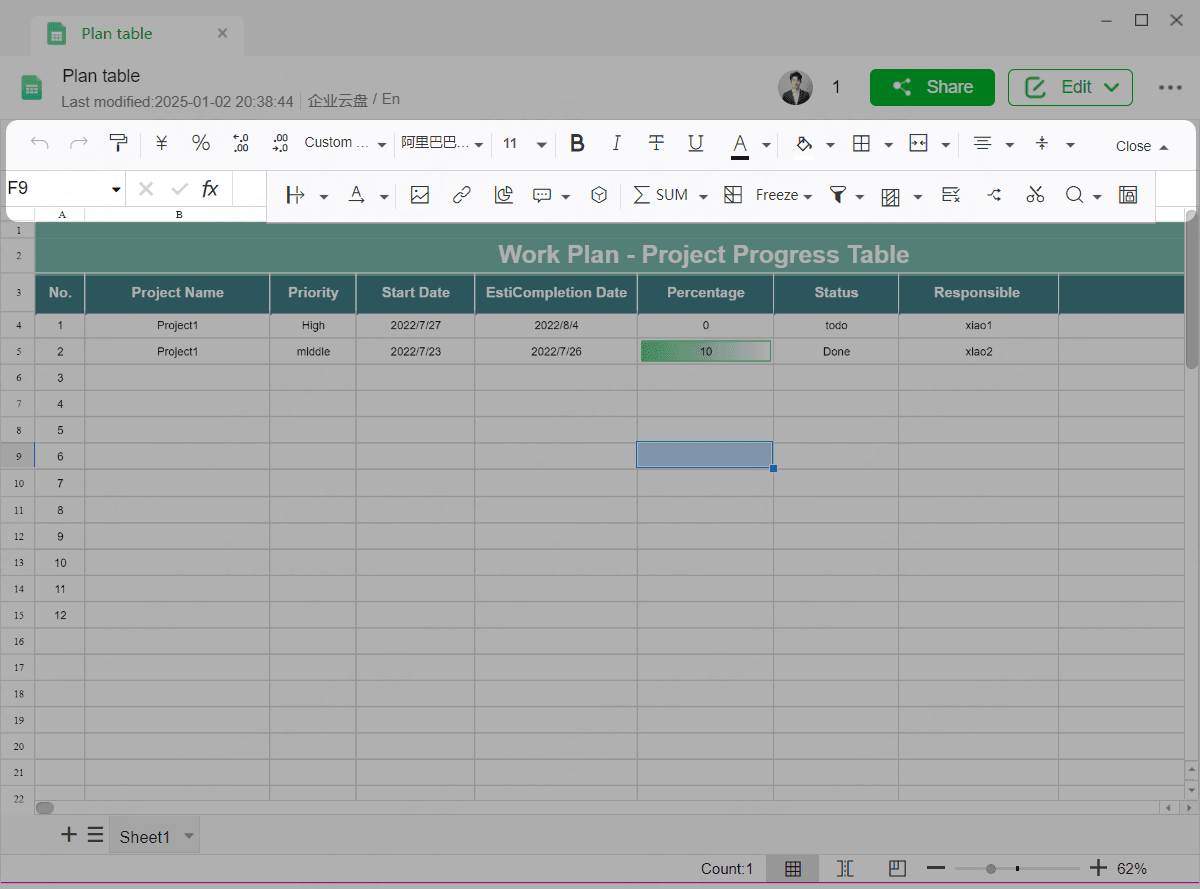
- Insert Content: In the toolbar, you can insert images, links, and charts.
- Set Style: Adjust font size, font style and color, background color, and alignment of the cell.
- Set Data Format: Set the spreadsheet's built-in formats for numbers, dates, currency, percentages, etc., in the toolbar.
3.1.2 Adjusting Page Layout
- Freeze Rows/Columns: Frozen rows/columns will stay in place, allowing readers to easily reference information while scrolling through the spreadsheet. Click the More button in the top right corner of the spreadsheet, select the position to freeze, and successfully freeze rows/columns.
- Hide Rows/Columns and Worksheets: Hide non-critical but unnecessary information to highlight key information and retrieve it when needed. Select the row/column, right-click and choose to hide the corresponding row/column to successfully hide it.
3.2Data Style and Format
3.2.1 Using Spreadsheet Functions
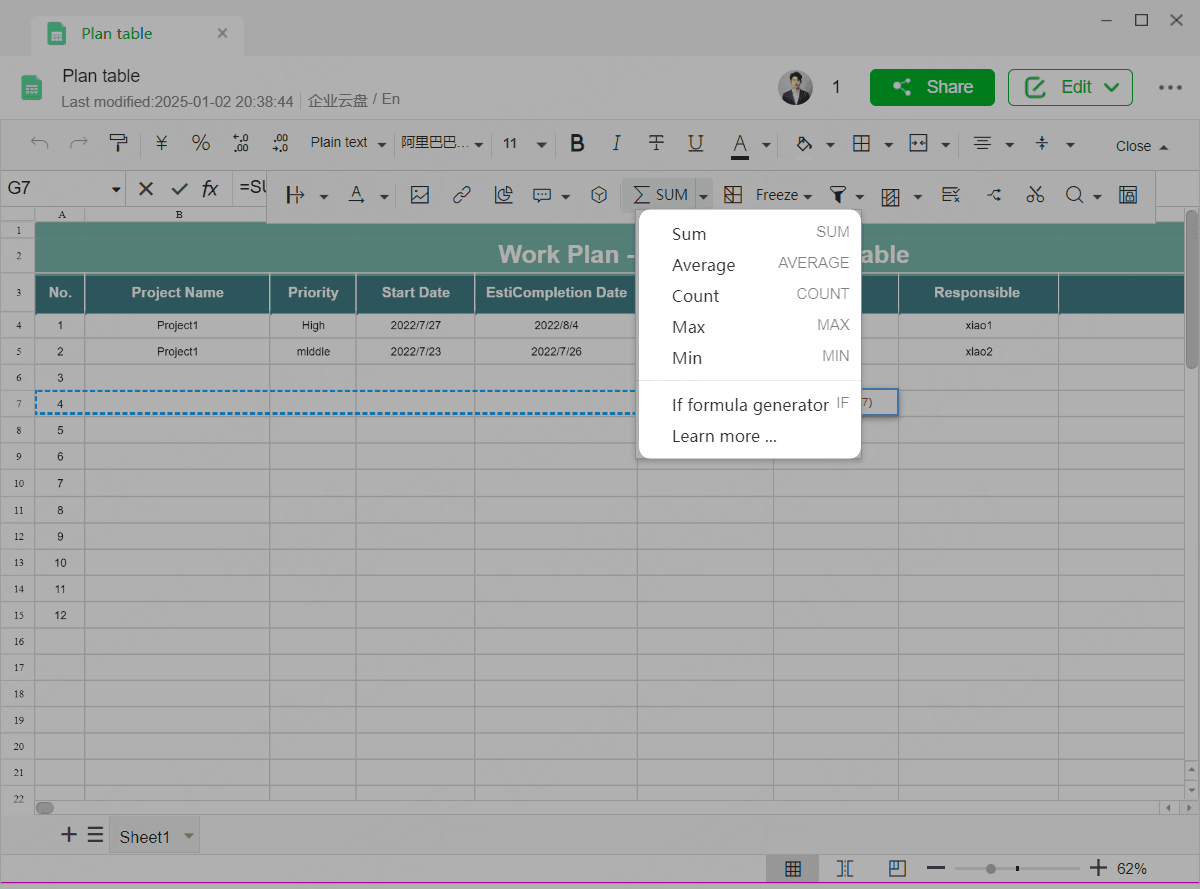
The spreadsheet consolidates frequently used or complex data processing procedures into functions, allowing you to quickly get results by just entering calculation parameters.
Operation Process:
You can insert function formulas in two ways:
(1)Directly in the Cell
Enter = in the cell, then type the function name you want to use.
(2)Through the Toolbar
Click More > Formula in the toolbar to view functions by category. Click the desired function to insert it into the cell.
3.2.2 Using Data Validation in the Spreadsheet
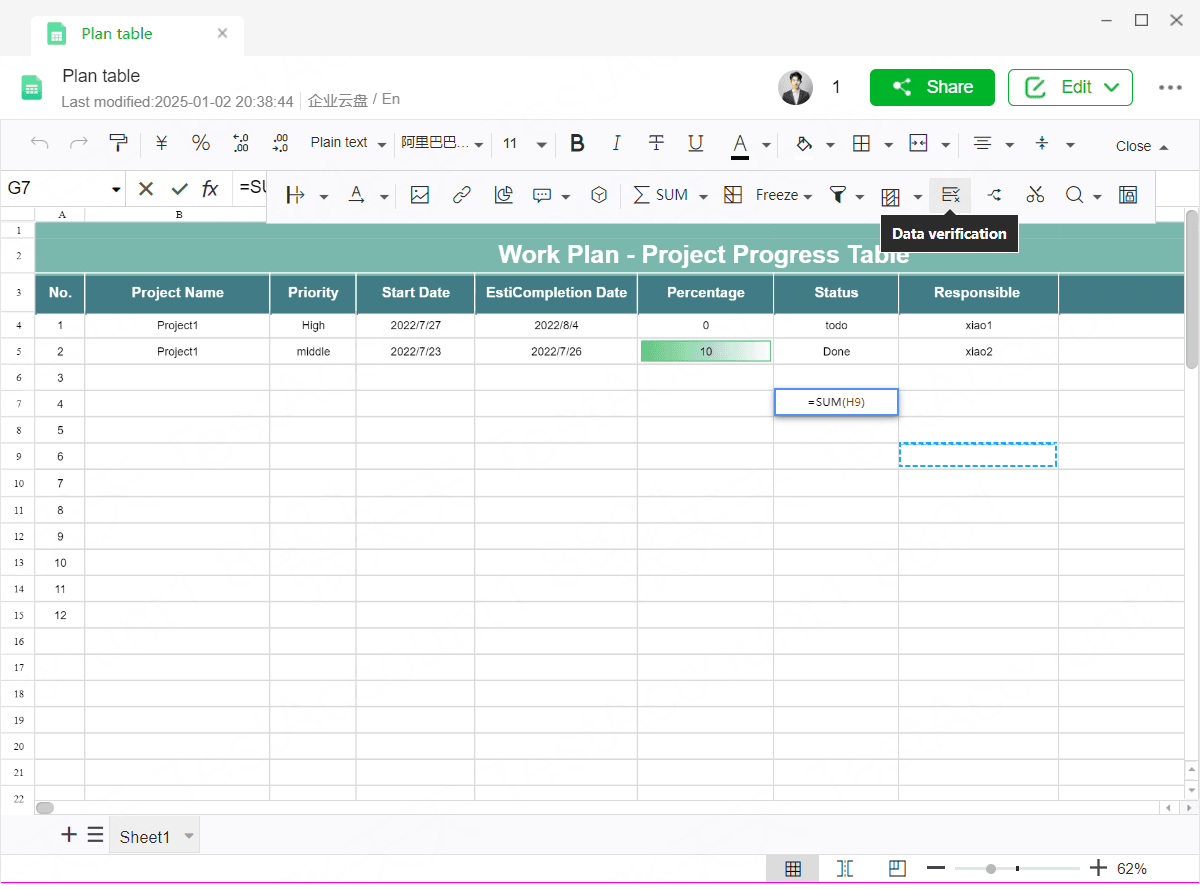
Apply data validation in the spreadsheet to allow only content in the specified format to be entered in the selected cell range. This ensures consistent and unified content format when multiple people fill out the form, avoiding incorrect entries.
Usage Scenarios:
- The Start Date column only allows date entries.
- The ID Number column only allows numeric certificate entries.
Operation Process:
(1)Select the cell range, right-click, and choose Data Validation.
(2)Click Validation Conditions, select a condition from the dropdown list.
(3)Set the corresponding validation.
4.Reading Mode/Editing Mode
Switch to Reading Mode
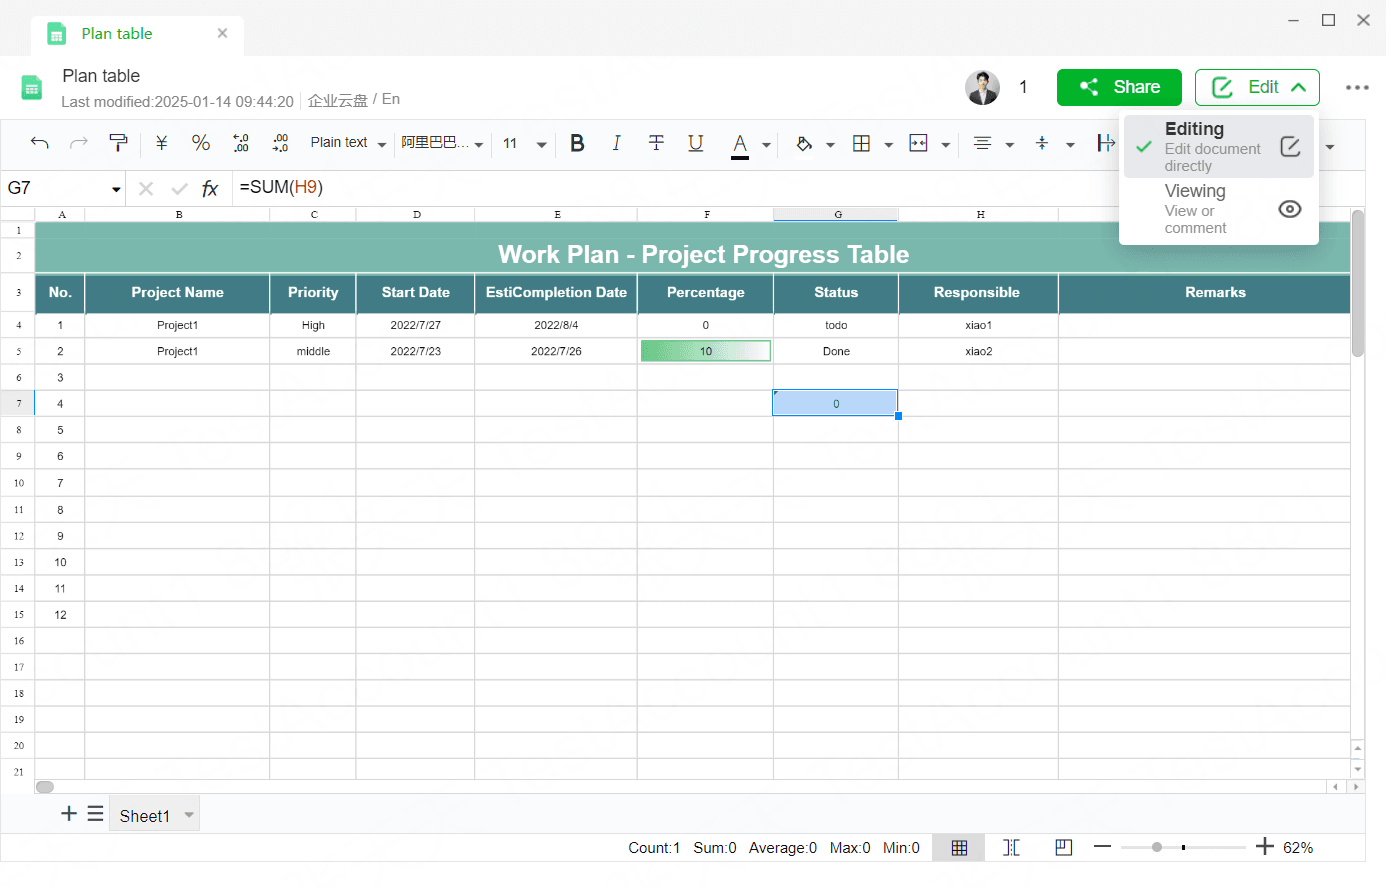
Users with spreadsheet editing permissions can open the spreadsheet, hover over Edit in the top right corner, select Read from the dropdown menu to switch to Reading Mode. In Reading Mode, you can only view the spreadsheet.
Switch to Editing Mode
Users with spreadsheet editing permissions can open the spreadsheet, hover over Edit in the top right corner, select Edit from the dropdown menu to switch to Editing Mode. (Note: The sentence "In Reading Mode, you can only view the spreadsheet." is redundant here if only discussing switching to Editing Mode.)
FAQs
Q: Will switching between Reading/Editing Mode affect others?
A: No, Reading/Editing Mode only affects the individual user.
Q: Why can't I switch between Reading/Editing Mode?
A: Only users with spreadsheet editing permissions can switch between Reading Mode and Editing Mode.
5.More Features
5.1 Document Information
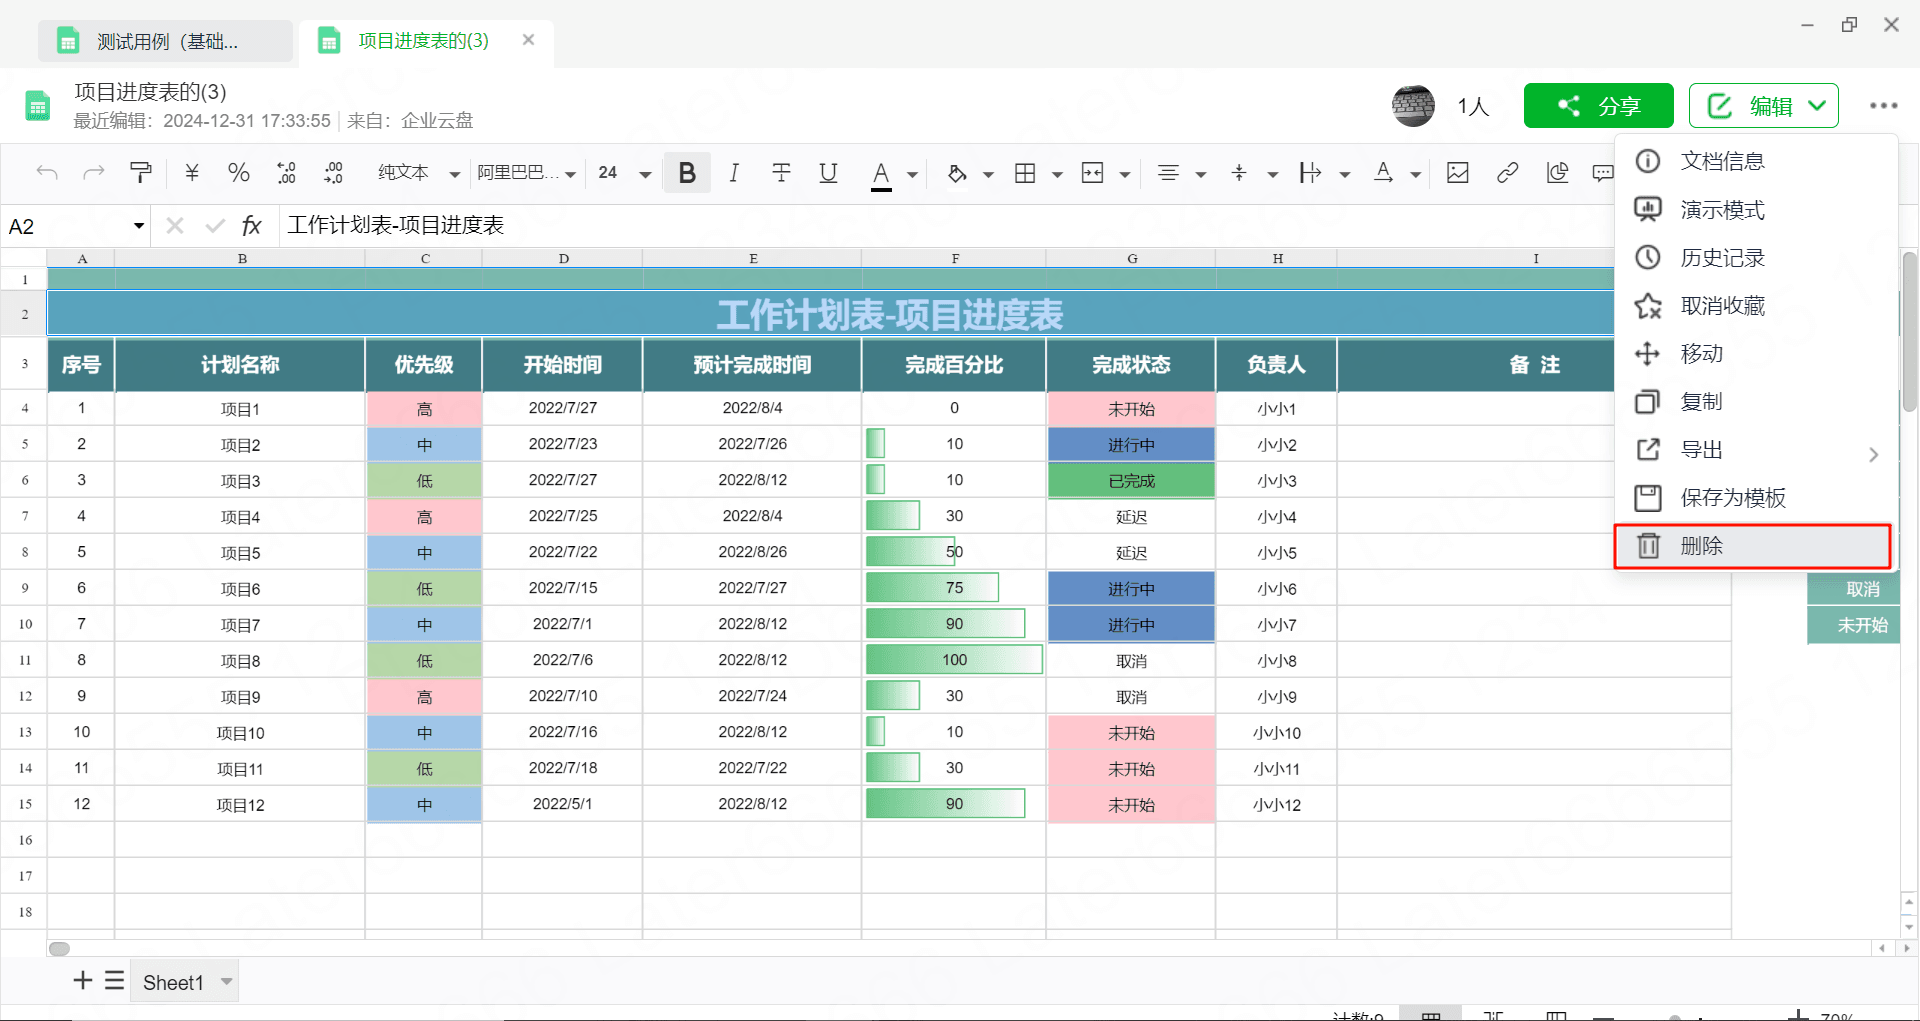
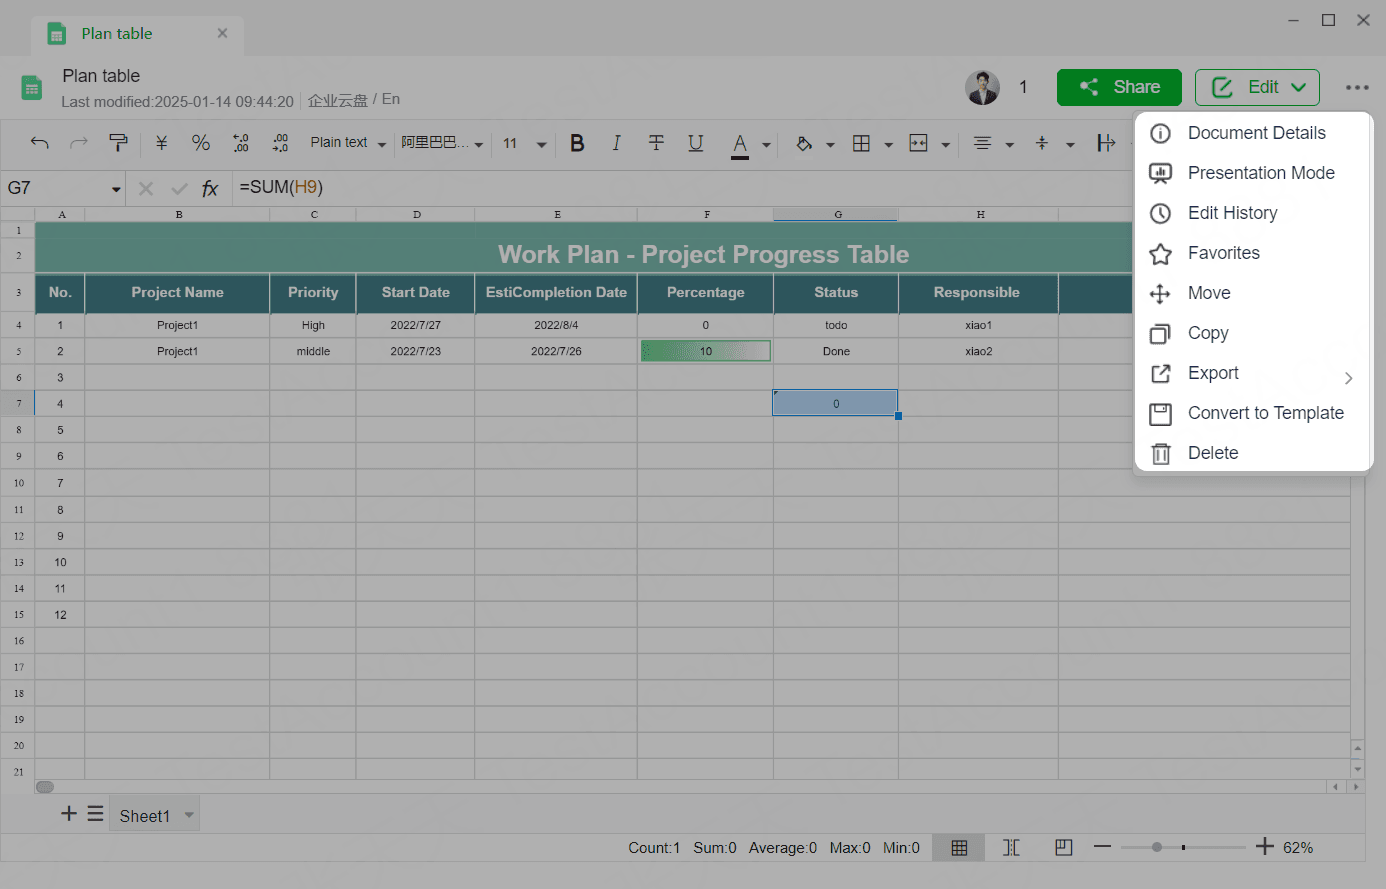
Click ... > Spreadsheet Info in the top right corner of the document to view the file's name, creator, creation time, last modified time, size, etc.
5.2 Presentation Mode
Click ... > Presentation Mode in the top right corner of the spreadsheet to enter Presentation Mode, where editing is not allowed. You cannot exit using the Esc key; you must move the mouse to the top to reveal the button to close Presentation Mode, click it to exit.
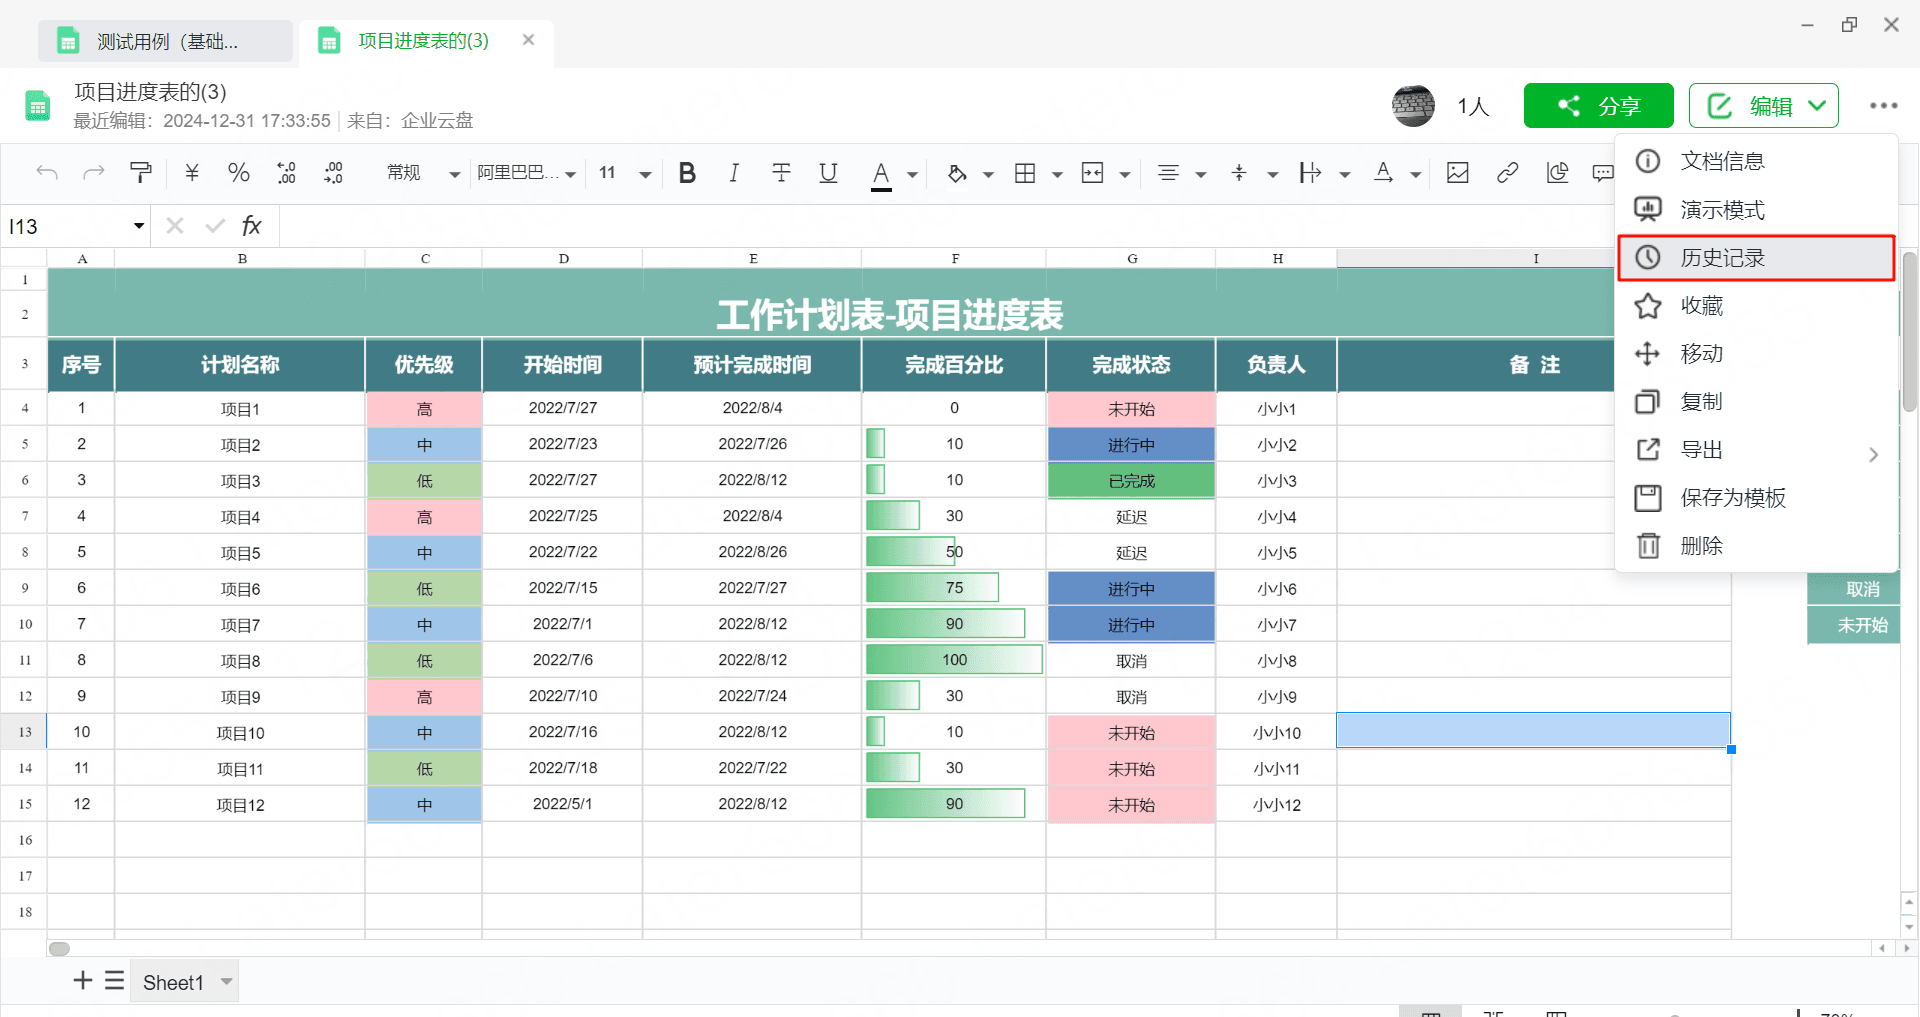
5.3 History
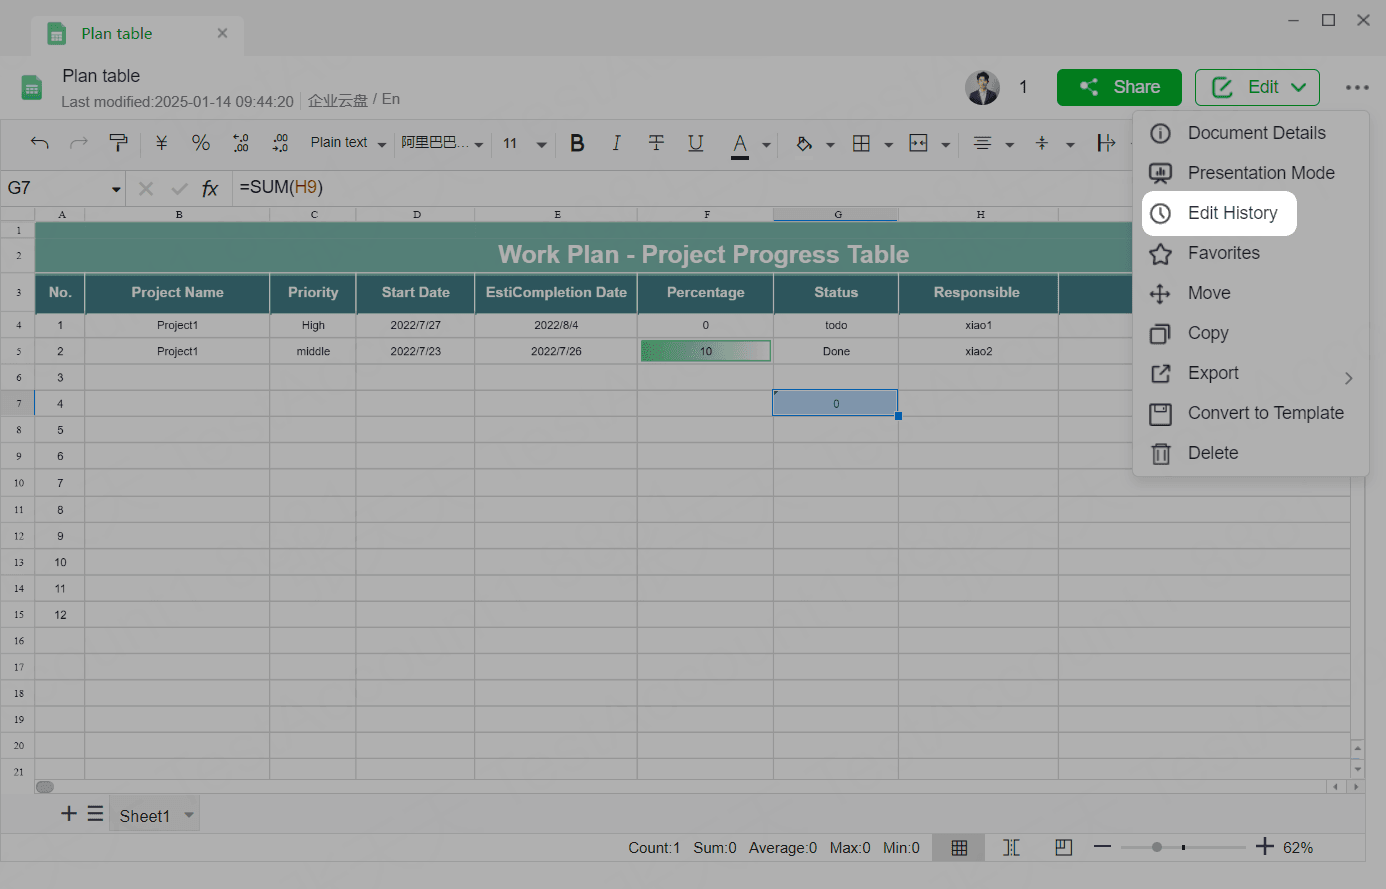
Click ... > History in the top right corner of the spreadsheet to access the history page.
Viewing Spreadsheet History
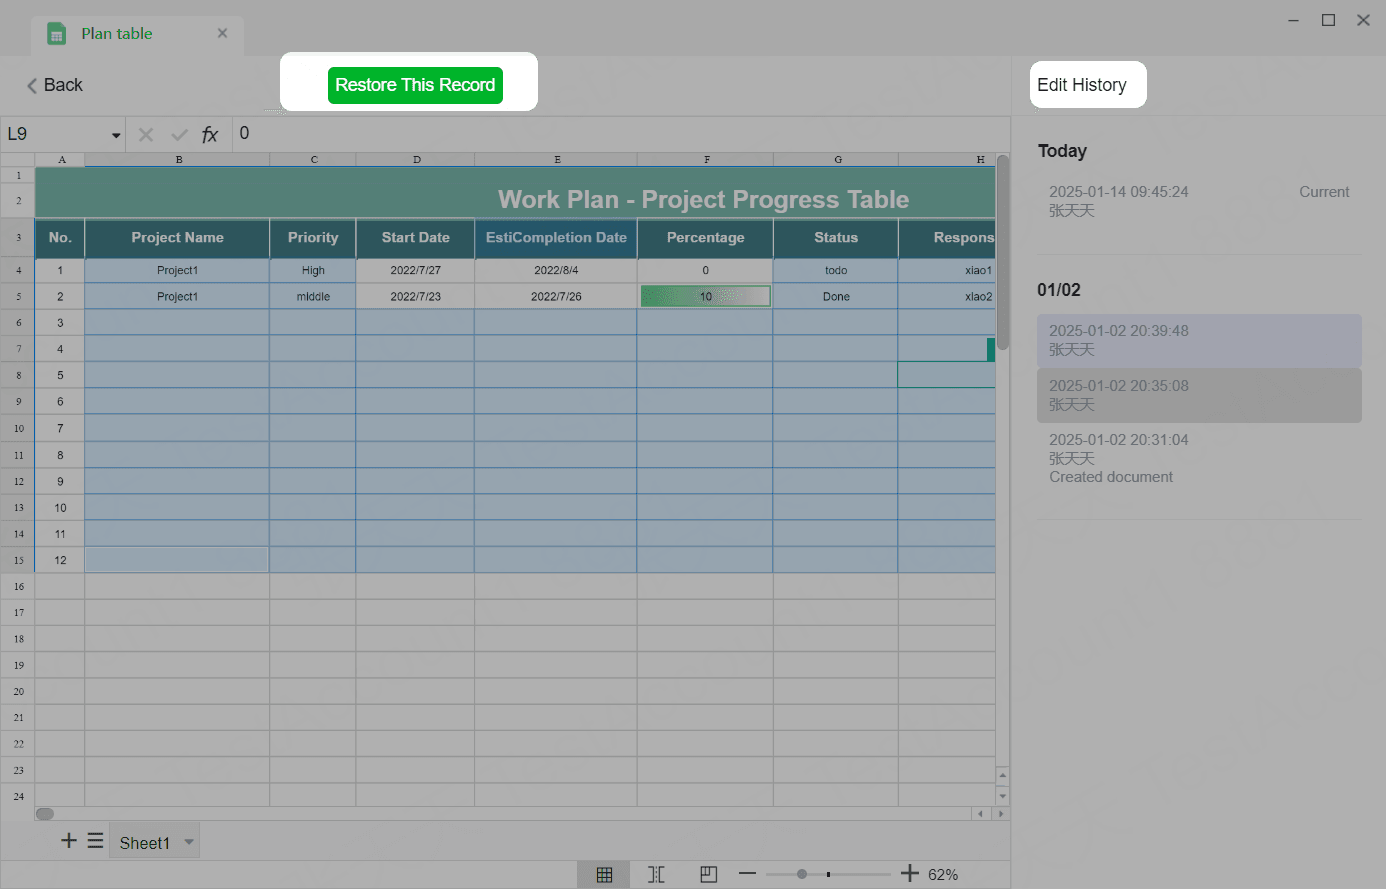
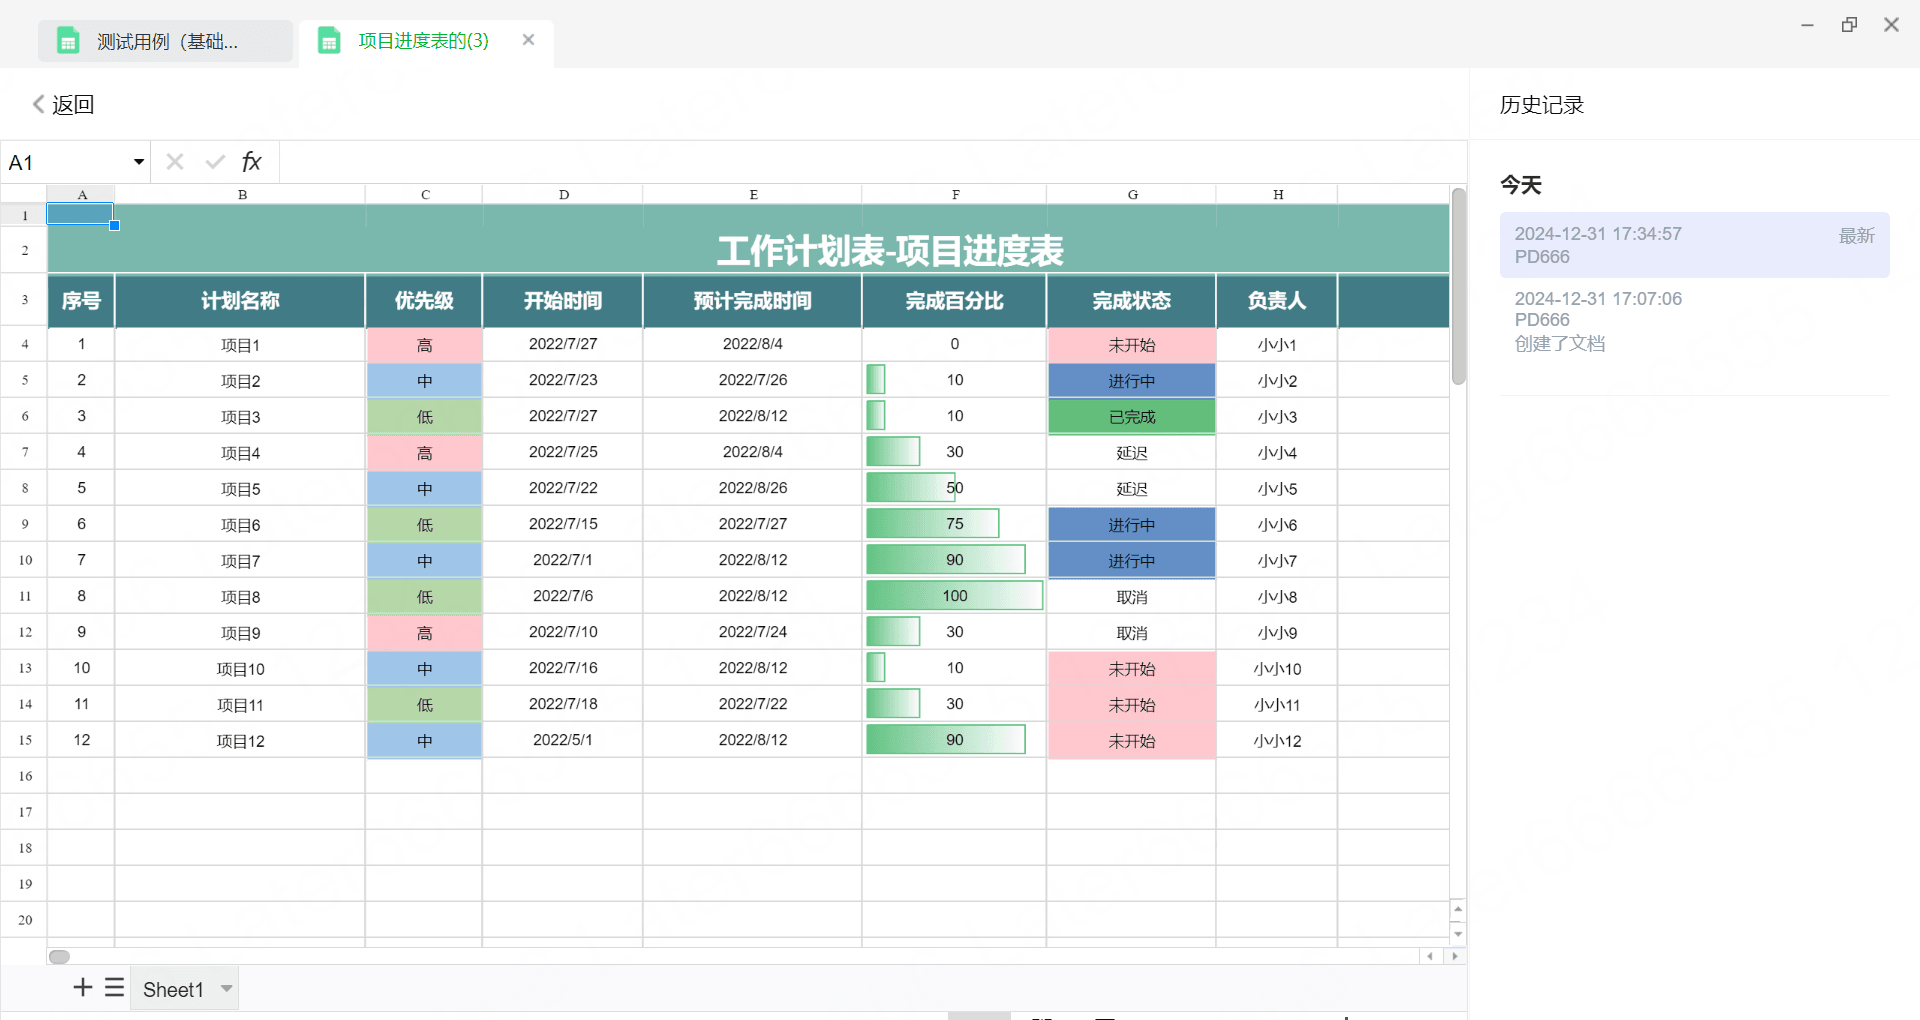
The spreadsheet provides powerful version management functionality, helping you easily retrieve historical versions and trace editing actions. When content is modified, the system automatically retains historical versions, recording the modifier, modification time, and changes, allowing you to restore the content to any historical version when needed. Only users with editor permissions can restore historical records, providing secure protection for spreadsheet data.
Operation Process: Hover over the More button in the top right navigation bar of the spreadsheet page, select History from the menu to open the history list. All historical records are listed in reverse chronological order, showing the corresponding modifier and modification time.
Viewing Complete Historical Versions
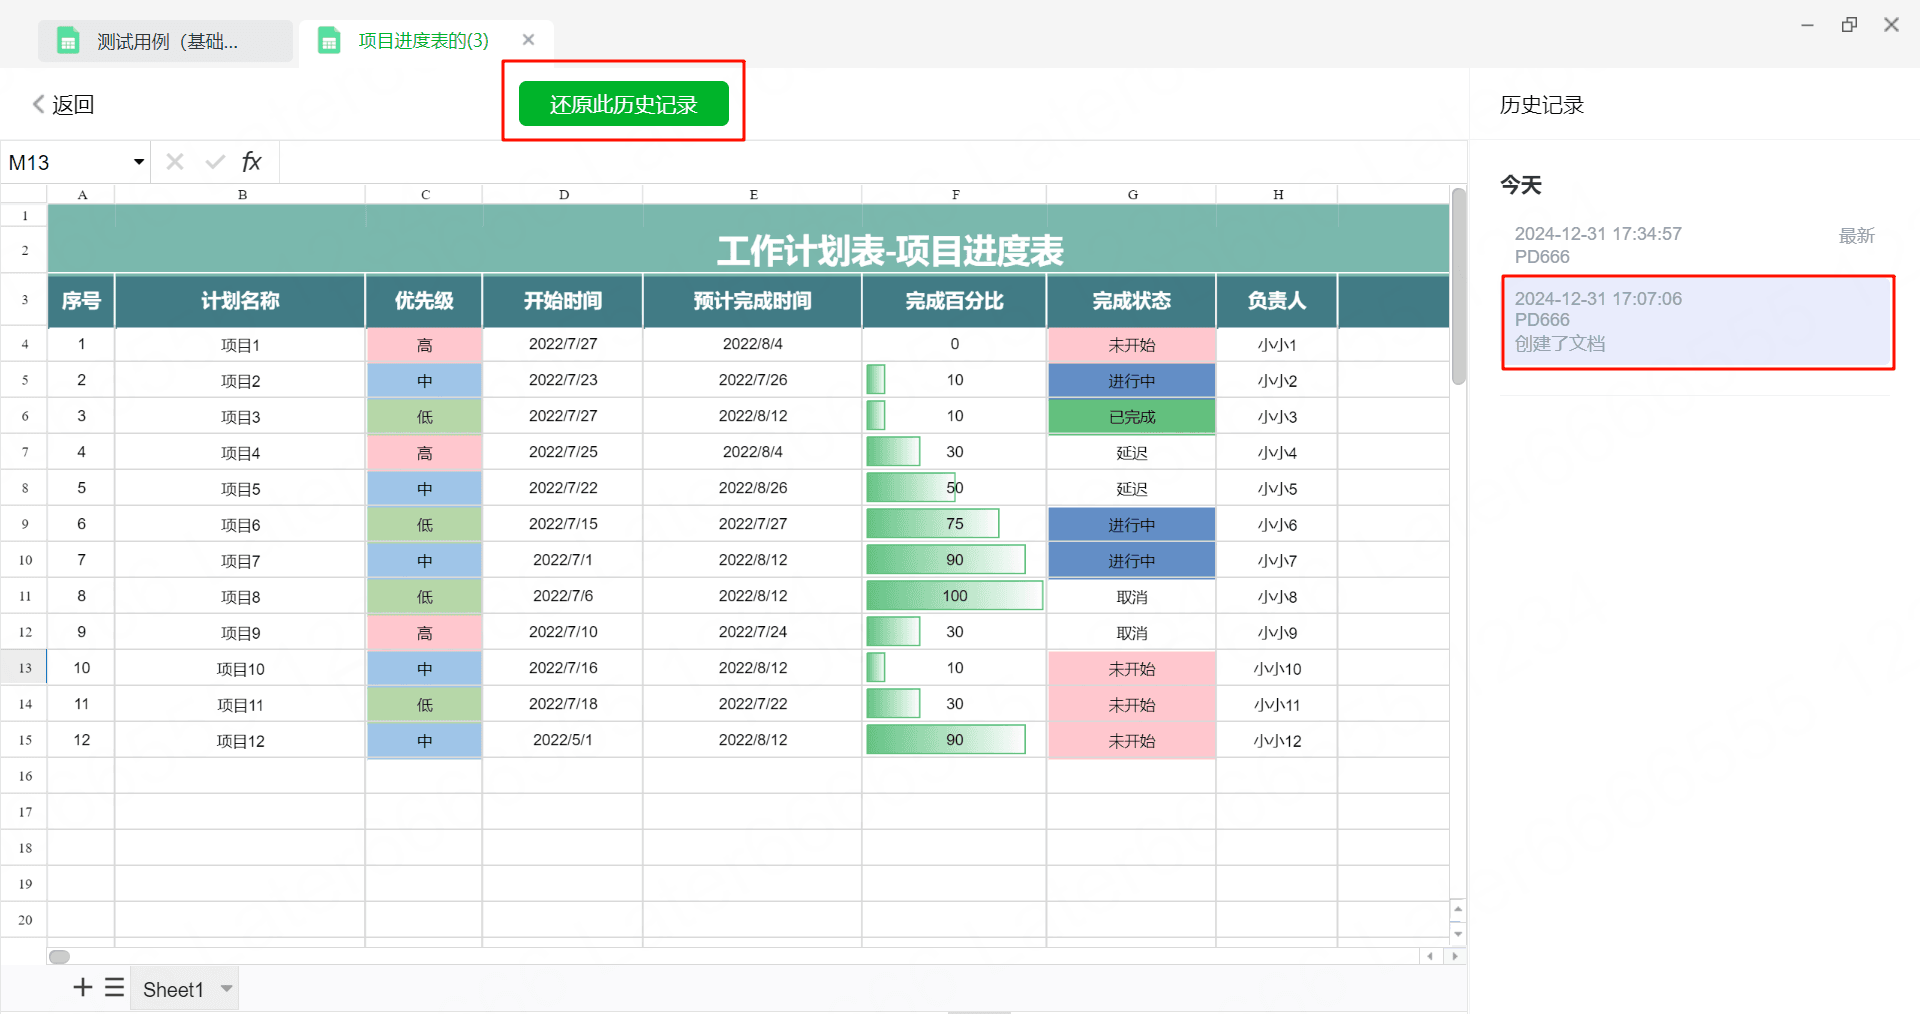
In the history list on the right, historical records are arranged in reverse chronological order by modification time. You can find and click on the historical version you want to view in detail to see the spreadsheet content or changes at that time.
Restoring Historical Versions
- In the history list, click to select the historical version you want to restore.
- Check the historical record area on the page to confirm if this is the version you want to retrieve.
- Click the Restore This Historical Record button above, select Restore, to restore the spreadsheet to the selected version.
5.4 Favorite
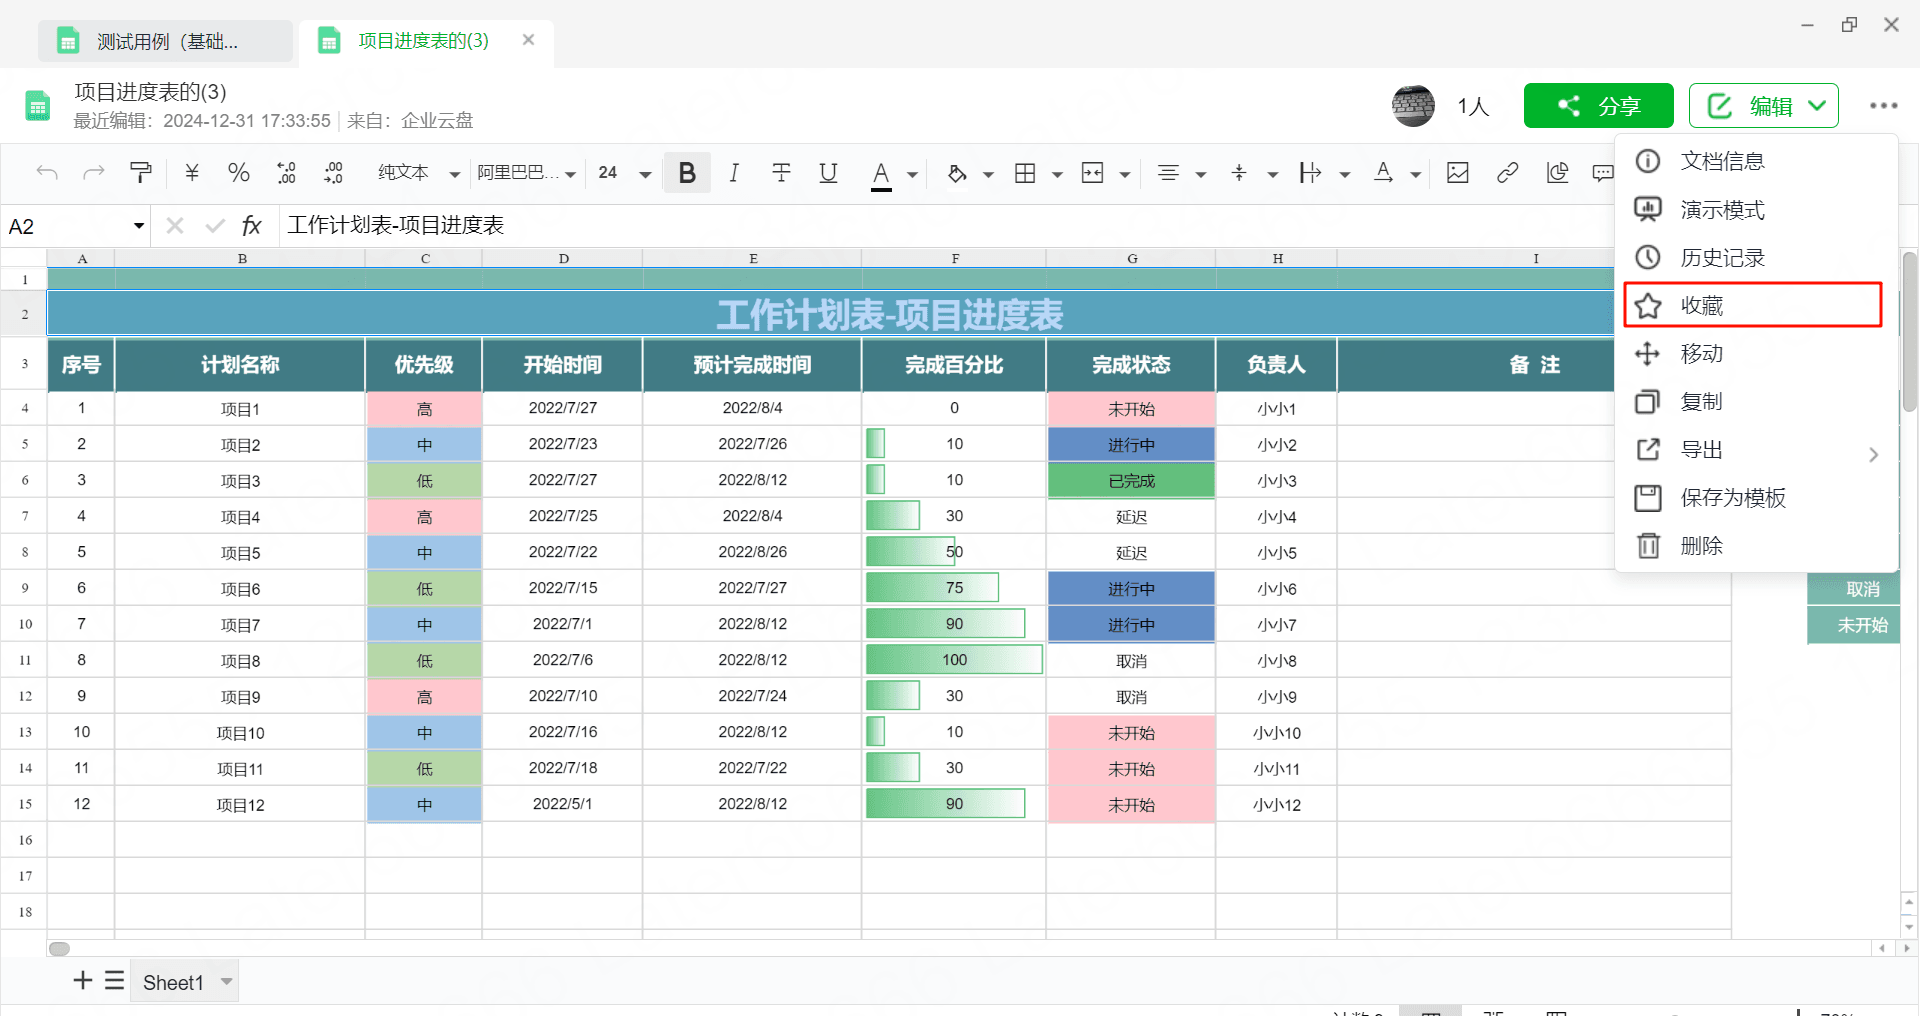
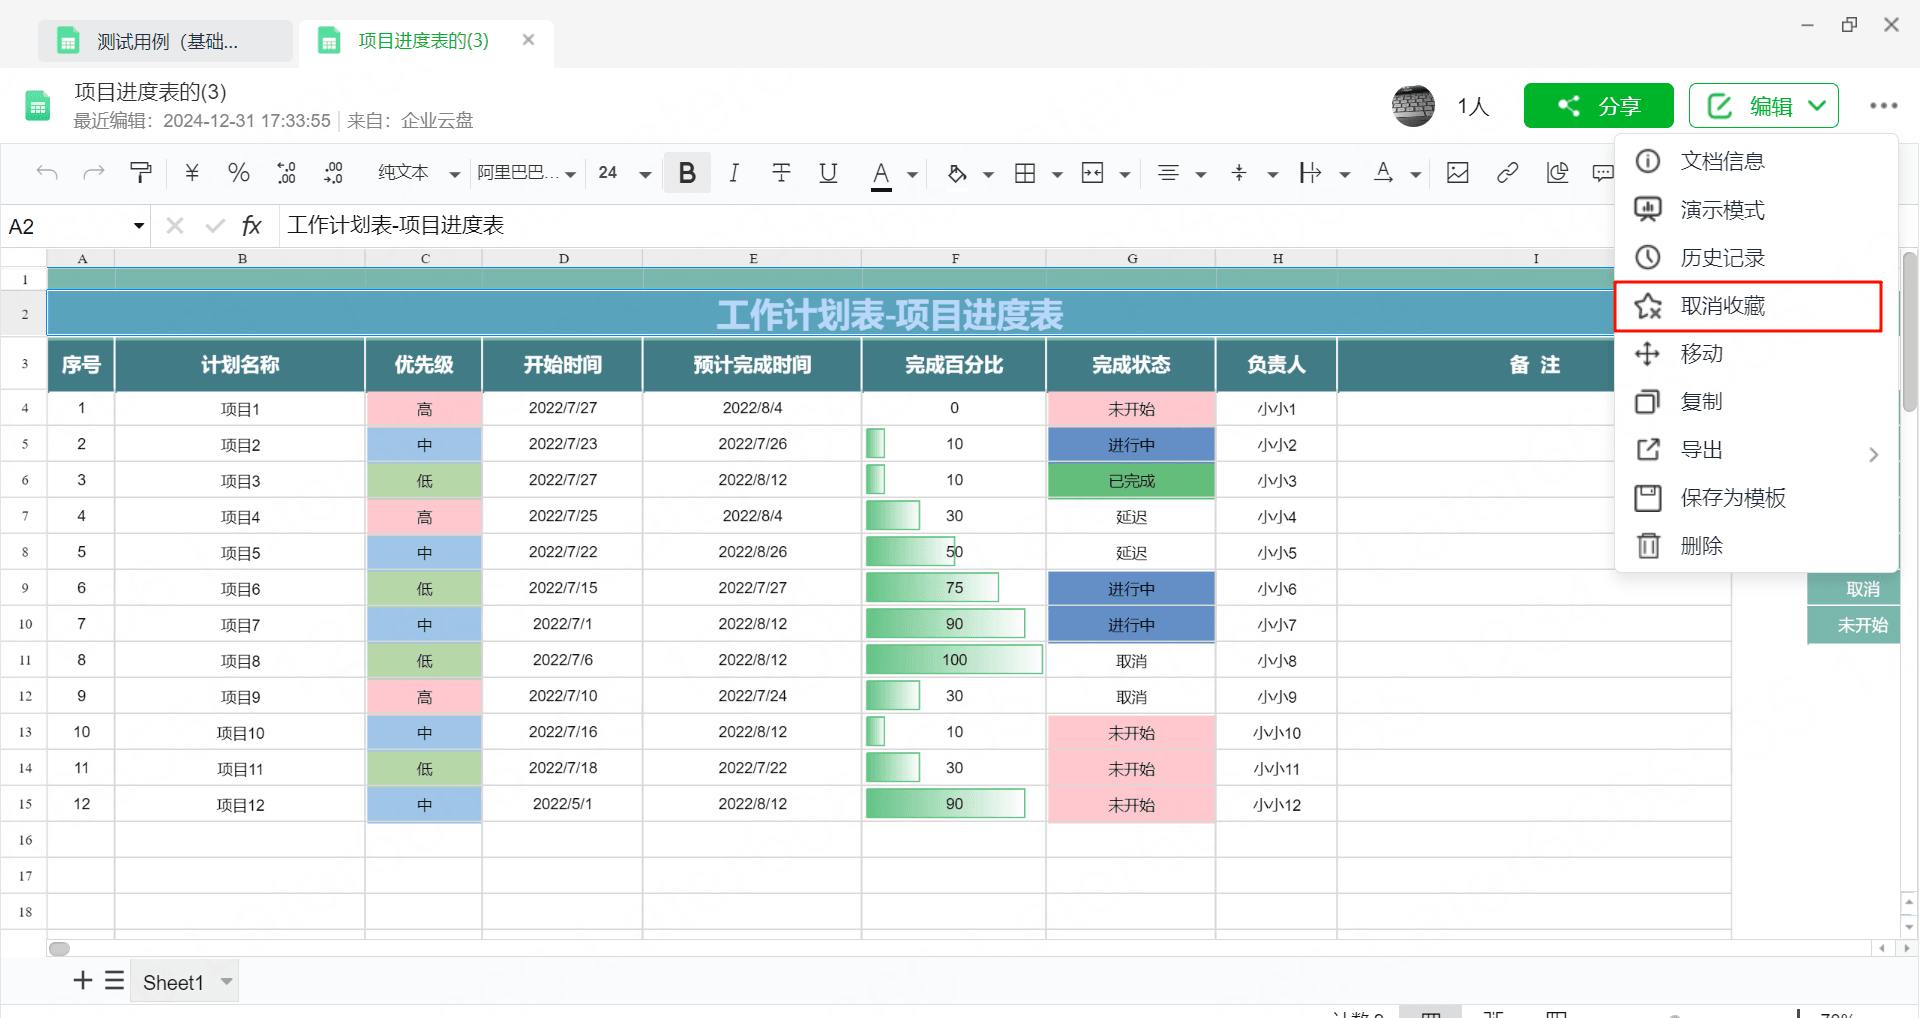
Click ... > Favorite in the top right corner of the spreadsheet to favorite the current file. Favorited files can be viewed in Cloud Drive - My Favorites. If the spreadsheet is already favorited, the Favorite button will change to Unfavorite. Clicking Unfavorite will remove the spreadsheet from My Favorites.
5.5 Move
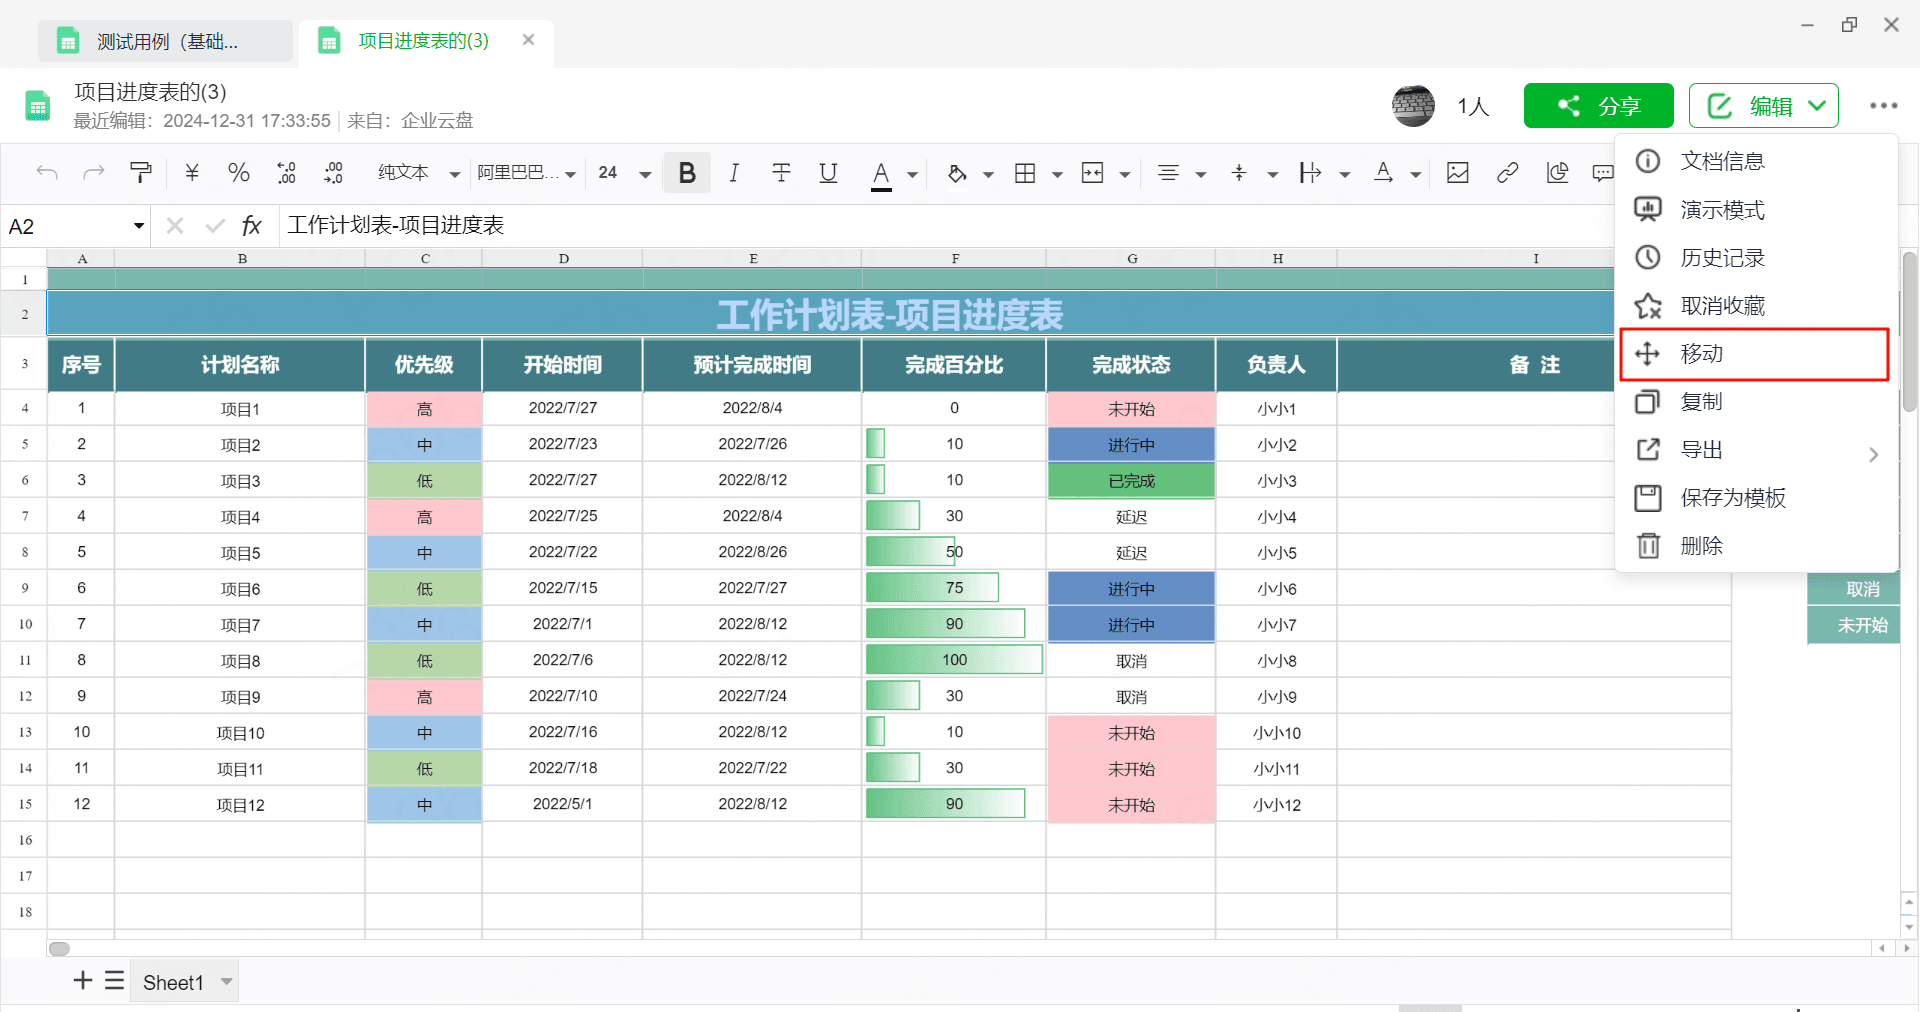
Click ... > Move in the top right corner of the spreadsheet to change the current file's path from the original to another.
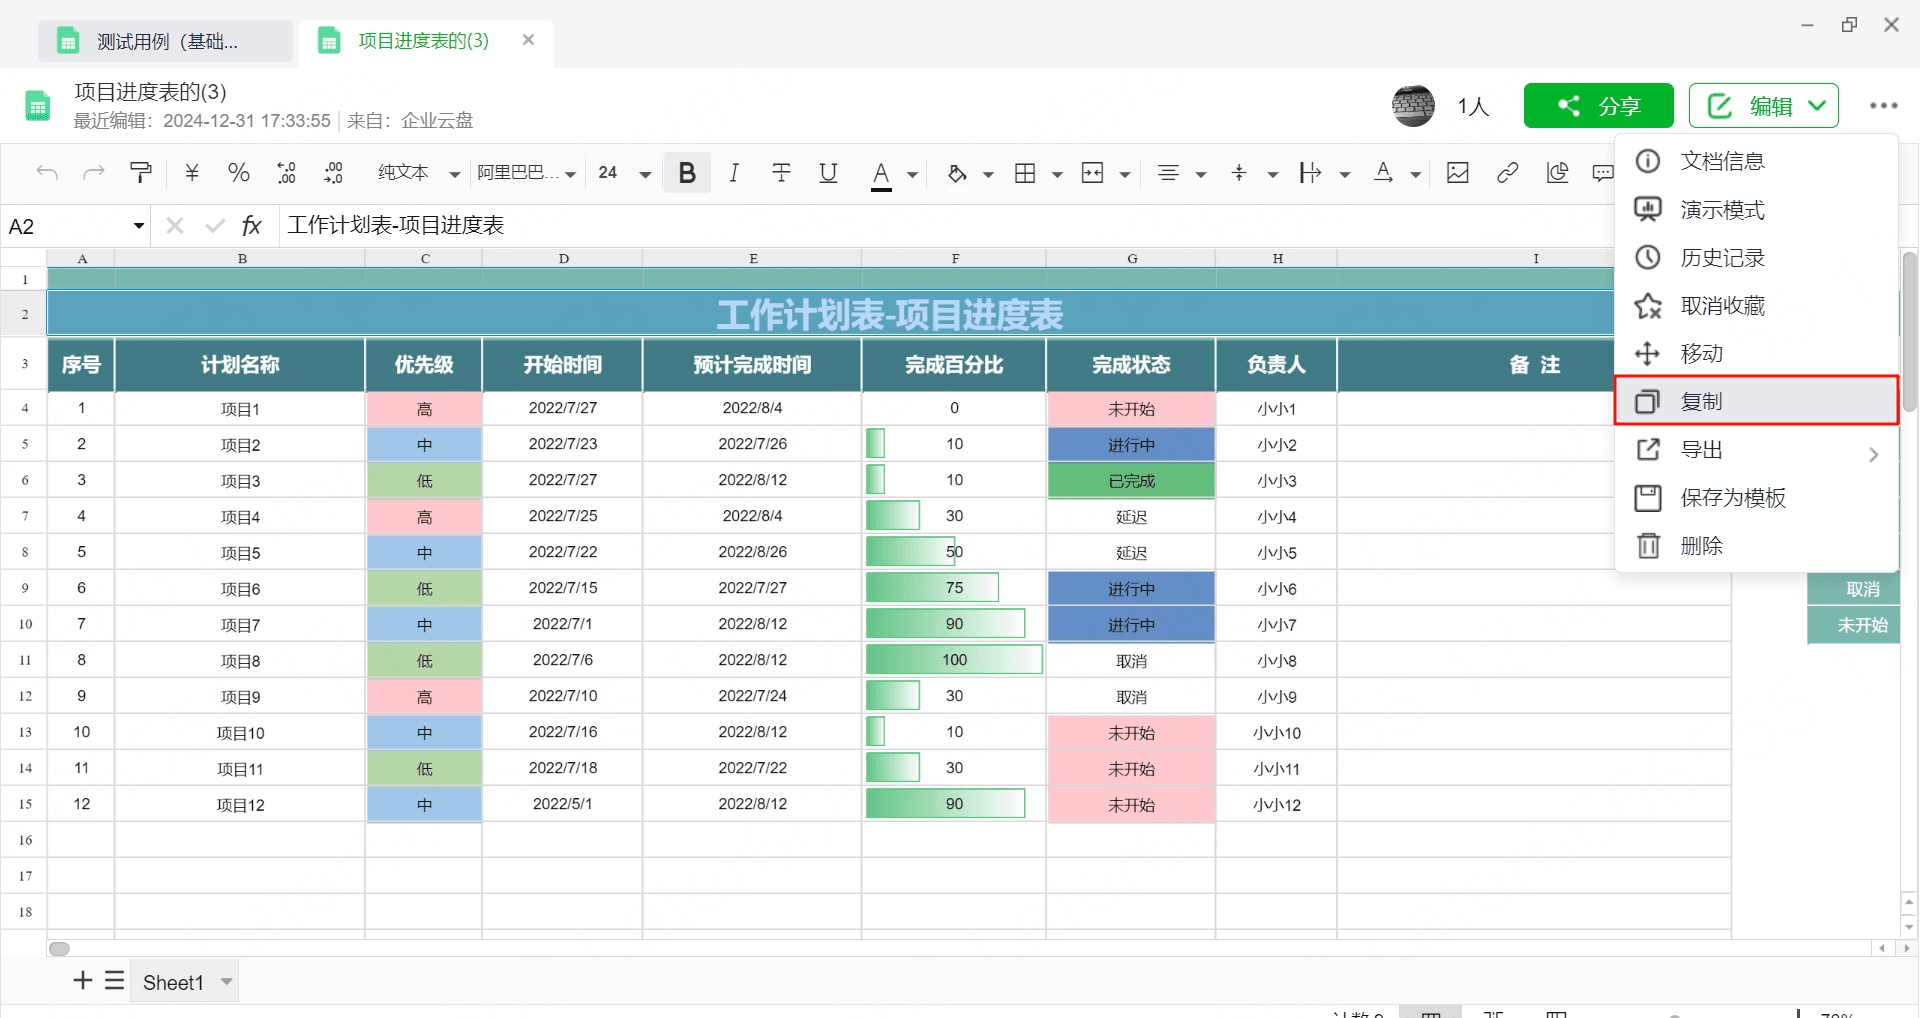
5.6 Copy
Click ... > Copy in the top right corner of the spreadsheet to add a copy of the current file to another location.
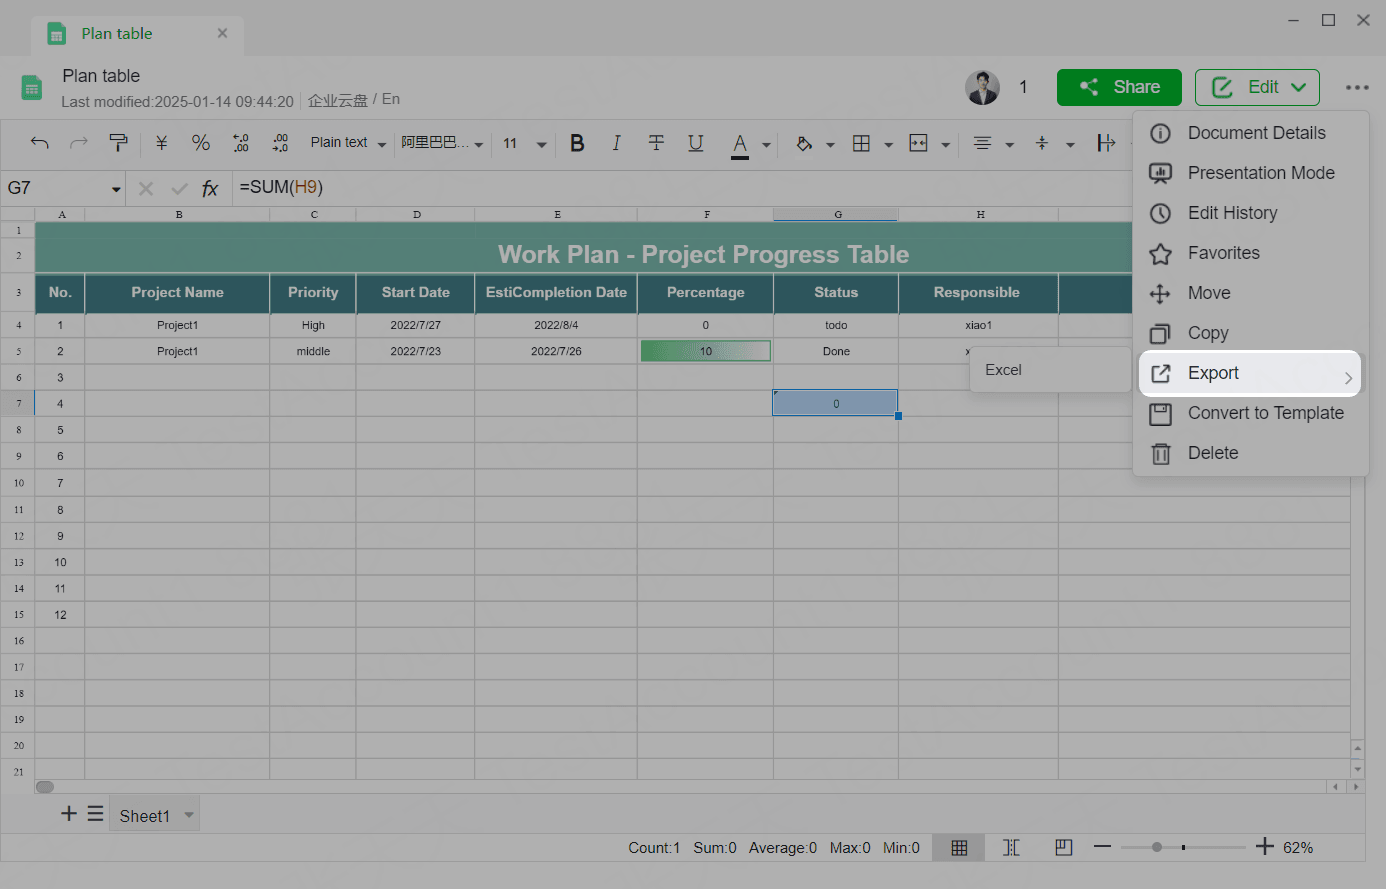
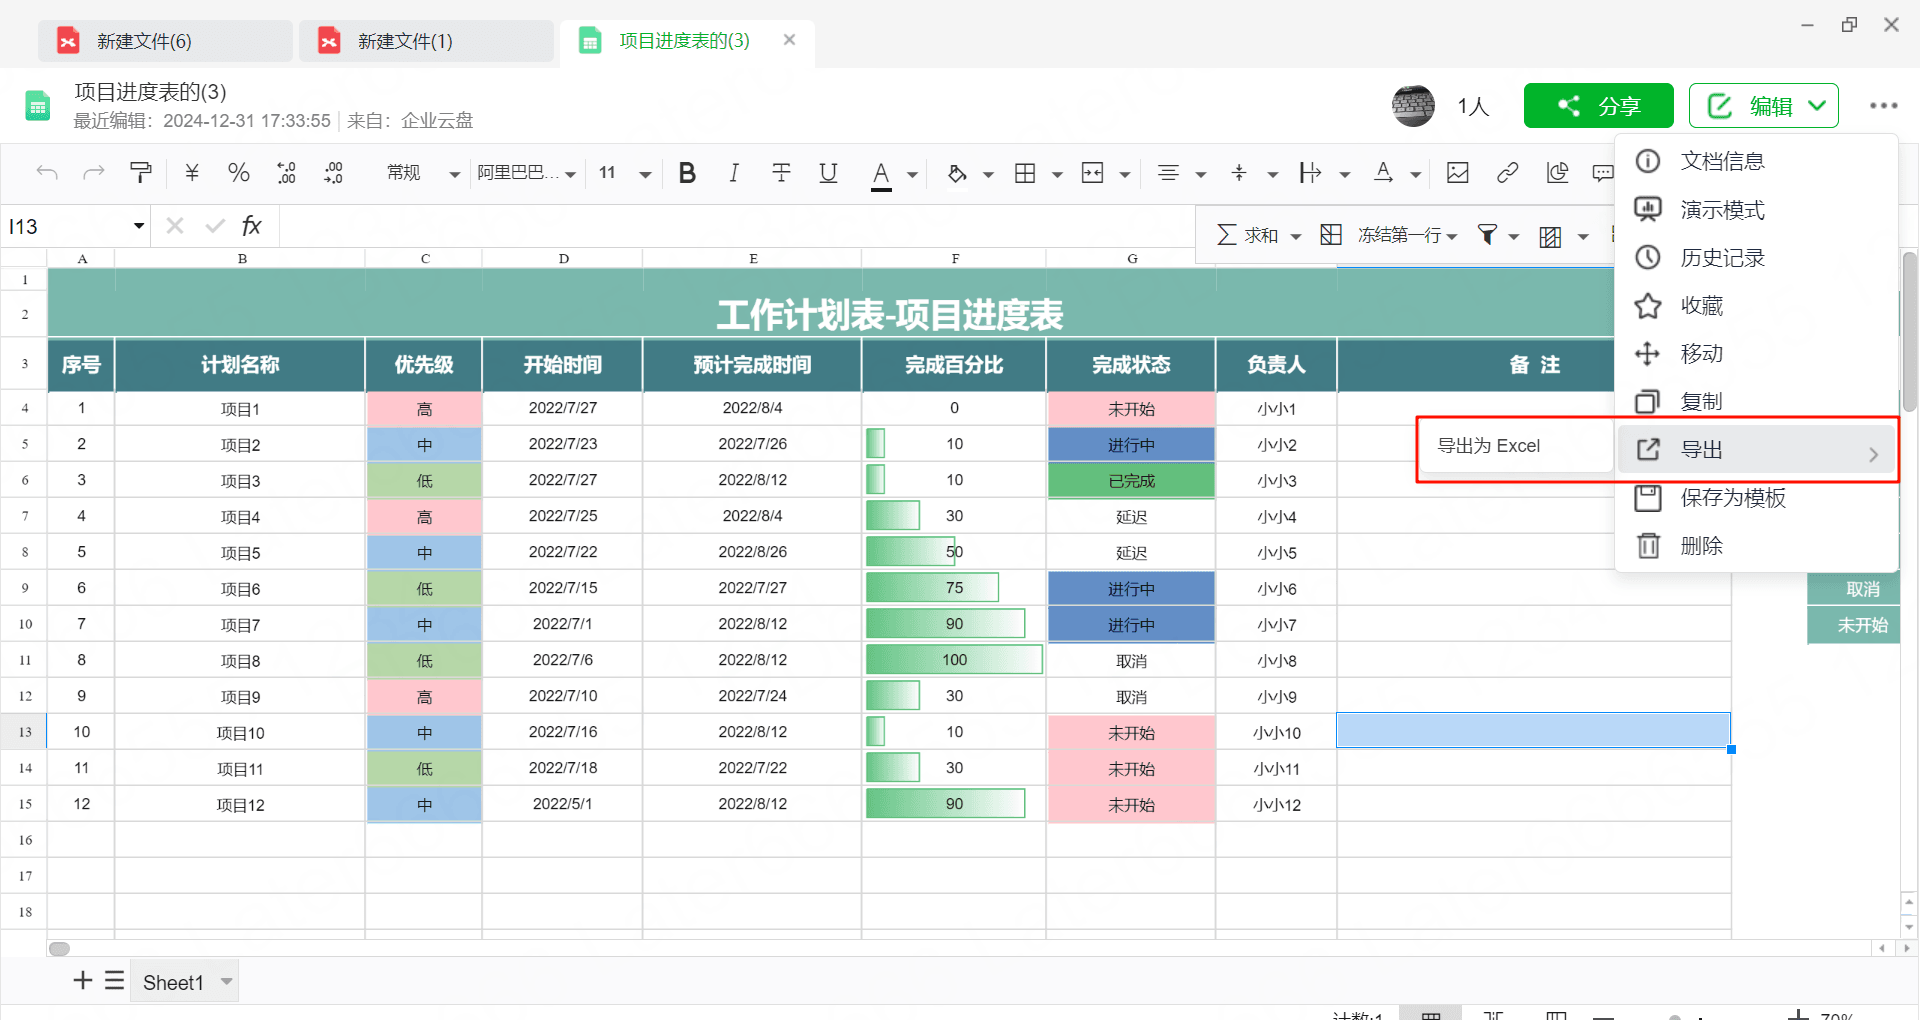
5.7 Export Spreadsheet
Click ... > Export in the top right corner of the spreadsheet to download it as an Excel file.
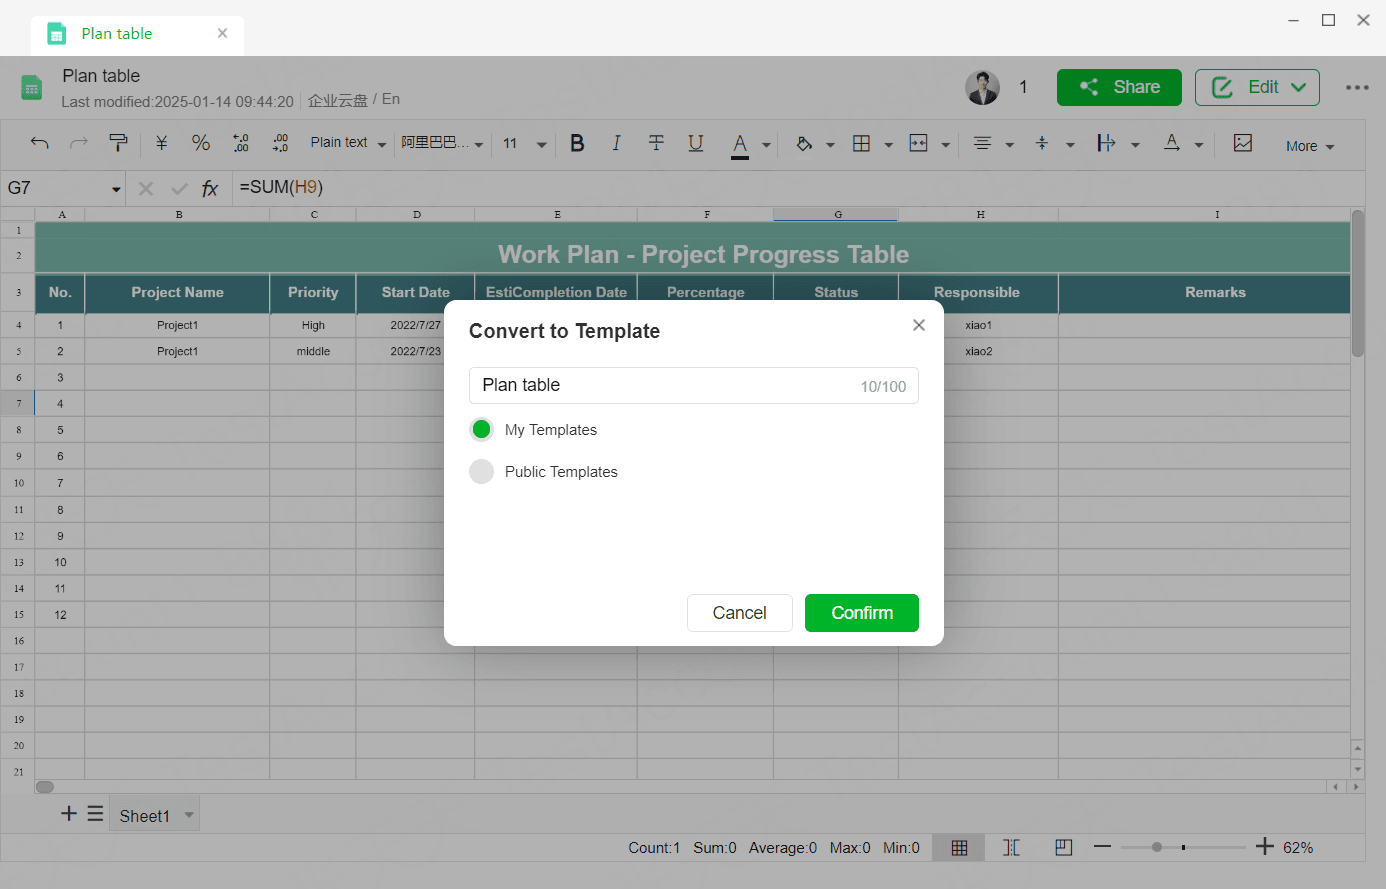
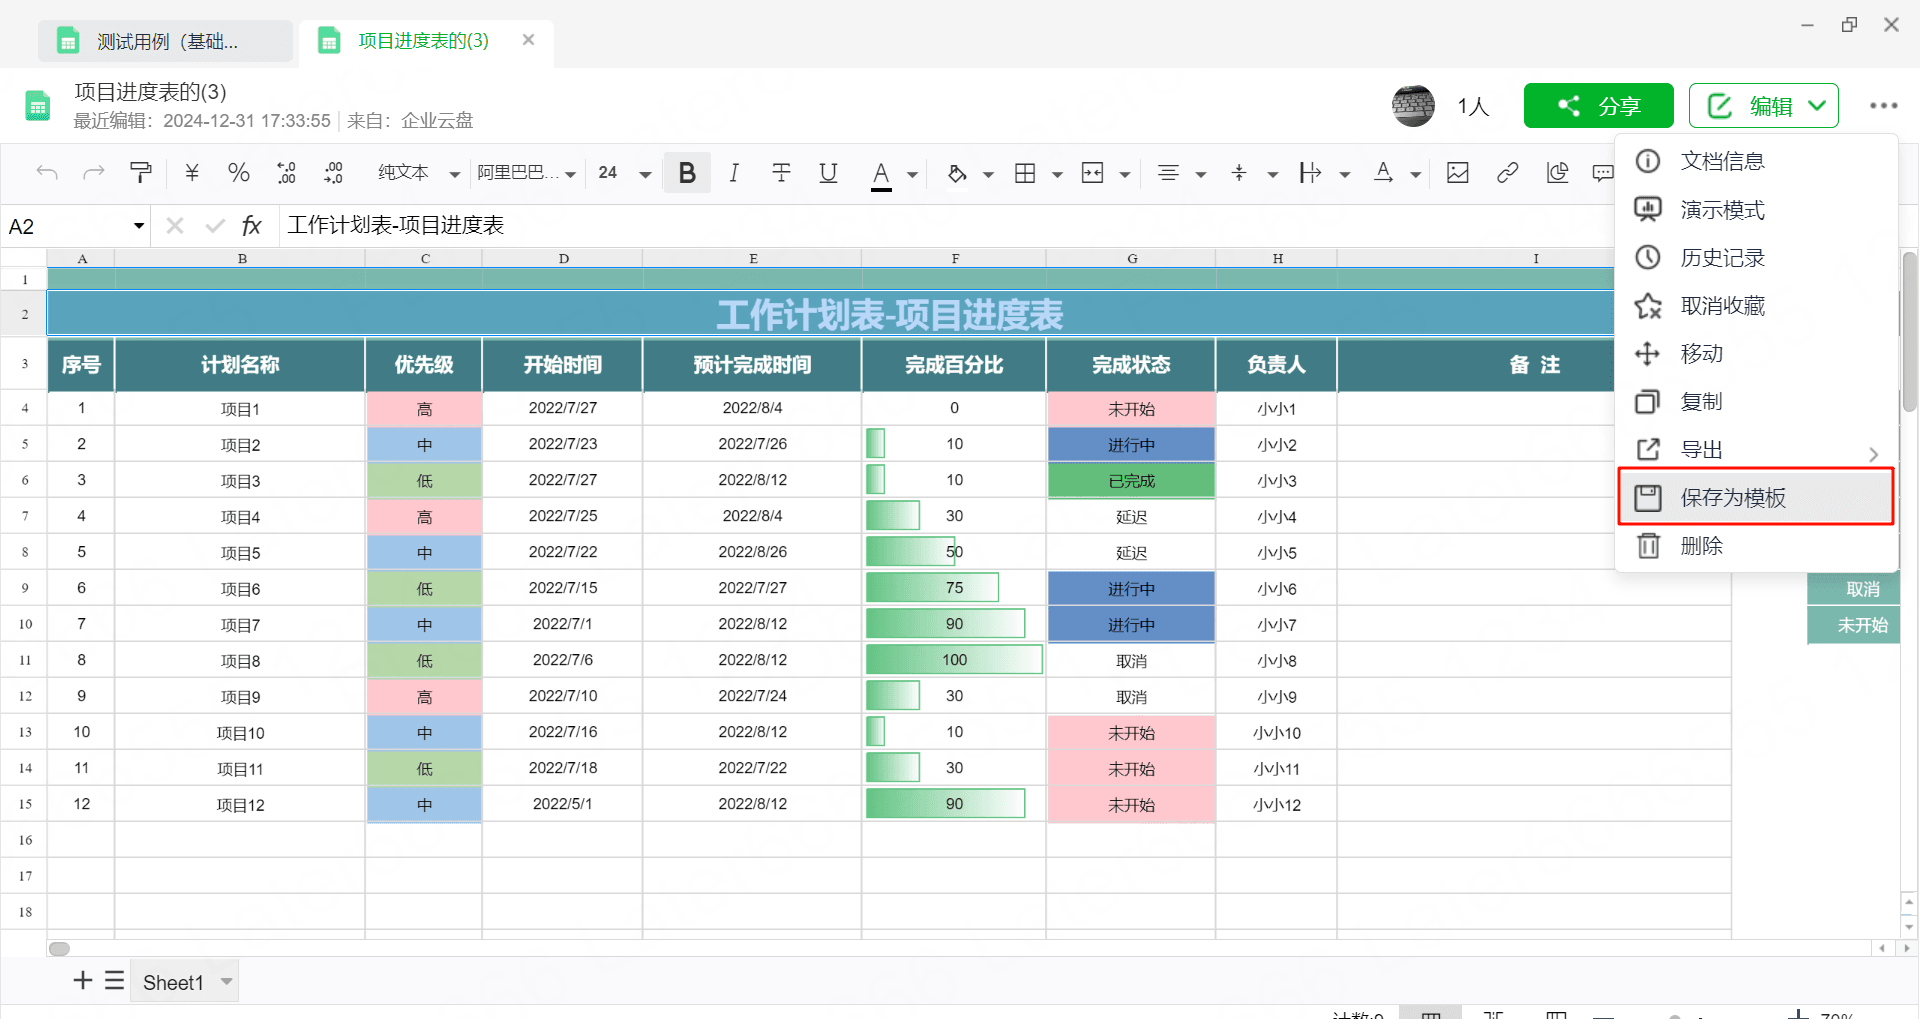
5.8 Save as Template
Click ... > Save as Template in the top right corner of the spreadsheet to add the current file as a template in the template library.
5.9 Delete
Click ... > Delete in the top right corner of the spreadsheet to delete the current file.
Operation Process: Hover over the More button in the top right navigation bar of the spreadsheet page, select History from the menu to open the history list. All historical records are listed in reverse chronological order, showing the corresponding modifier and modification time.
Viewing Complete Historical Versions
In the history list on the right, historical records are arranged in reverse chronological order by modification time. You can find and click on the historical version you want to view in detail to see the spreadsheet content or changes at that time.
Restoring Historical Versions
- In the history list, click to select the historical version you want to restore.
- Check the historical record area on the page to confirm if this is the version you want to retrieve.
- Click the Restore This Historical Record button above, select Restore, to restore the spreadsheet to the selected version.
5.4 Favorite
Click ... > Favorite in the top right corner of the spreadsheet to favorite the current file. Favorited files can be viewed in Cloud Drive - My Favorites. If the spreadsheet is already favorited, the Favorite button will change to Unfavorite. Clicking Unfavorite will remove the spreadsheet from My Favorites.
5.5 Move
Click ... > Move in the top right corner of the spreadsheet to change the current file's path from the original to another.
5.6 Copy
Click ... > Copy in the top right corner of the spreadsheet to add a copy of the current file to another location.
5.7 Export Spreadsheet
Click ... > Export in the top right corner of the spreadsheet to download it as an Excel file.
5.8 Save as Template
Click ... > Save as Template in the top right corner of the spreadsheet to add the current file as a template in the template library.
5.9 Delete
Click ... > Delete in the top right corner of the spreadsheet to delete the current file.