BE-Contacts
Contacts
1.Members & Departments
Administrator Invites Members to Join the Enterprise
I. Function Overview
In the backend > Address Book > Members & Departments, administrators can add enterprise members to departments, facilitating internal communication and collaboration among members.
II. Operation Process
1.Enter the DuliDuli management backend, click on Address Book > Members & Departments.
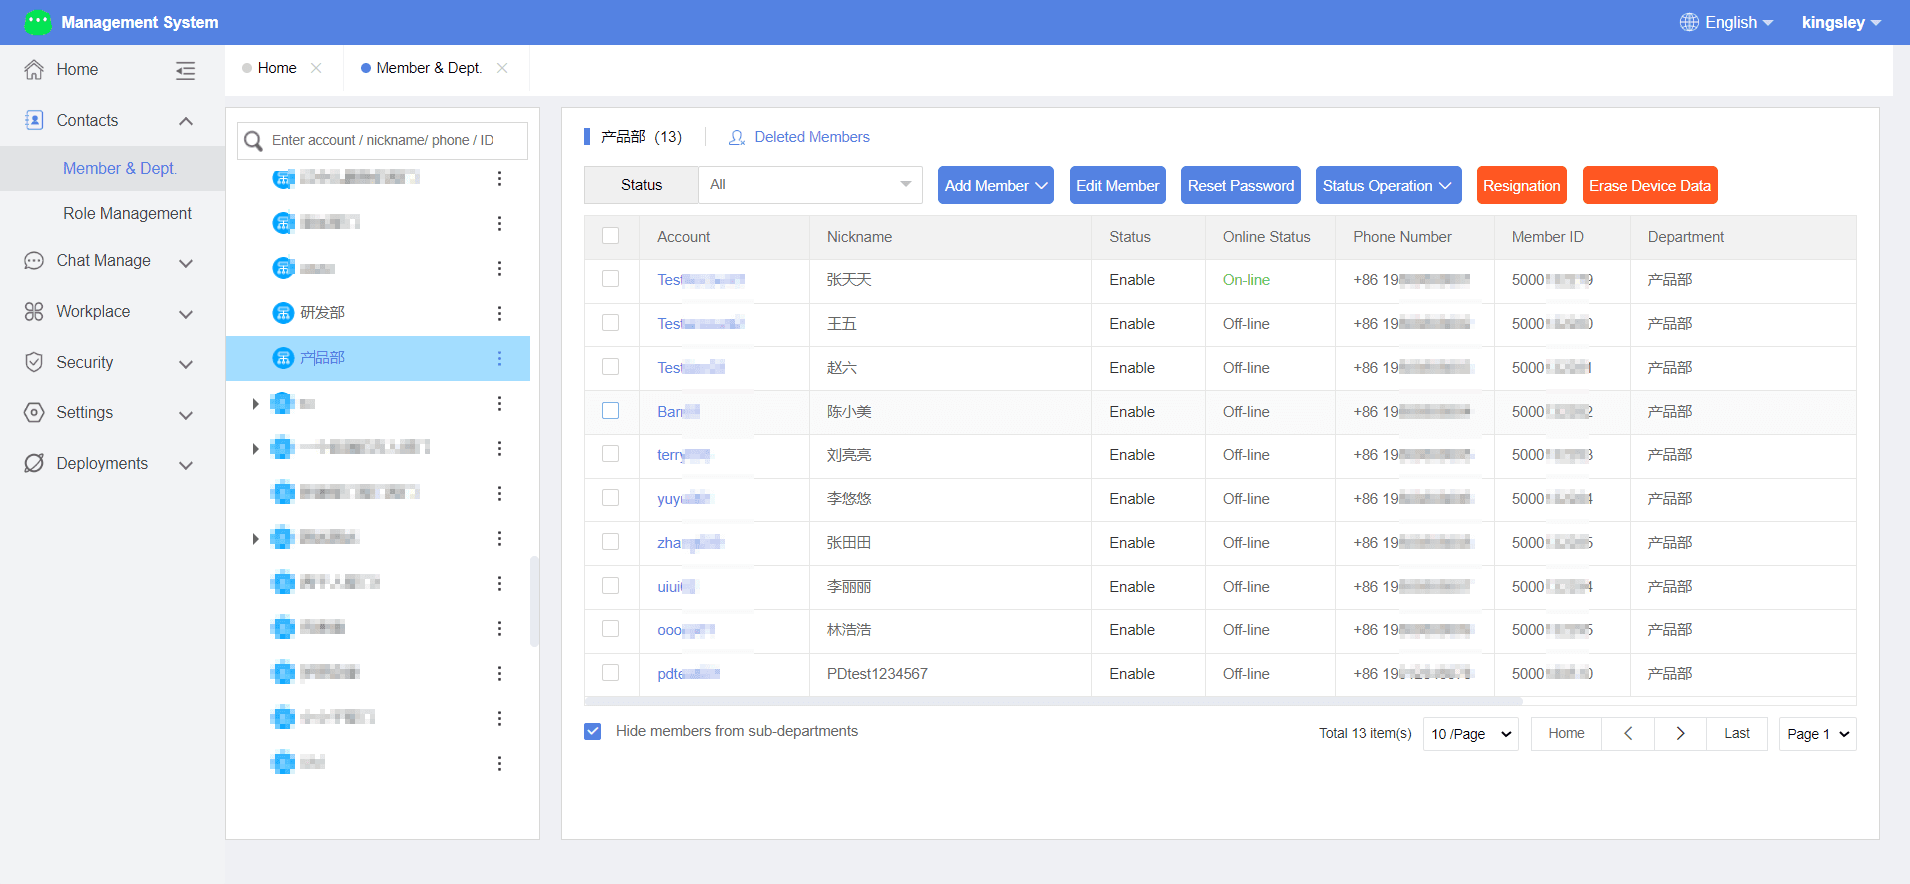
2.Click on the corresponding department and select "Add Member".
3.Fill in the basic information such as member account, nickname, phone number, and email, then click "Submit" to successfully add the member. After successful addition, the member can log in to DuliDuli using the account password, with the initial password set as: a123456.
Administrator Batch Adds Members
I. Function Overview
When the number of enterprise members is large, administrators can batch add members in the management backend to efficiently invite members within the enterprise to join.
II. Operation Process
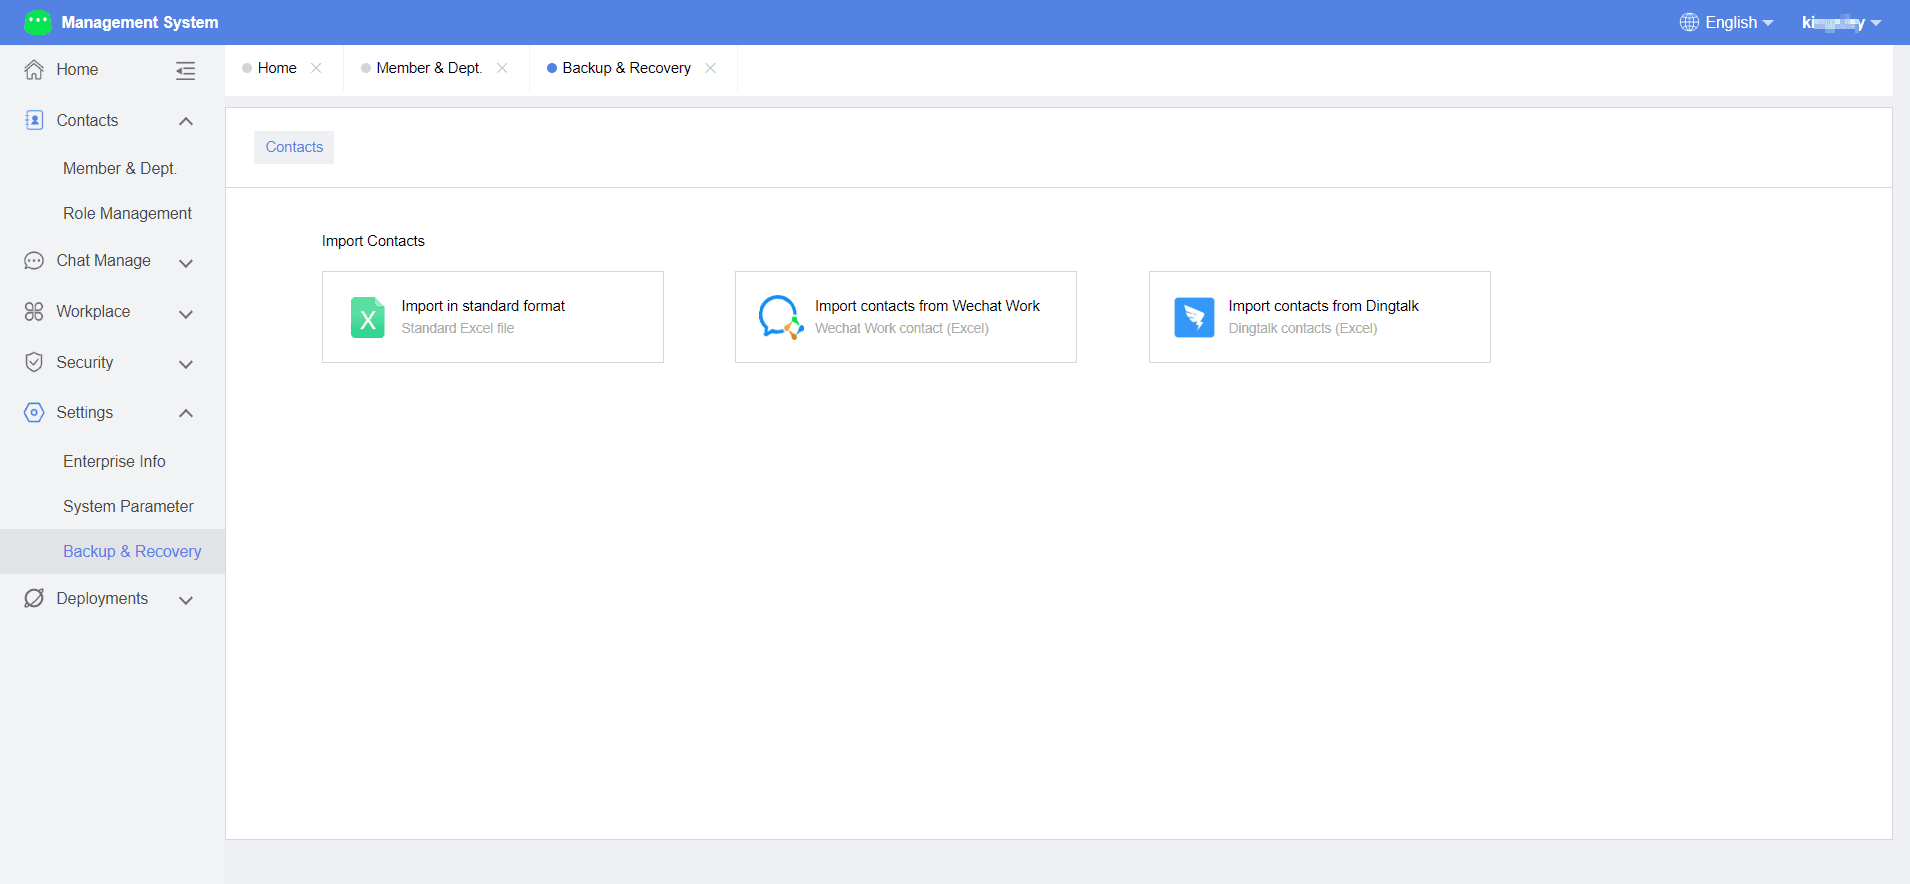
Enter the DuliDuli management backend, click on Enterprise Settings > Backup & Restore > Import Address Book.
- Enter the batch import interface and download the template.
- After downloading, fill in the enterprise member information. Please read the filling instructions carefully before filling out.
- After completing the member information, save the form, upload it to the standard format address book section in the management backend, and click "Import" to complete the batch addition of members.
Administrator Performs Related Operations on Members in the Backend
I. Function Overview
Administrators can make corresponding adjustments to member information in the backend, efficiently managing enterprise member accounts.
II. Operation Process
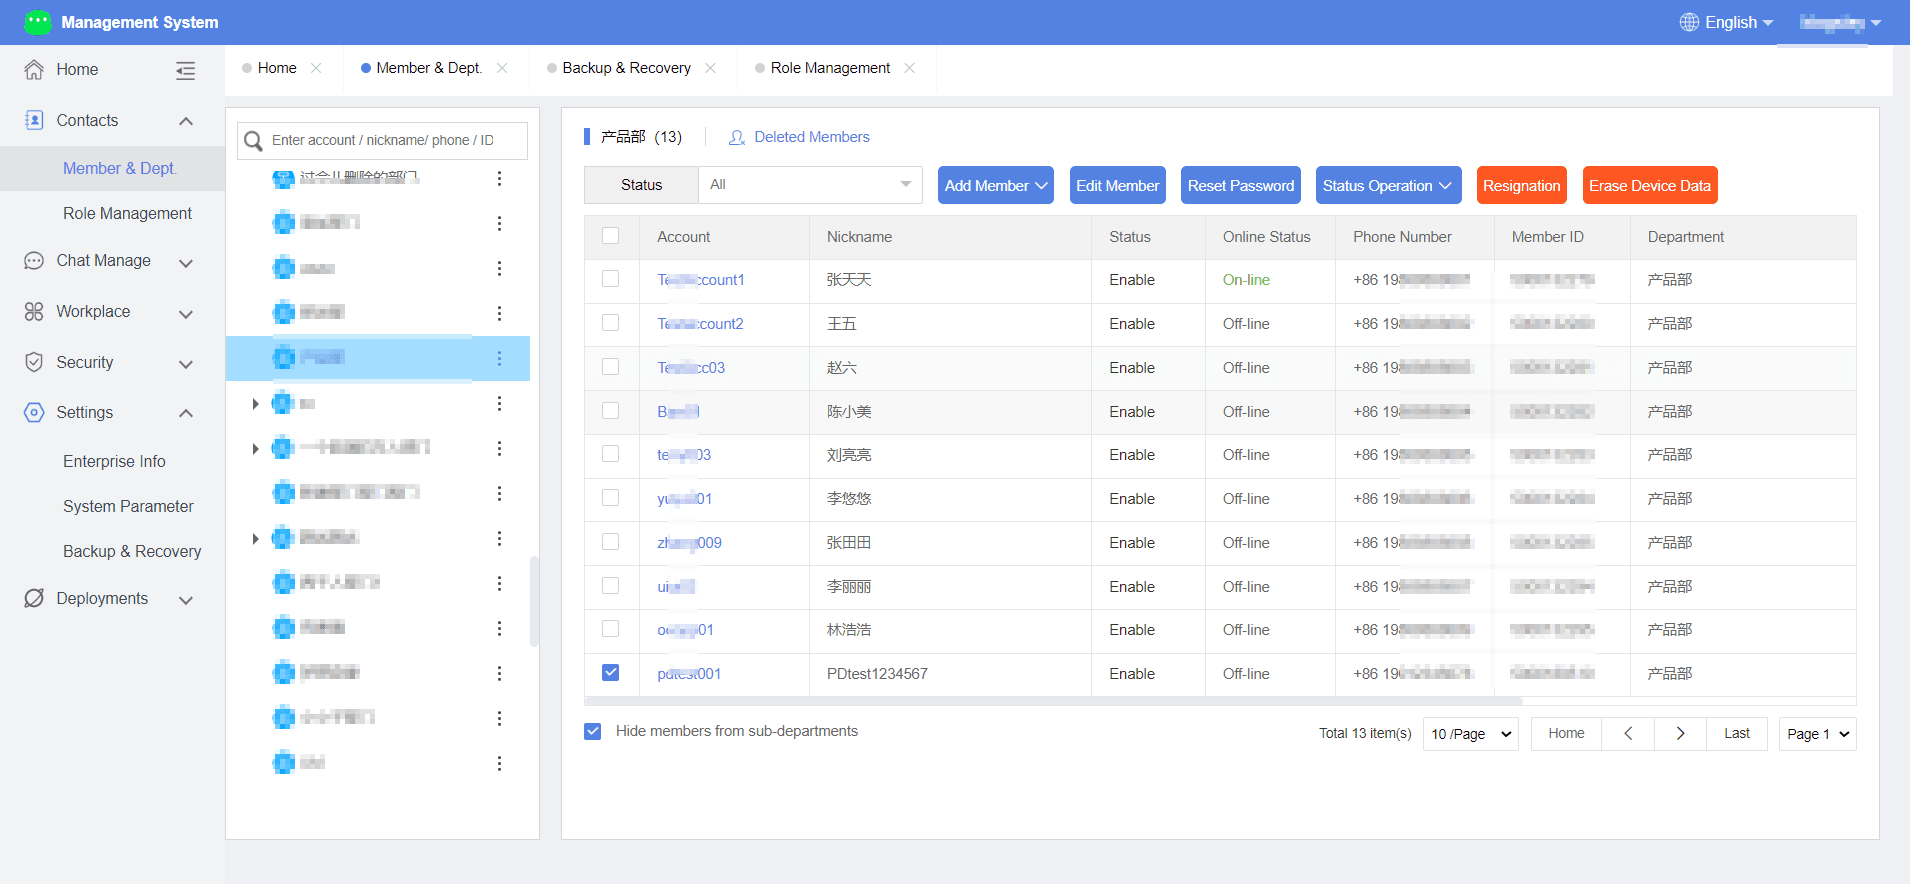
Enter the DuliDuli management backend, click on Address Book > Members & Departments > Select the corresponding member > Edit Member/Reset Password/Adjust Status/Mark as Resigned/Erase Device Data, etc.
- Edit Member: Modify member information.
- Reset Password: Reset the member's password to "a123456".
- Adjust Status: Enable/Disable the member. Disabling a member prohibits the corresponding member from logging in and forces them to log out.
- Mark as Resigned: Set the member's account to resigned status.
- Erase Device Data: Clear all message records on the corresponding device and disable the corresponding device number.
Administrator Creates and Manages Departments
I. Function Overview
To make enterprise management more structured and orderly, administrators can create departments and set department heads in the management backend.
II. Operation Process
Create/Edit Department
- Enter the DuliDuli management backend and click on DuliDuli.
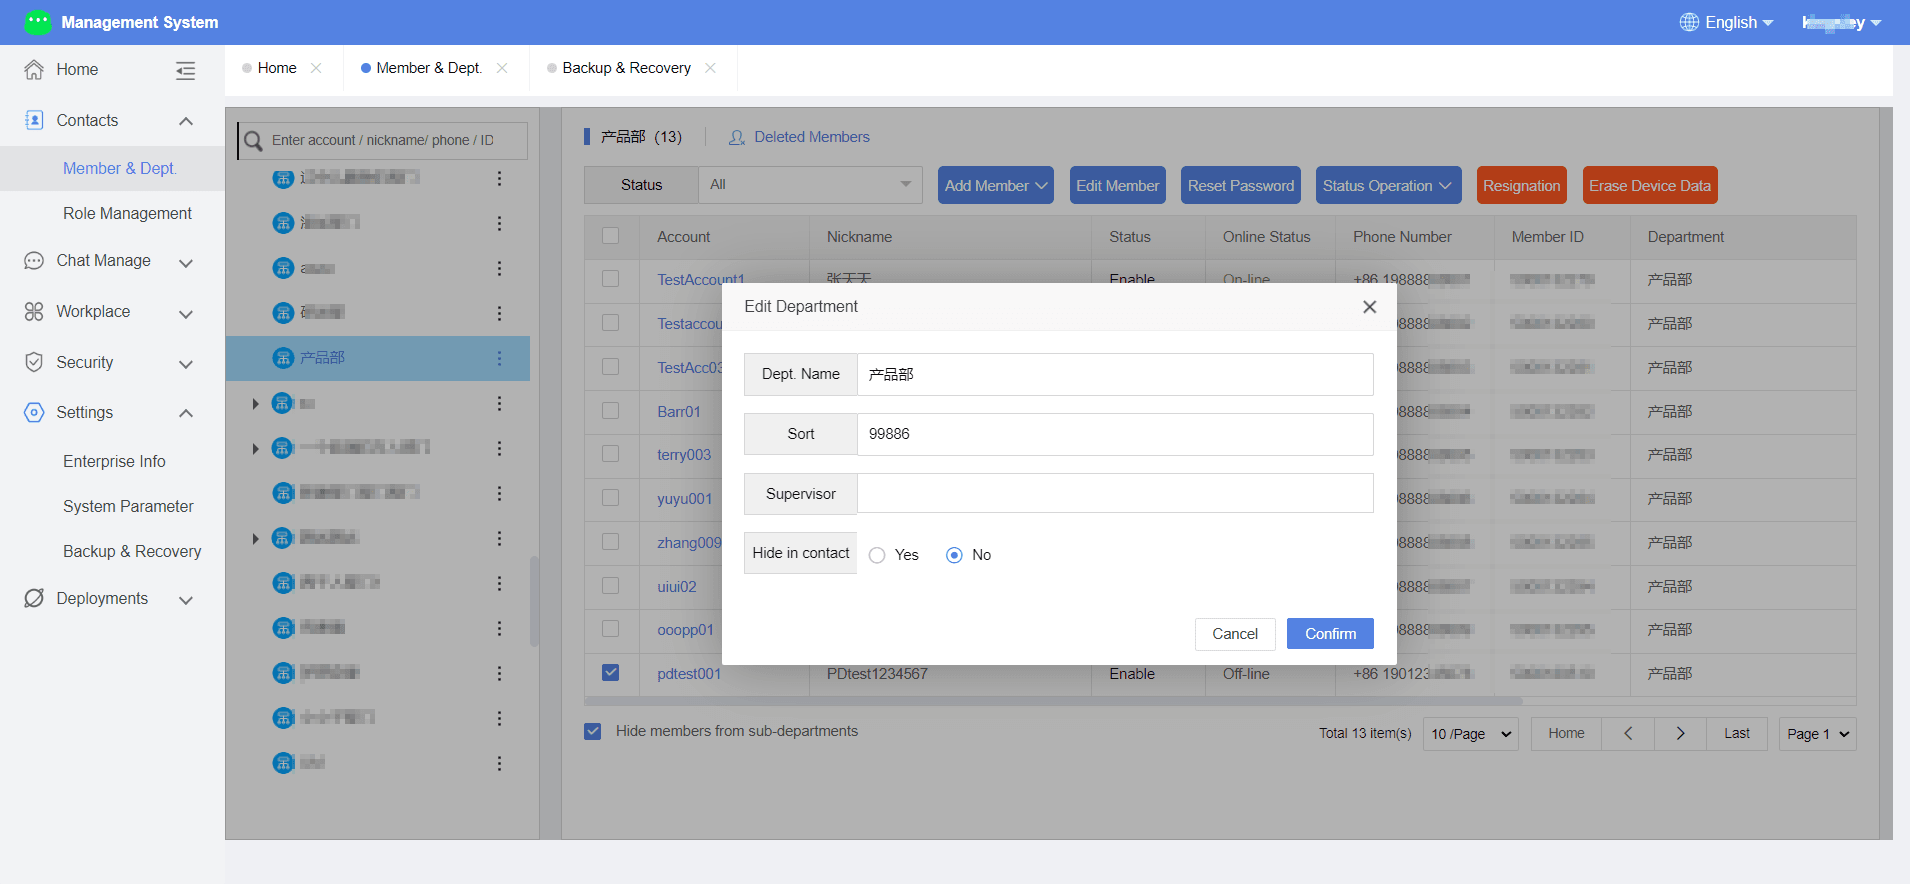
- In the department list, click "More" to select options such as edit department, add sub-department, delete department, etc.
- After creating the enterprise, the system defaults to creating a department named after the organizational structure, under which sub-departments can be created.
- Click "Add Sub-Department", edit the department name, sorting, head, whether to display in the address book, etc., and click "OK" to complete the creation of the new department.
2.Role Management
Administrator Sets Roles Within the Enterprise
I. Function Overview
A role refers to a type of member in the team structure, such as HR, administration, finance, legal, IT, etc. Role settings can be conveniently applied to member permissions, approval processes, and cloud disk permission management. For example, in the cloud disk, you can set the collaborators of a file to a certain role, such as designating HR to maintain company team-building materials in the cloud disk, or finance to maintain financial report files in the cloud disk.
II. Operation Process
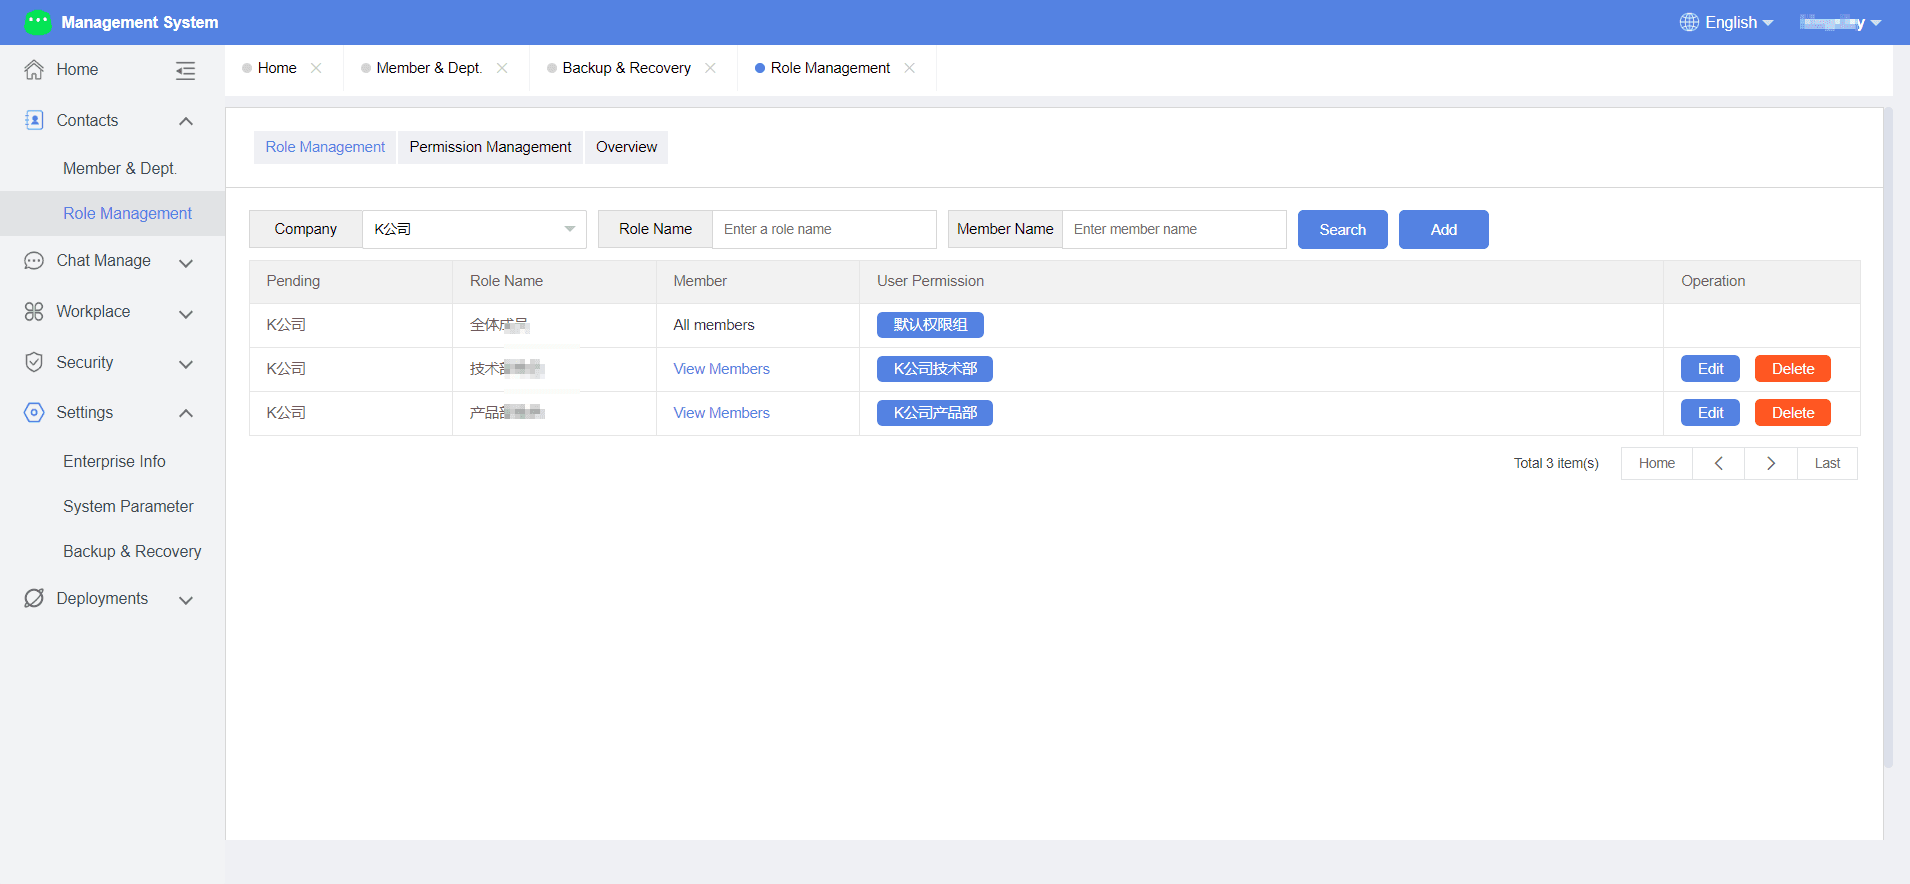
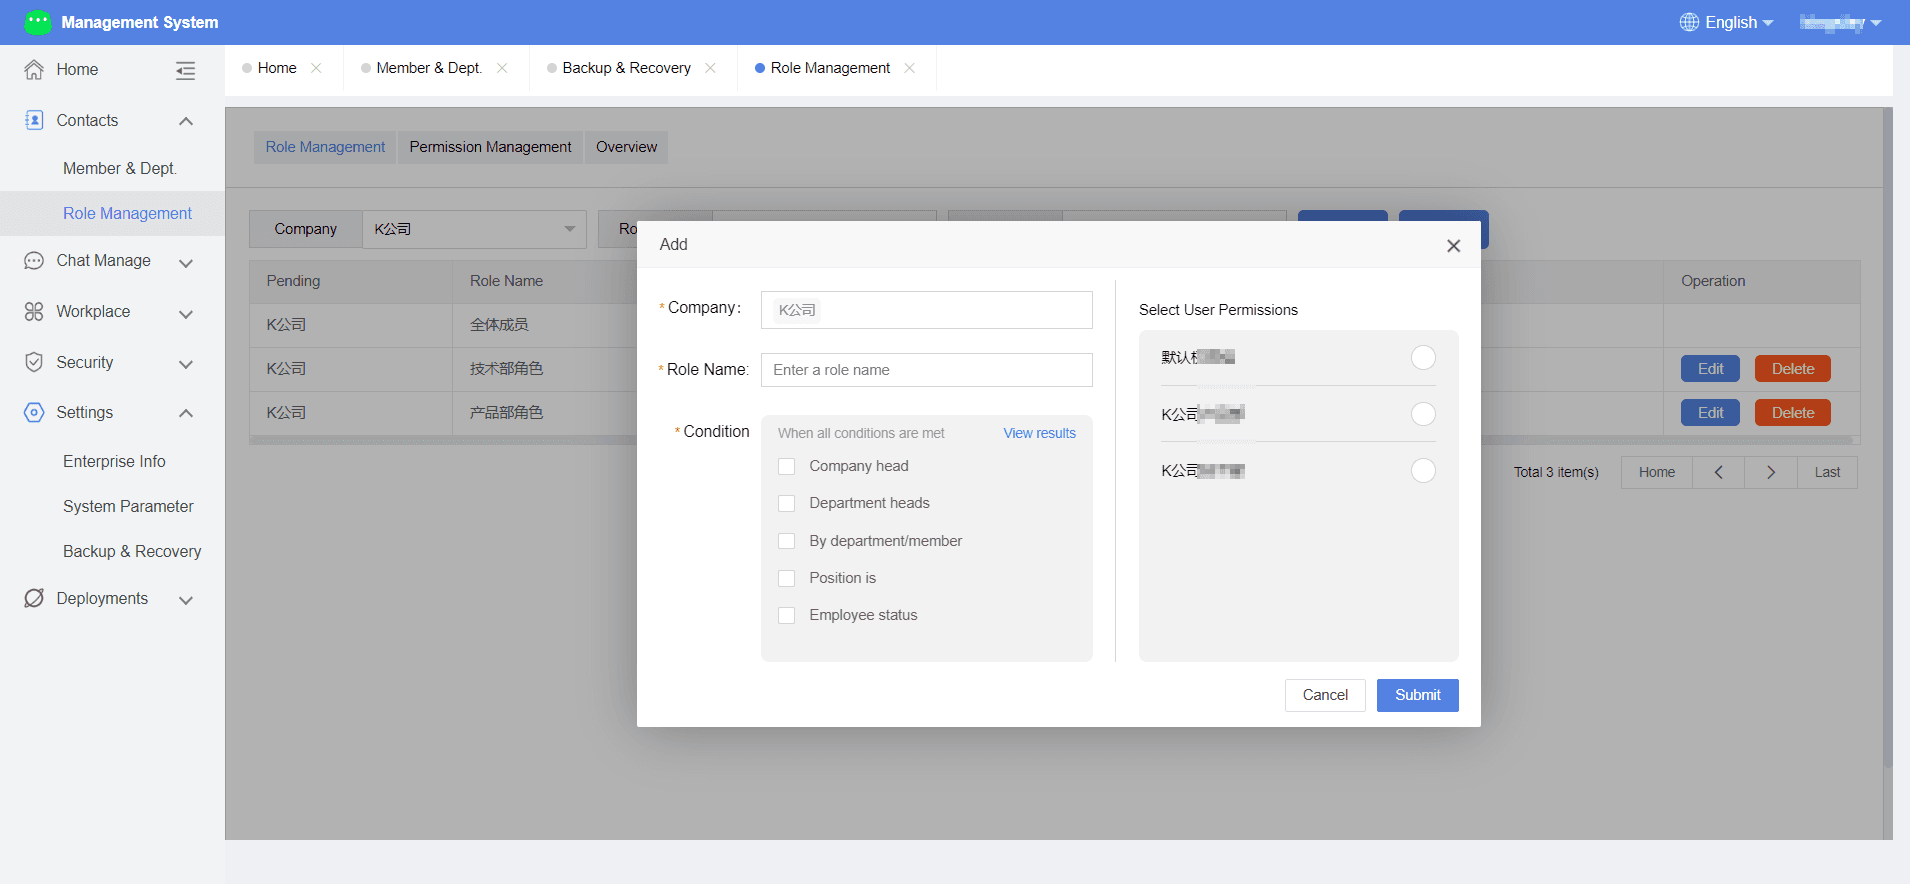
Enter the DuliDuli management backend, select Address Book > Role Management, click "Add Role", fill in the role name, select role conditions, and click "OK" to complete role creation.
Edit/Fill in Name
If you need to edit the role name, find the corresponding role in the role list, click "Edit", fill in the role name, click "Submit", and the edit will be successful.
Role Conditions
When setting a role, you need to select role conditions. When a user meets the selected role conditions simultaneously, they will automatically become that role. Multiple users can exist under one role, and one user can also serve as multiple roles simultaneously.
After selecting the role conditions, you can view the members under the current conditions by clicking "View Filter Results" in the upper right corner.
Role conditions include:
- Whether the user is the company head.
- Whether the user is the department head.
- By department/member, you can select specified members or all members under a specified department, with multiple selections allowed.
- Position is, you can select members with specified positions. The position here is the one set for the member when adding them.
- Employee status: You can select the employee's status (permanent, intern, probationary, contract, outsourced, consultant).