
Online Docs
DuliDuli Online Document is a real-time collaborative online document tool that also serves as a rich creation platform. Duli Document enables freer creation and more efficient collaboration.。
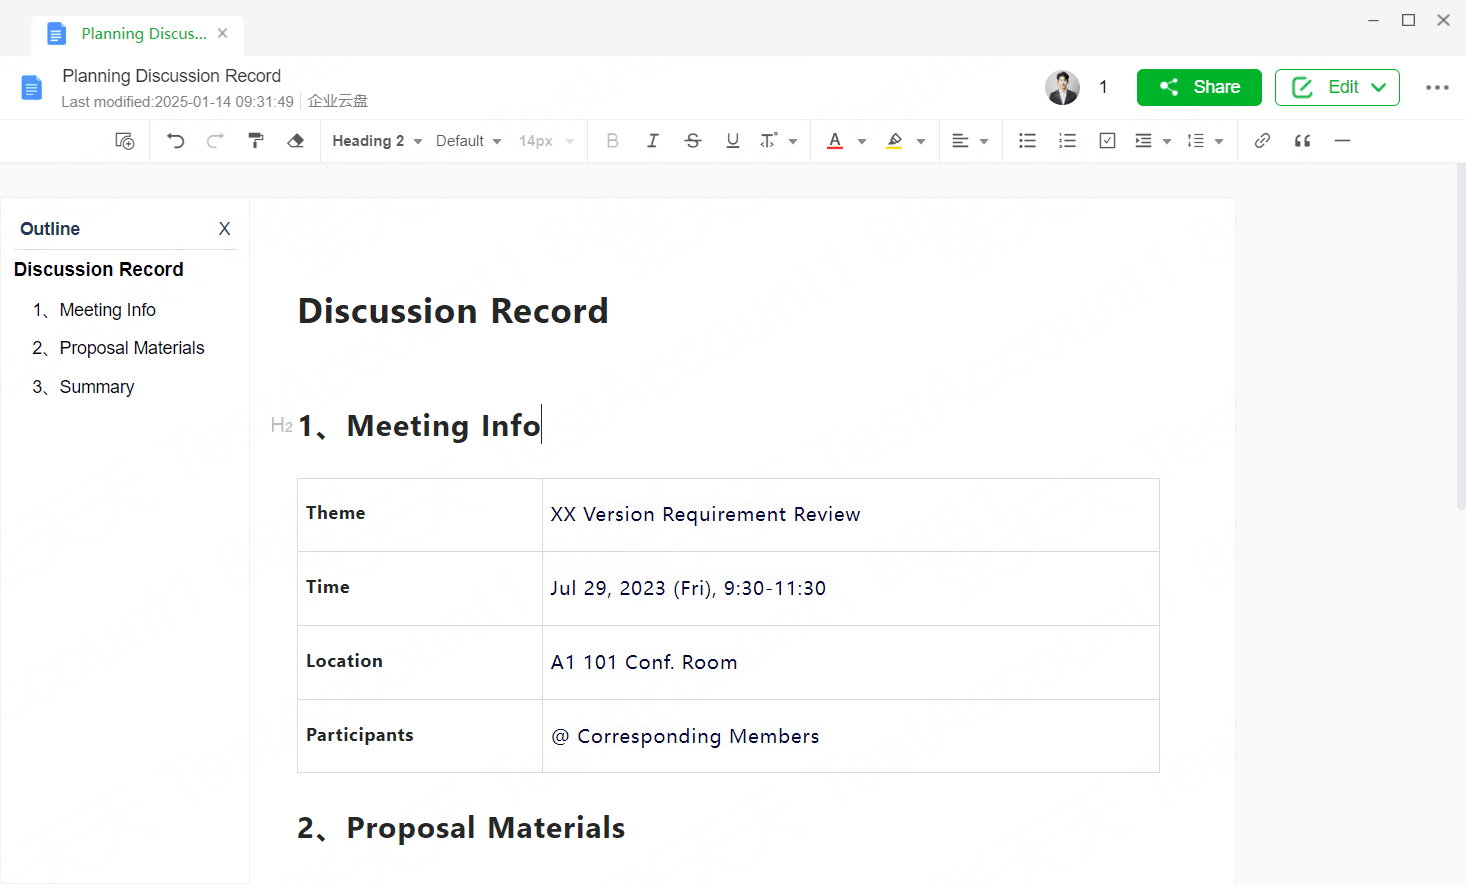
1.Creating a Document
You can create a blank document or import an existing local file as an online document.
Create a Blank Document
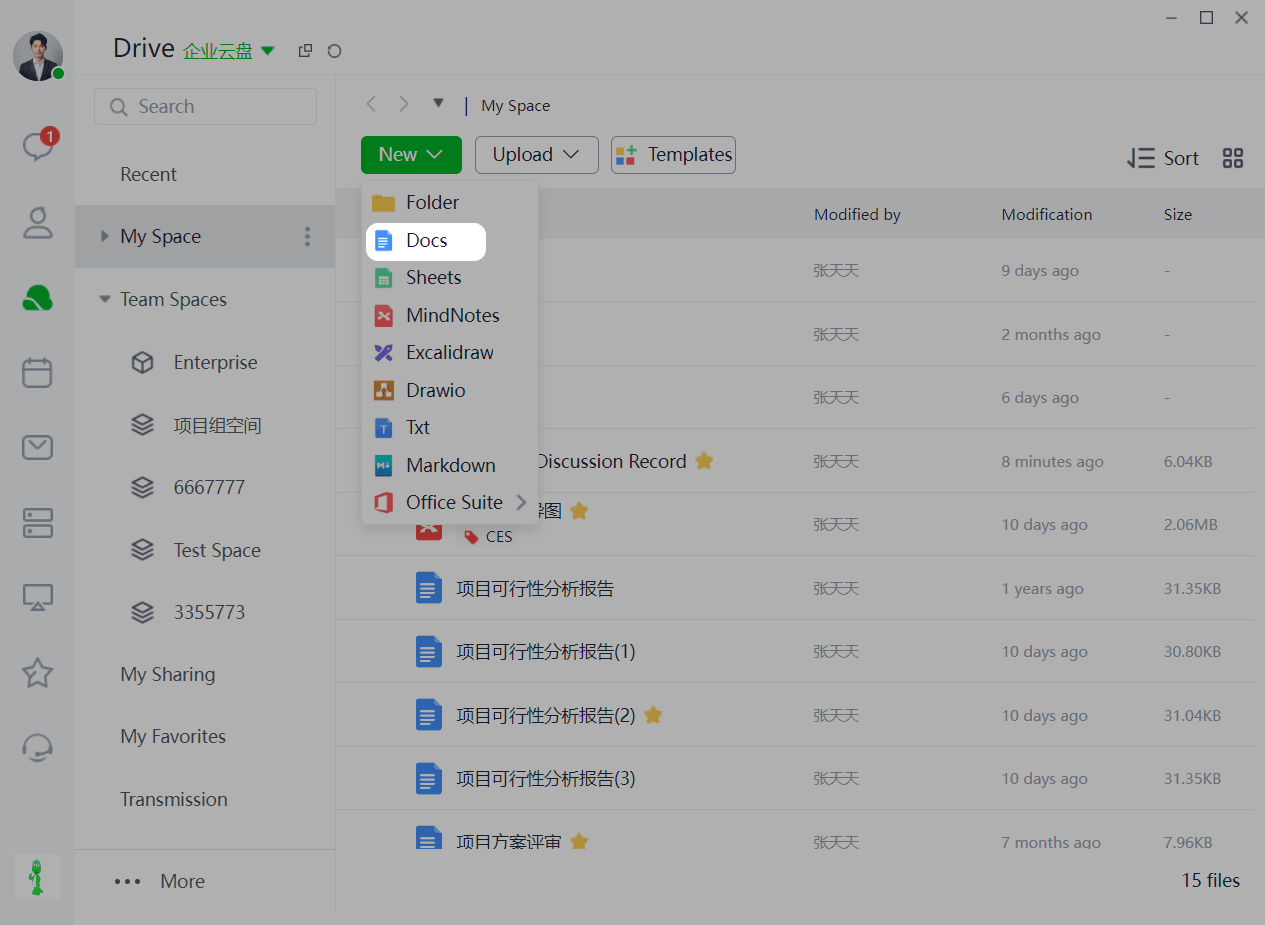
On the cloud drive homepage, click New > Online Document to create a blank document. You can also create one based on a document template.
Import a Document
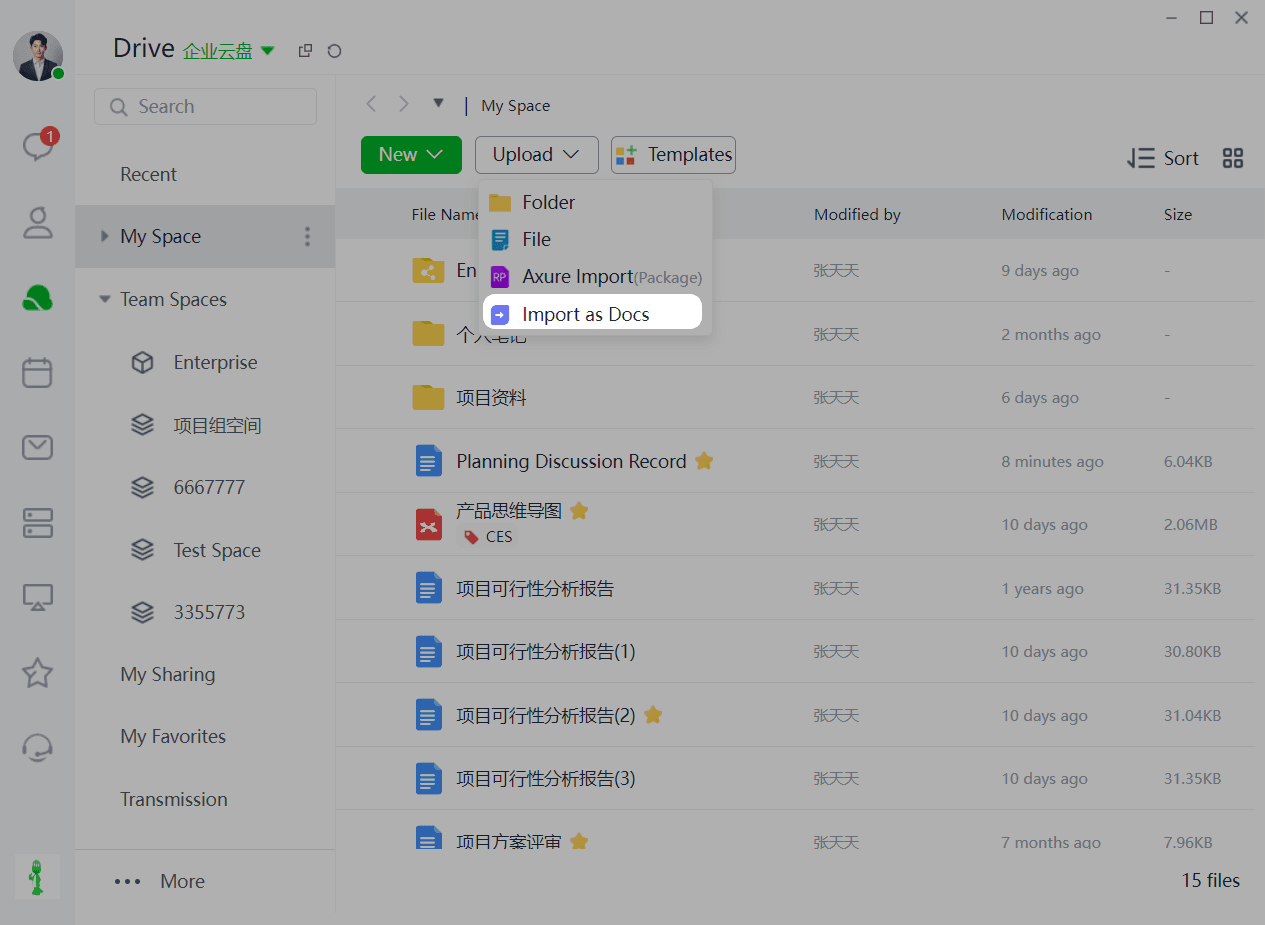
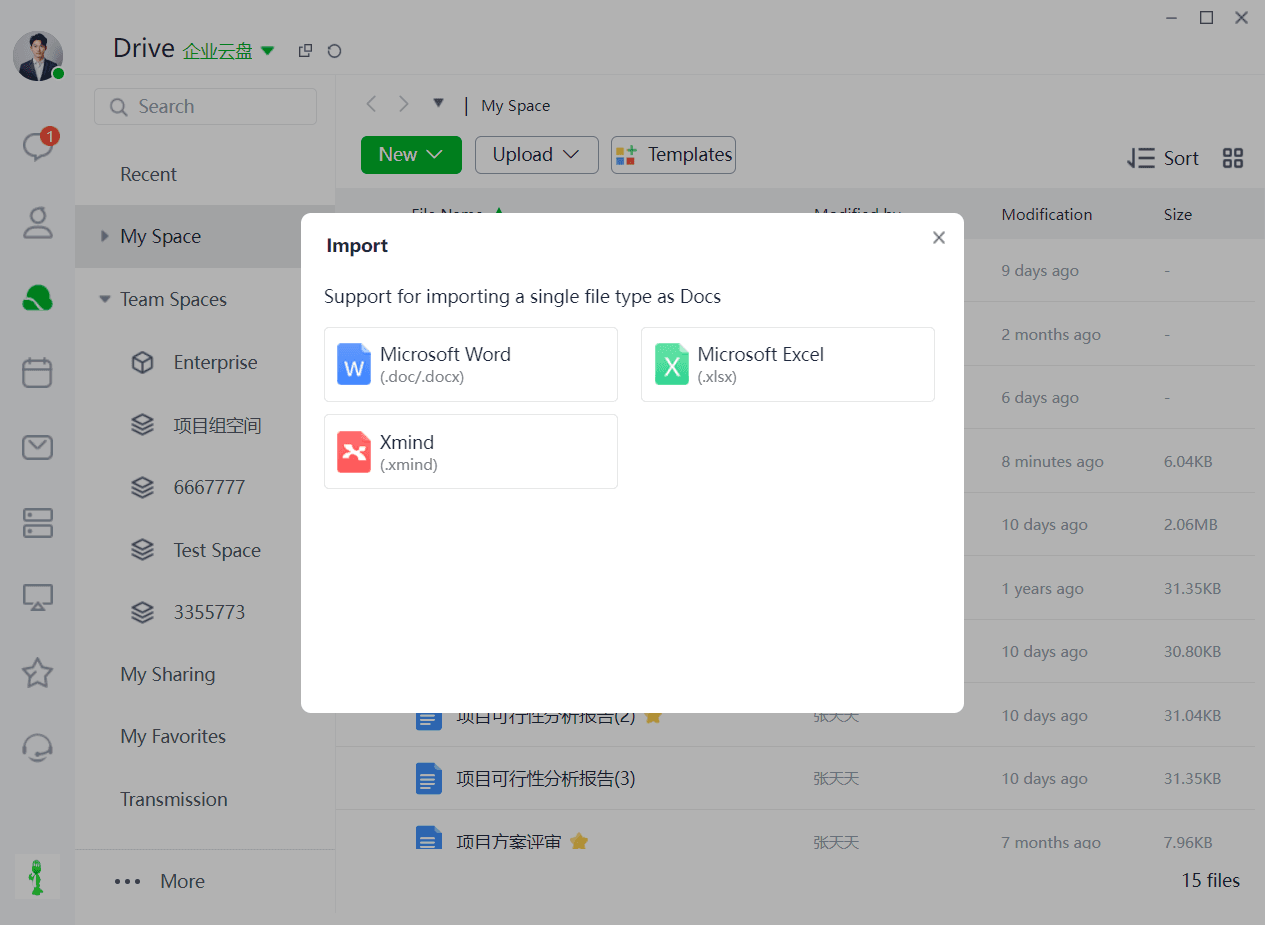
If you want to import an existing local file to Duli Cloud Drive, on the cloud drive homepage, click My Documents > Upload > Import Document, and select the corresponding file format.
2.Online Collaboration
Sharing a Document
Method 1: Invite Collaborators in the Document
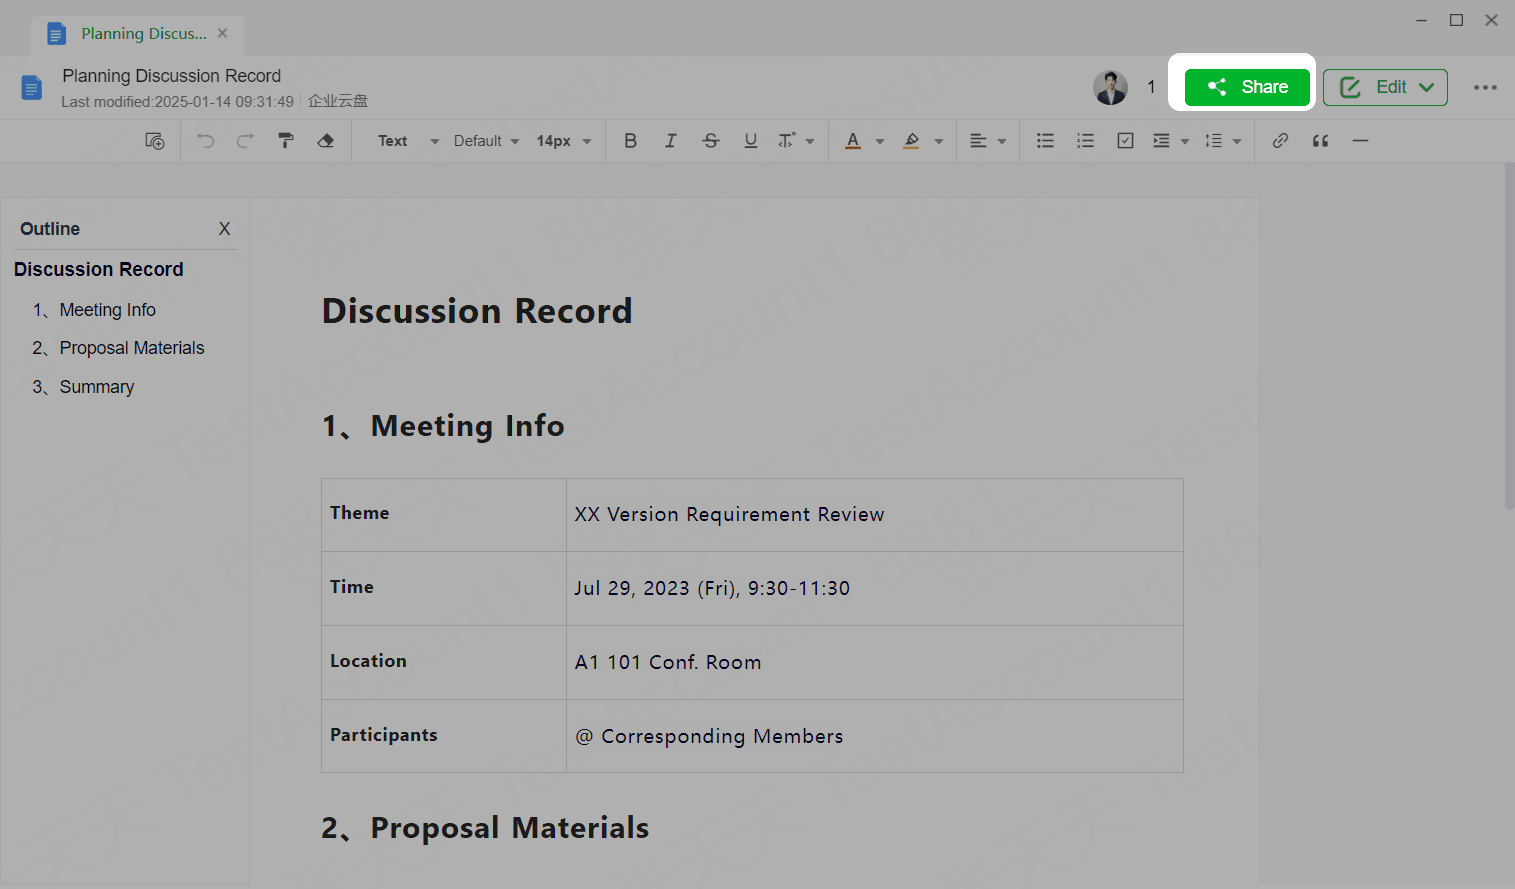
Click Share in the top right corner of the document, select Permission Management, add the invitee, assign the corresponding management permissions, and share the document with them.
Method 2: Share a Document in a Chat
Click Share in the top right corner of the document, select Send to Chat, choose the corresponding conversation, assign the corresponding management permissions, and share the document with users in the current conversation.
3.Reading Mode
Switch to Reading Mode
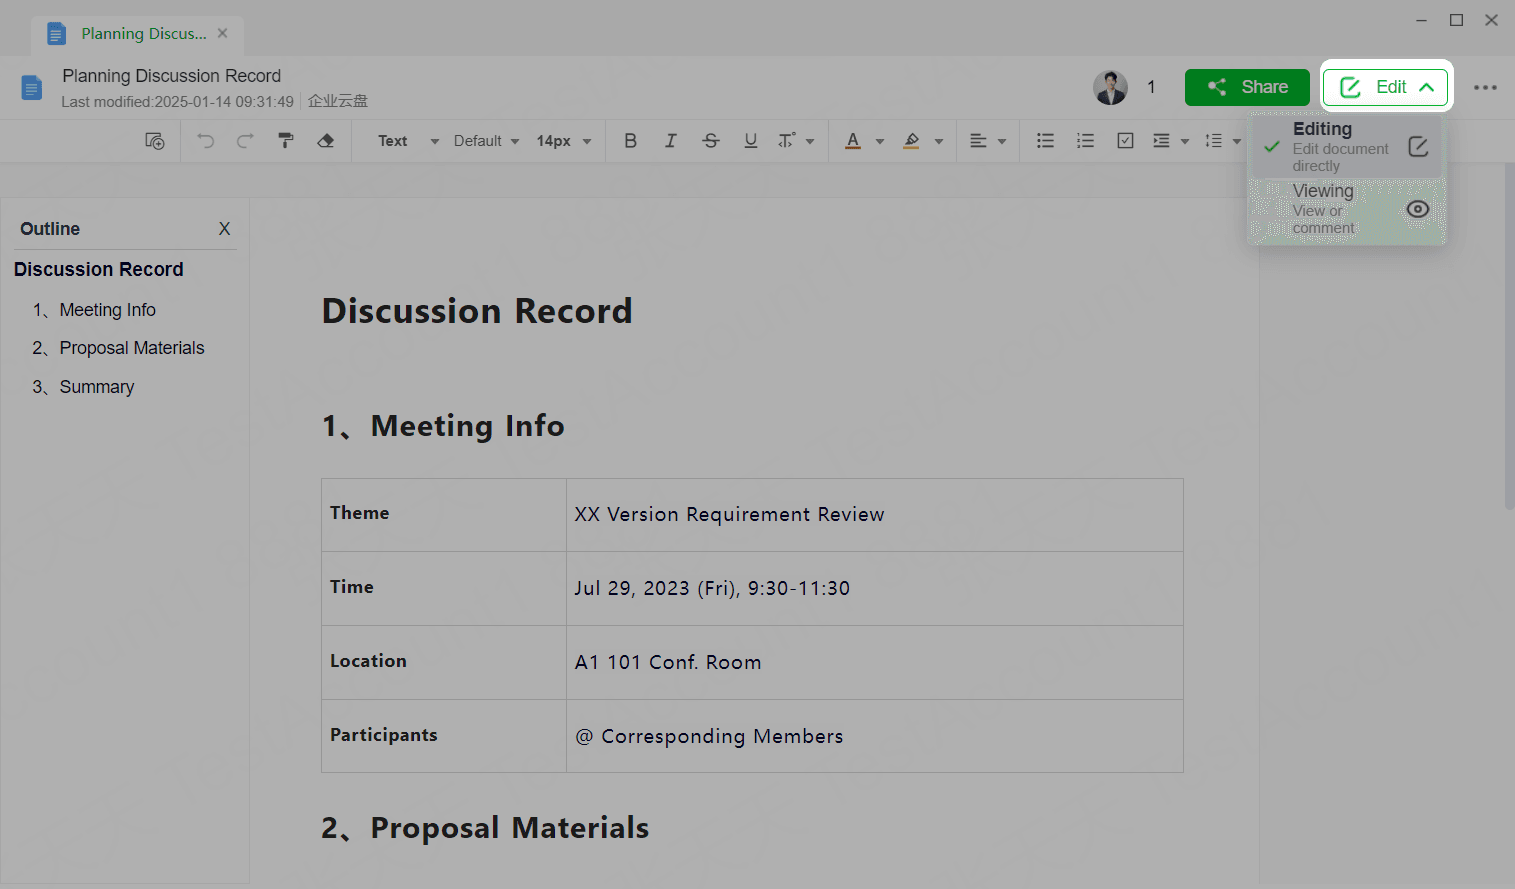
Users with document editing permissions can open the document, hover their mouse over Edit in the top right corner, select Read from the dropdown menu, and switch to reading mode. In reading mode, you can only view the document.
Switch to Editing Mode
Users with document editing permissions can open the document, hover their mouse over Edit in the top right corner, select Edit from the dropdown menu, and switch to editing mode.
FAQs
Q: Does switching reading/editing mode affect others?
A: No, reading/editing mode only applies to the individual user.
Q: Why can't I switch reading/editing mode?
A: Only users with document editing permissions can switch between reading and editing modes.
4.Editing and Formatting
Toolbar
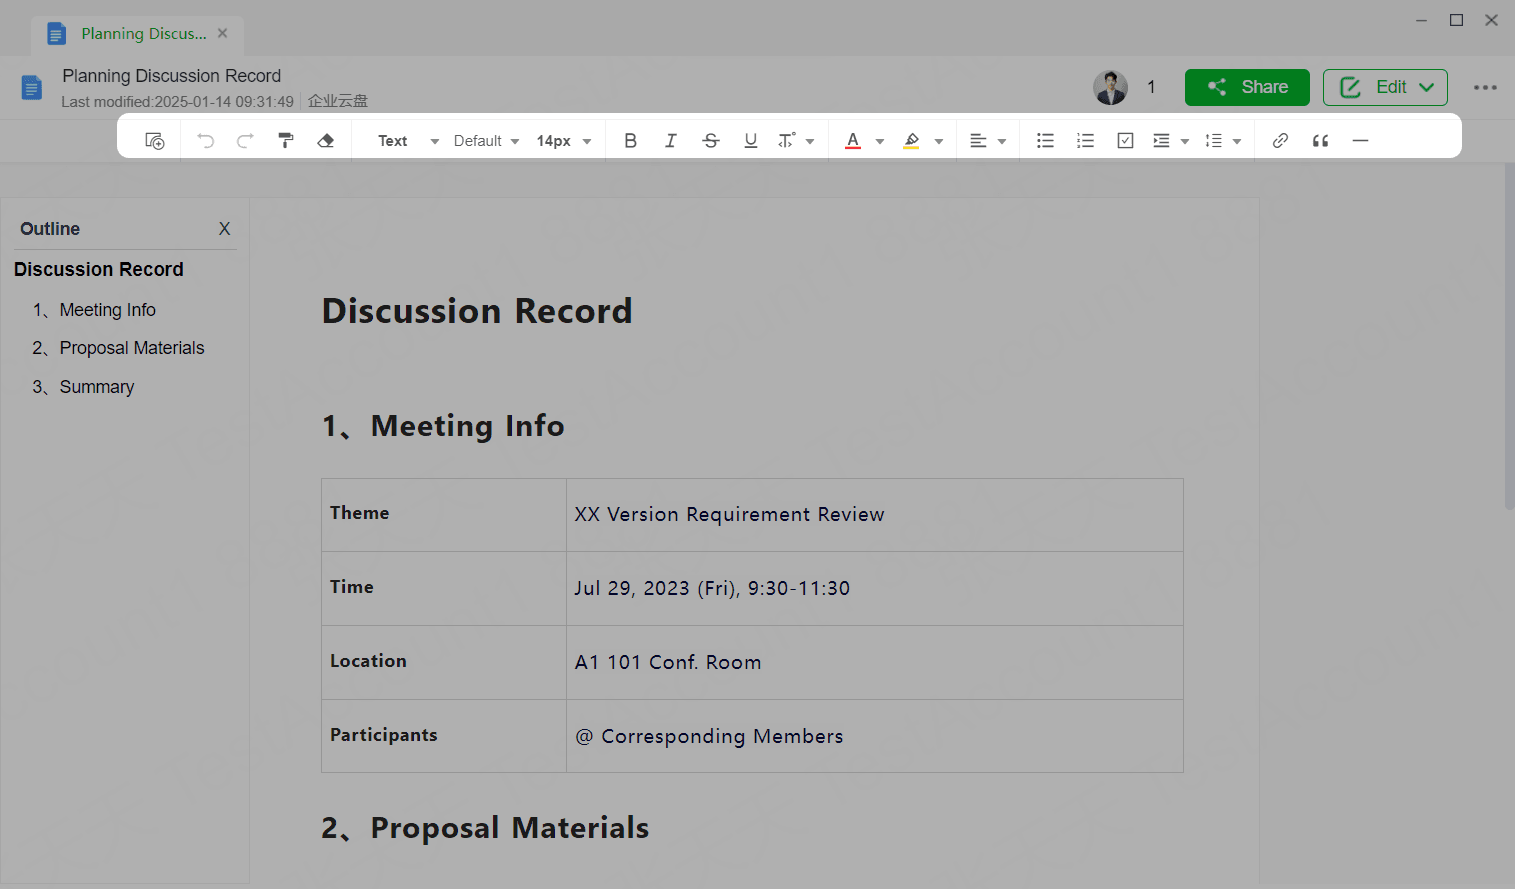
Using the top toolbar, you can change font style or color, bold, strikethrough, add ordered or unordered lists, insert hyperlinks, copy links, add headings, lists, highlight blocks, and more. You can also insert content types such as images, tasks, documents, and columns.
Find and Replace
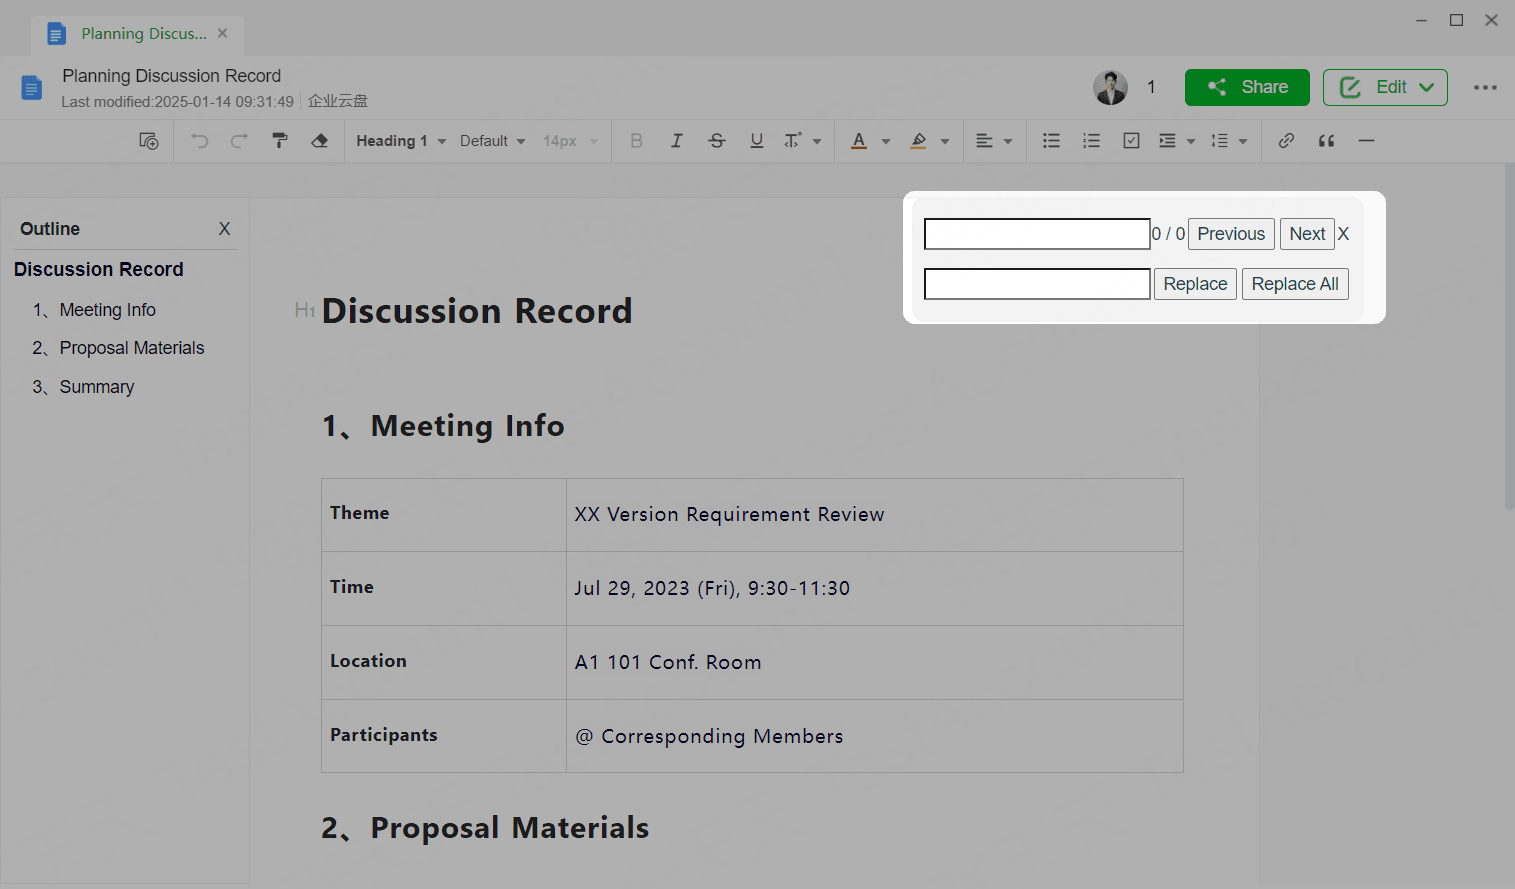
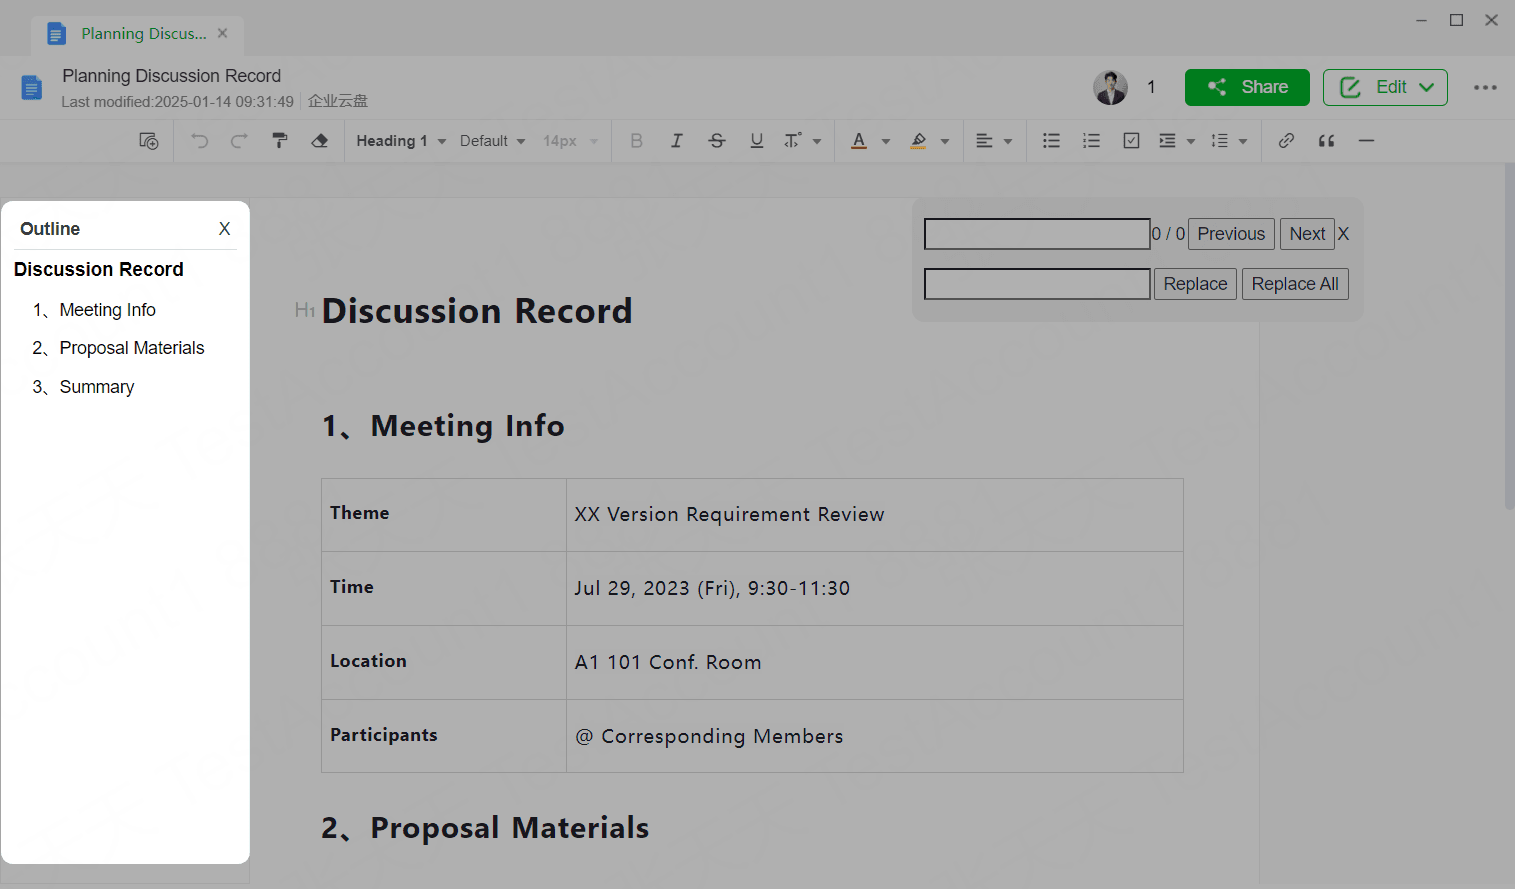
Find: Use "Ctrl+F" to open the Find and Replace panel. In the Find bar, enter the search content to locate the corresponding content.
Replace: Use the Replace function in the Find and Replace panel, enter the search content and the content to be replaced, click Replace or Replace All to complete the replacement.
Document Outline Function
The document supports automatic generation of an outline. By setting headings, a clear document outline is automatically generated and updated. In reading/editing mode, you can view the document outline on the left, click on a heading in the outline area to quickly jump to the corresponding content, improving content search and reading efficiency.
5.More
5.1 Document Info
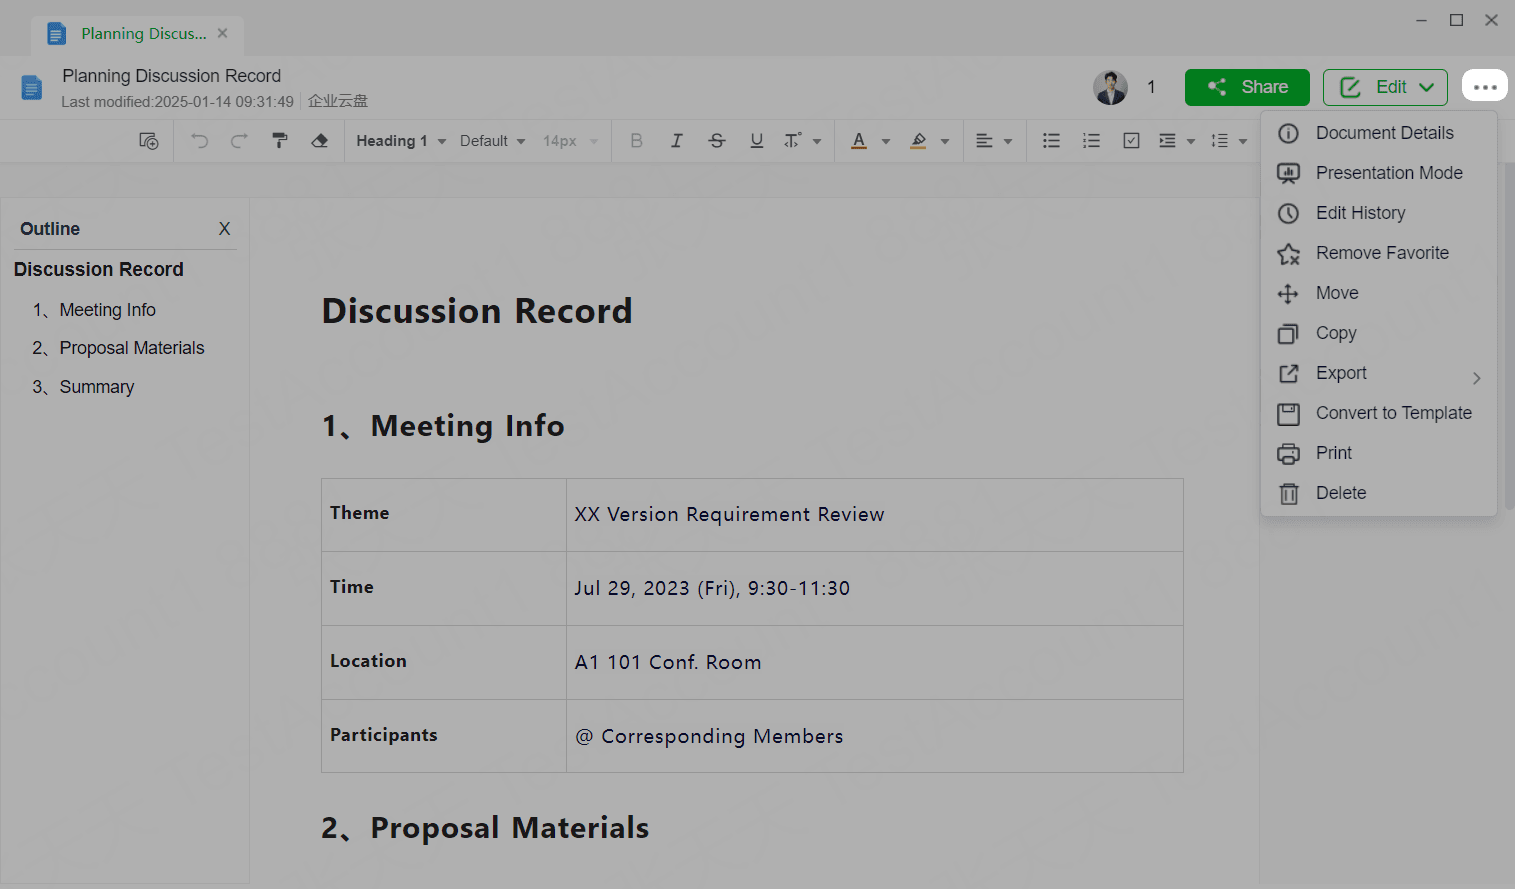
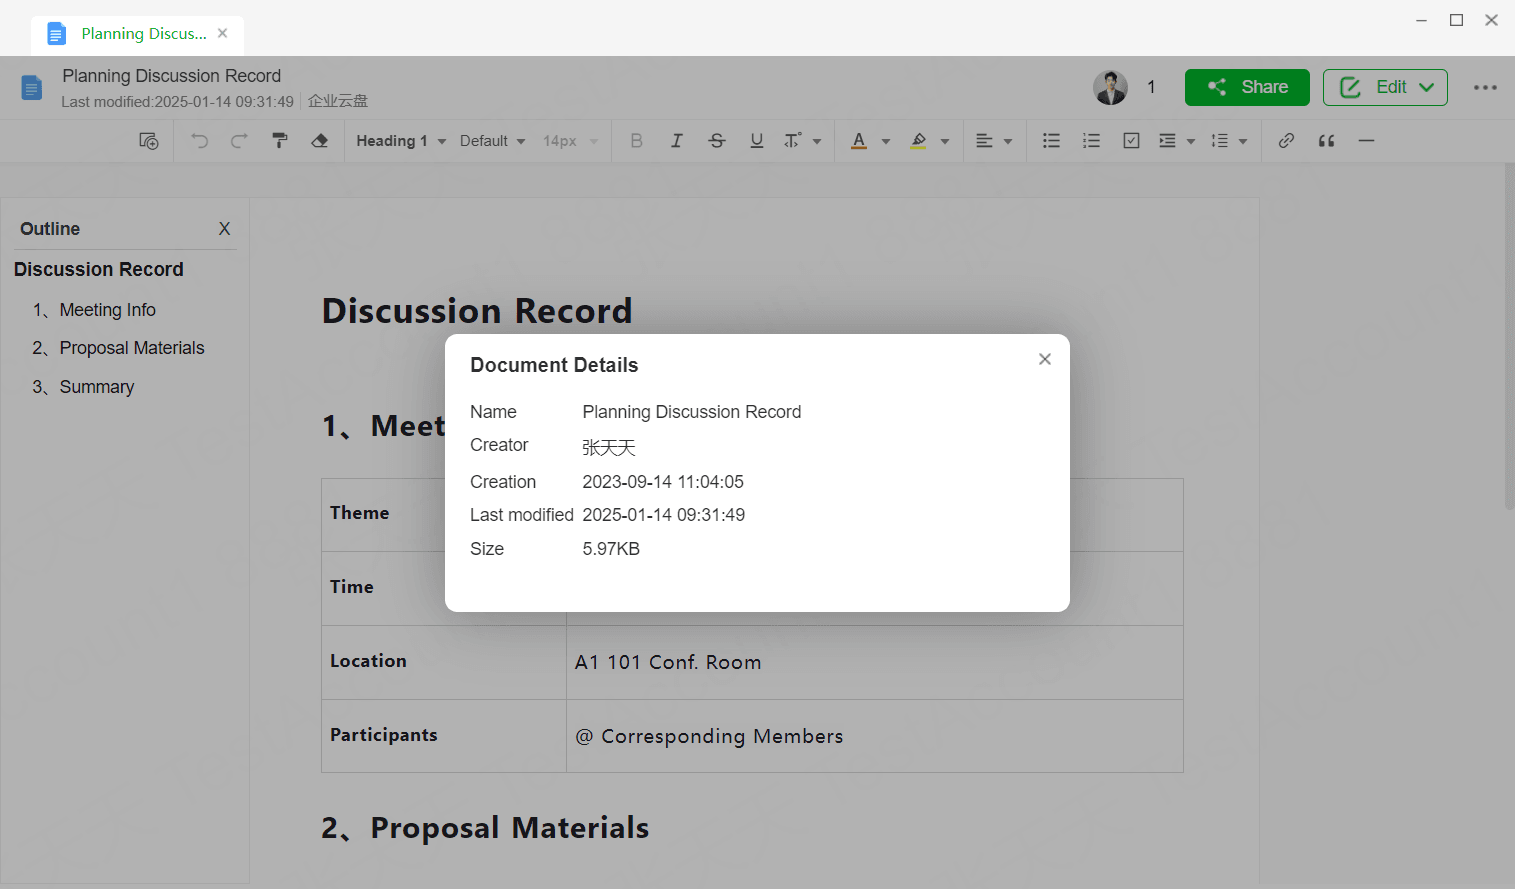
Click ... > Document Info in the top right corner of the document to view the file's name, creator, creation time, last modification time, size, and other information.
5.2 Presentation Mode
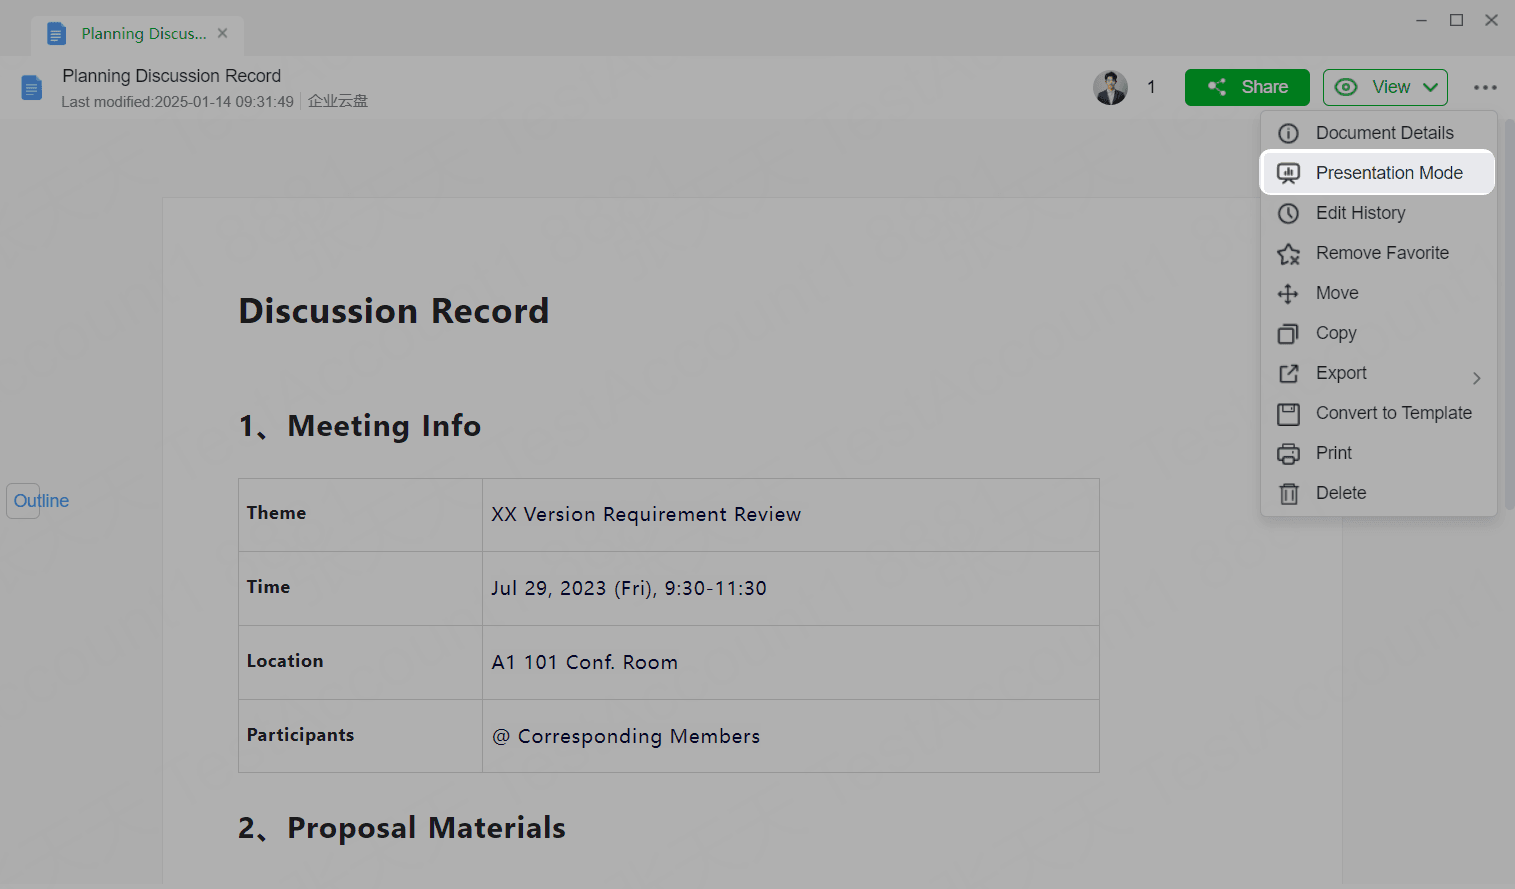
Click ... > Presentation Mode in the top right corner of the document to enter presentation mode. In this mode, editing is not allowed. You cannot exit using the Esc key. You can only exit by moving your mouse to the top to reveal the Close Presentation Mode button and clicking it.
5.3 History
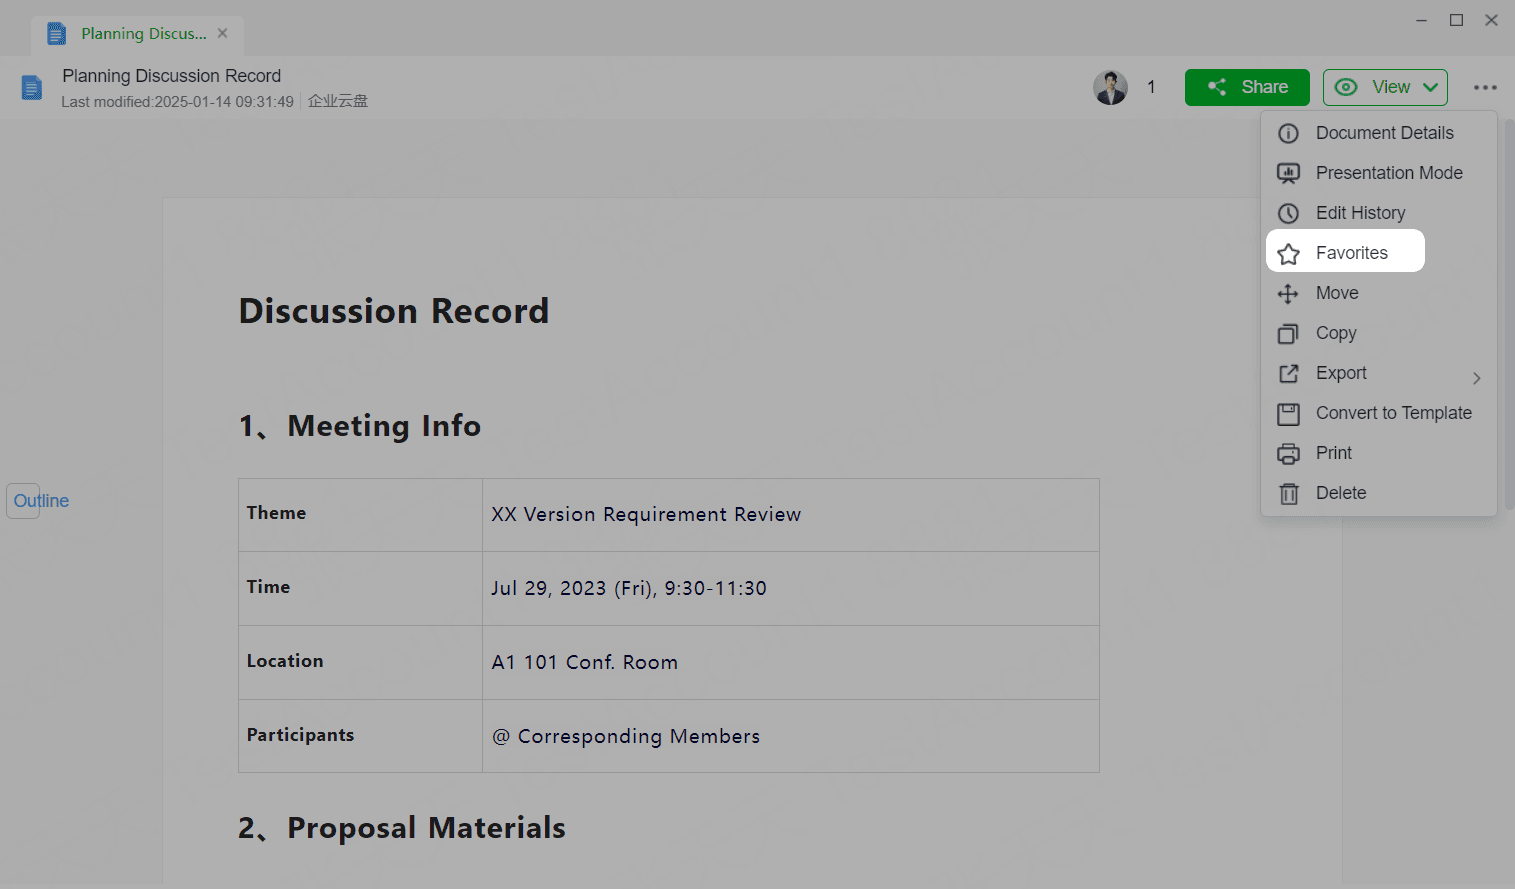
Click ... > History in the top right corner of the document to access the history page.
View Document History
The document provides powerful version management functions, helping you easily retrieve historical versions and trace editing changes. When content is modified, the system automatically retains historical versions and records the modifier, modification time, and modification content, allowing you to restore content to any historical version as needed. Only users with editor permissions can restore historical records, providing secure protection for document data.
Operation Process: In the navigation bar in the top right corner of the document page, hover your mouse cursor over the More button, select History from the menu to open the history list. All historical records are listed in reverse chronological order and display the corresponding modifier and modification time.
View Complete Historical Versions
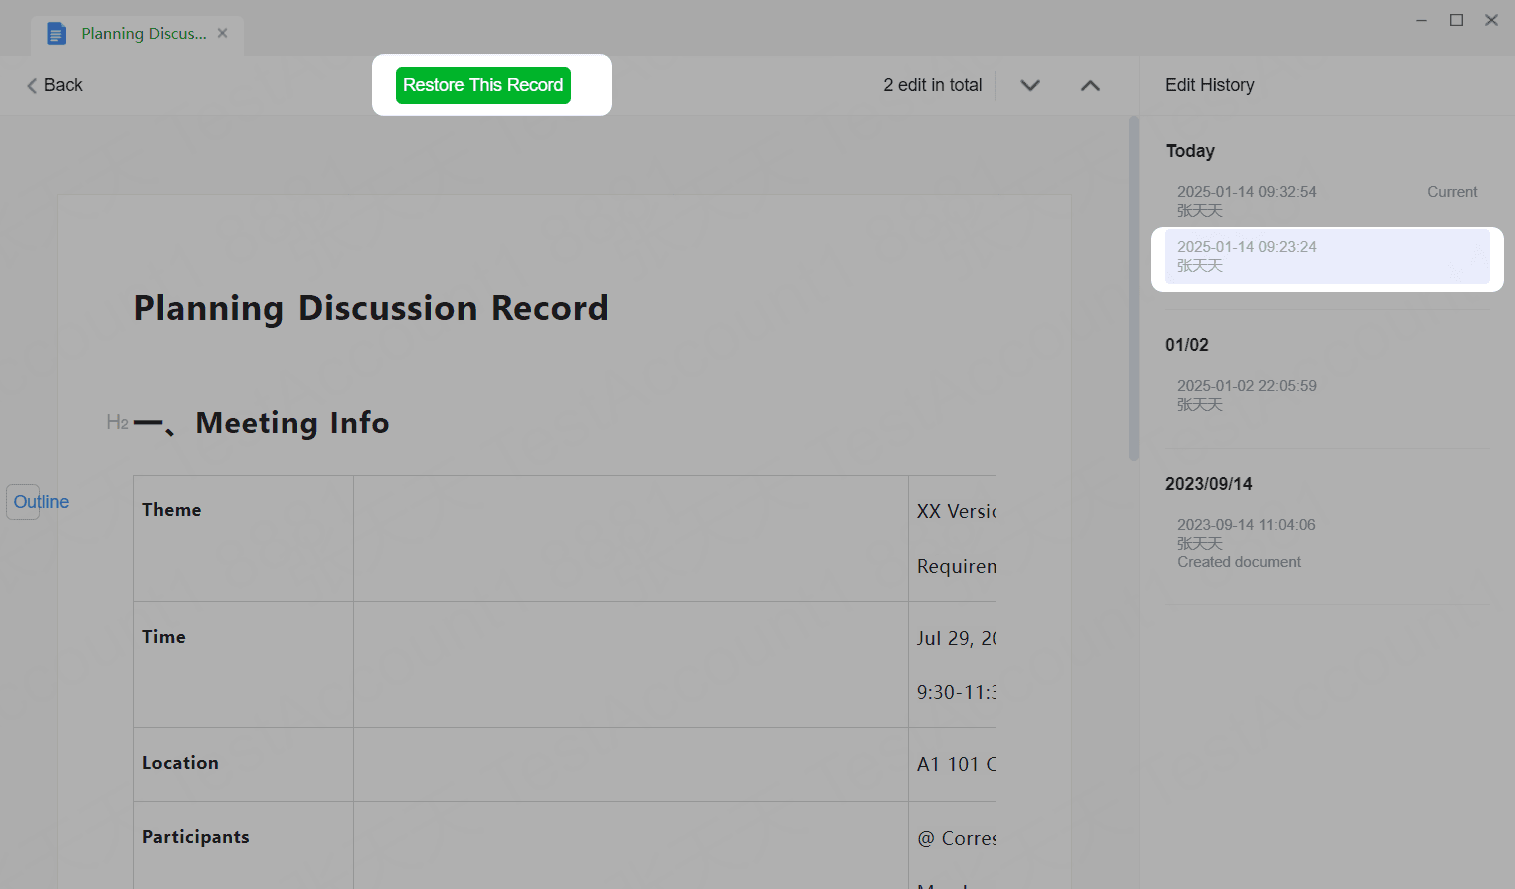
In the history list on the right, historical records are listed in reverse chronological order by modification time. You can find the historical version you want to view in detail, click on it to view the document content or change details at that time point.
Restore Historical Version
- In the history list, click to select the historical version you want to restore.
- View the historical record area on the page to confirm if this is the version you want to retrieve.
- Click the Restore This Historical Record button and select Restore to restore the document to the currently selected version.
5.4 Favorite
Click ... > Favorite in the top right corner of the document to favorite the current file. After favoriting, you can view favorited files in Cloud Drive - My Favorites. If the document has already been favorited, the Favorite button will change to Unfavorite. Clicking Unfavorite will remove the document from My Favorites.
5.5 Move
Click ... > Move in the top right corner of the document to change the current file's path from the original to another path.
5.6 Copy
Click ... > Copy in the top right corner of the document to add a new copy of the current file to another path.
5.7 Export Document
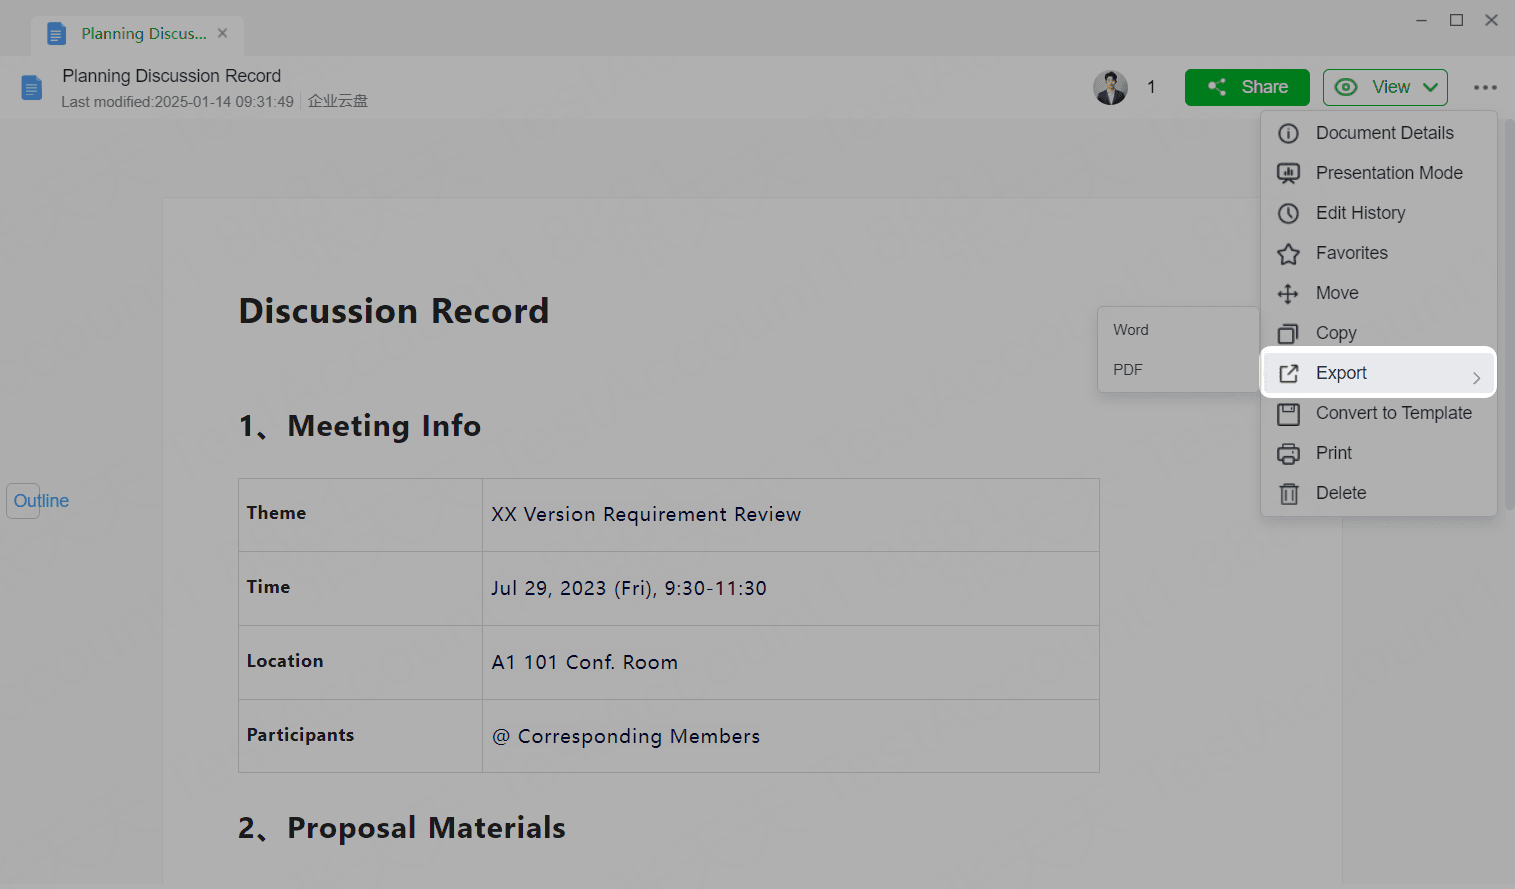
Click ... > Export in the top right corner of the document to download the document as a Word or PDF file.
5.8 Save as Template
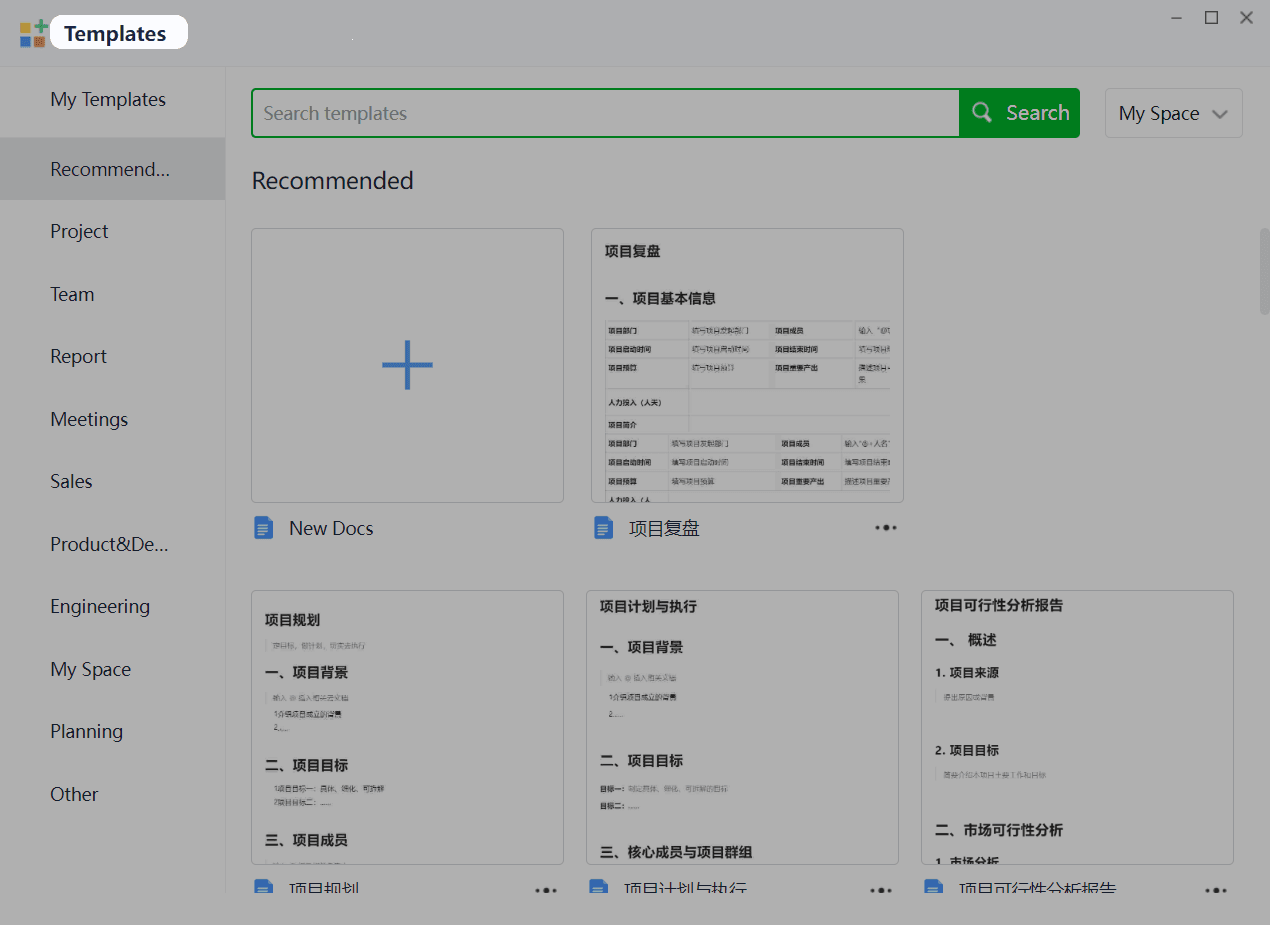
Click ... > Save as Template in the top right corner of the document to add the current file as a new template in the template library.
5.9 Print
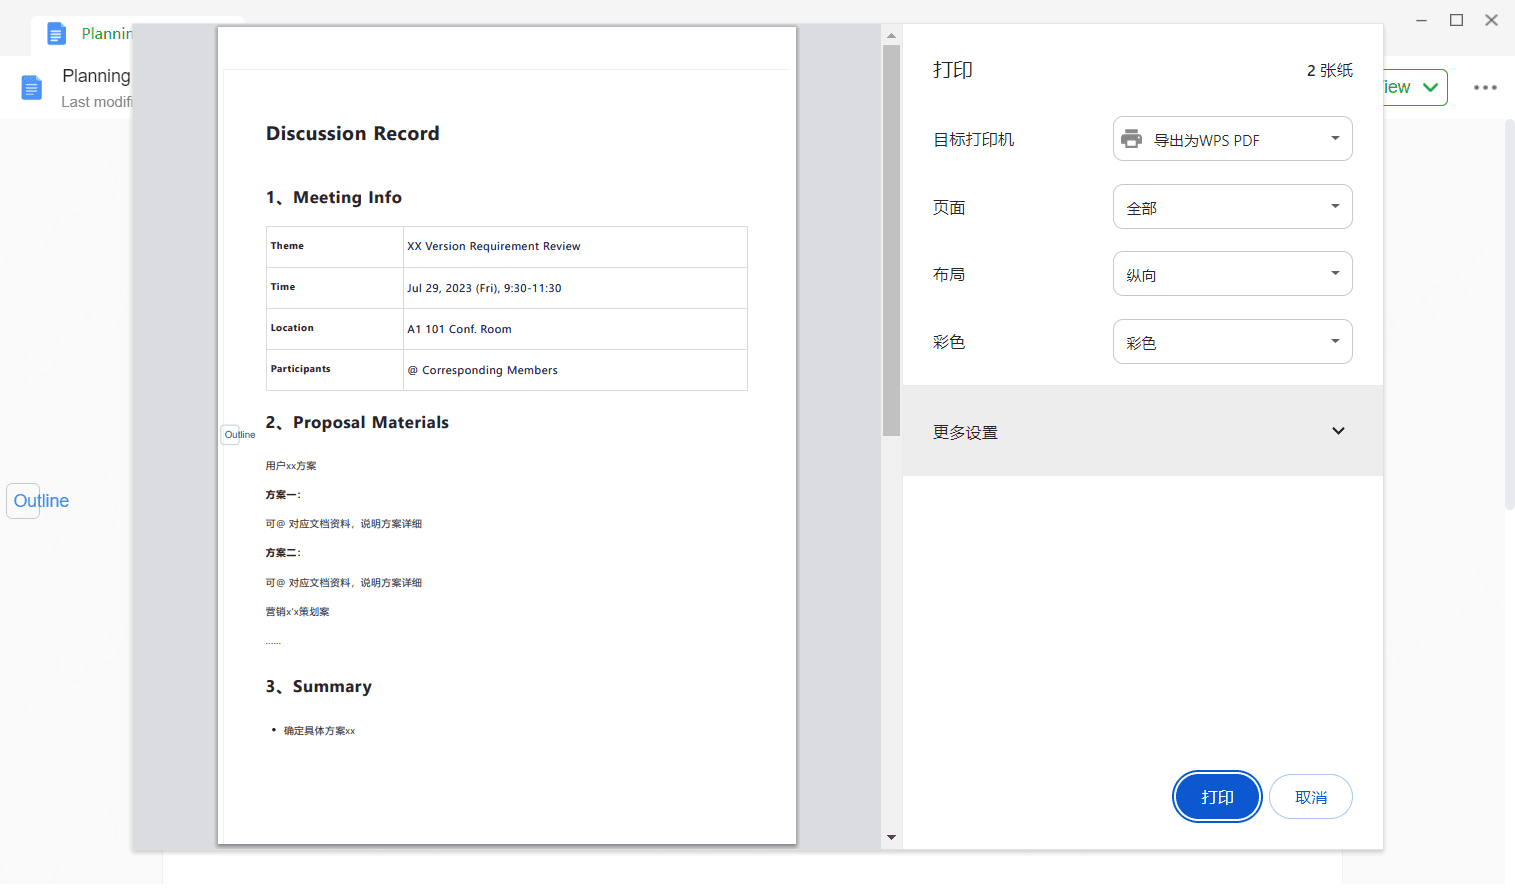
Click ... > Print in the top right corner of the document to connect to a printer and print the current file.
5.10 Delete
Click ... > Delete in the top right corner of the document to delete the current file.