Group Chat
When multiple people are needed for a task, a group can be created and relevant members invited to join for centralized discussion. All members in the enterprise can create group chats.
1.1 Creating a Group
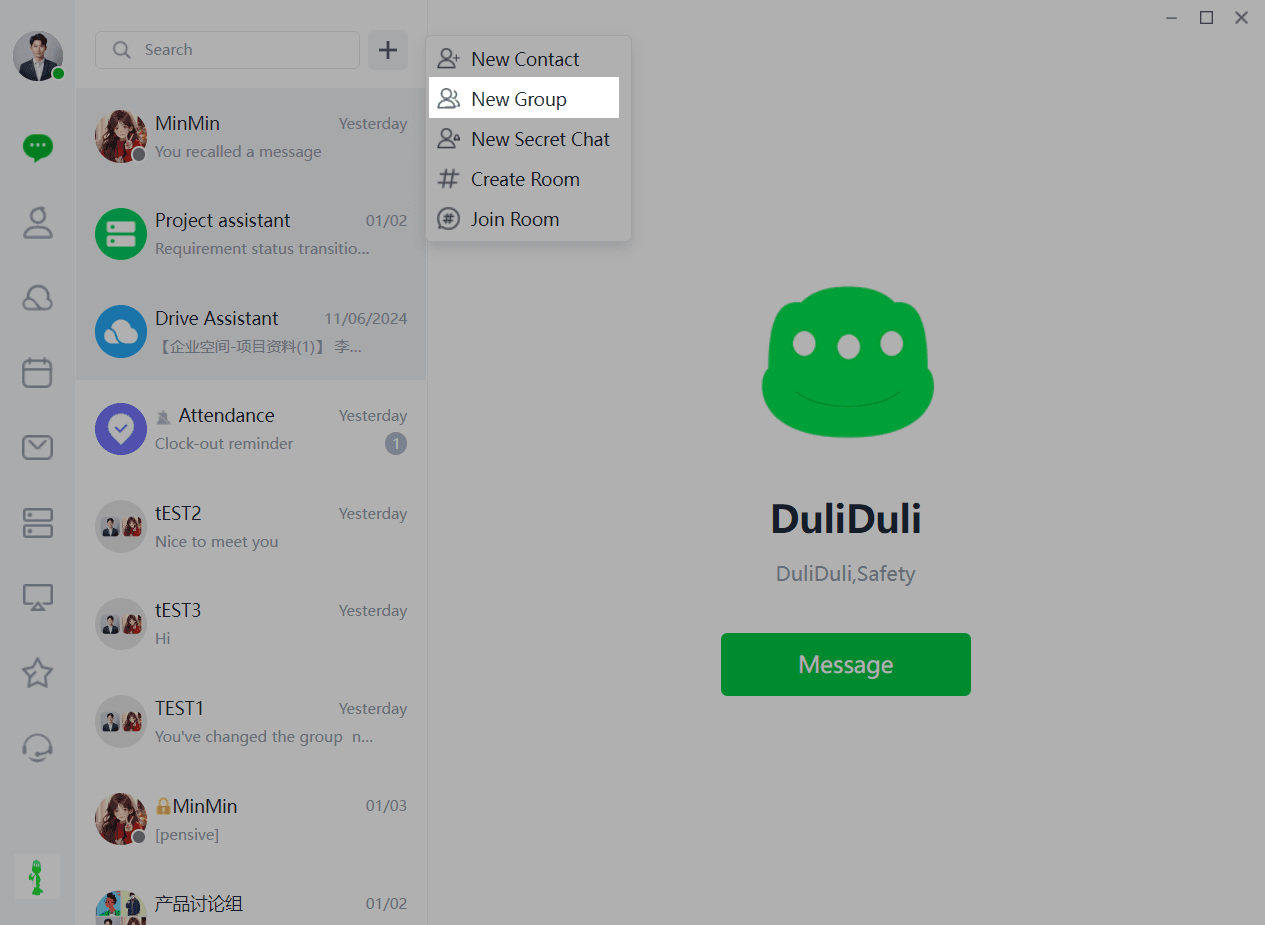
(1)Click the "+" above the message list and select "Create Group".
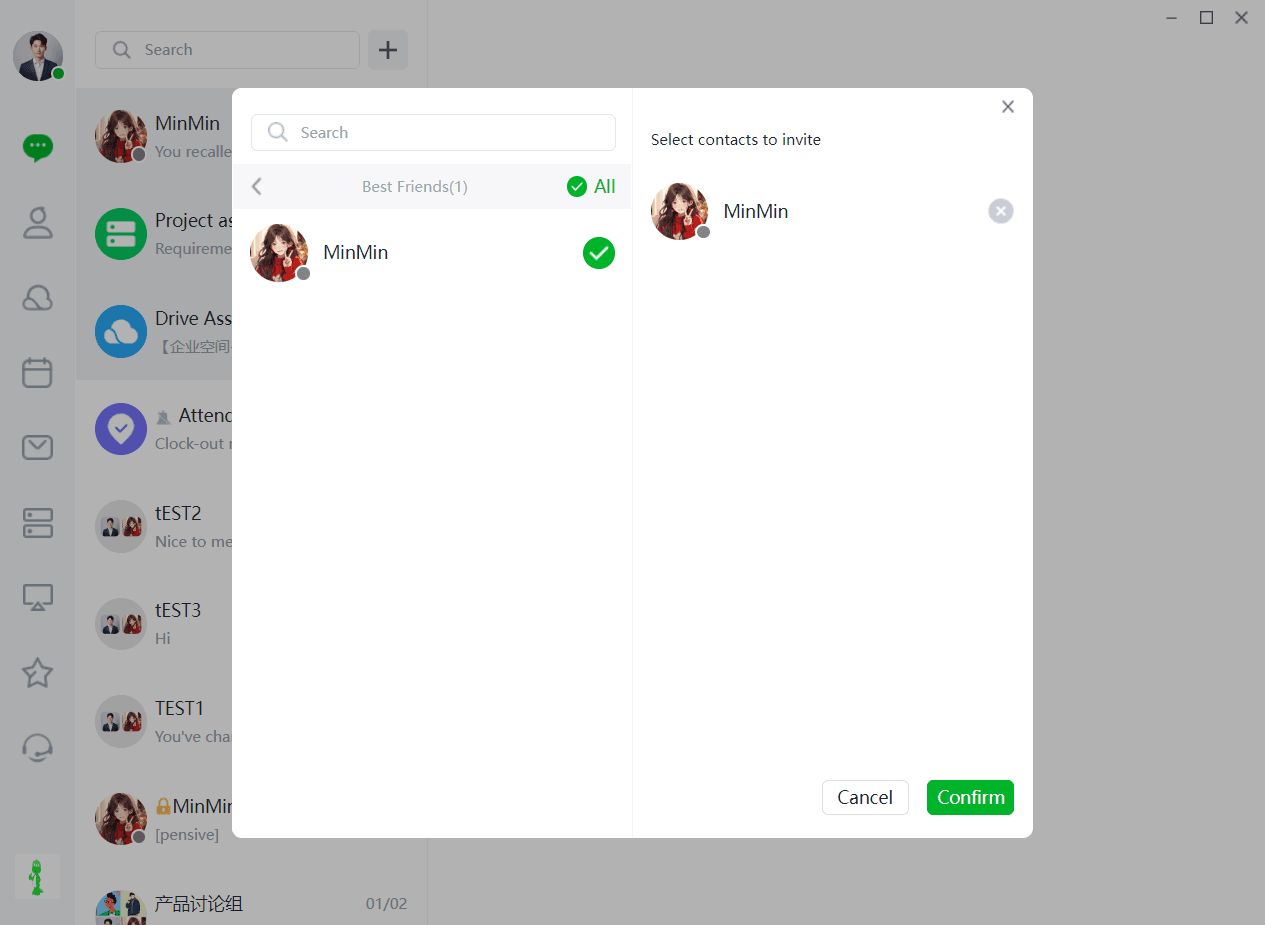
- Select the group members to be added. You can directly search and add members, or find and select members from the contact list or based on tags.
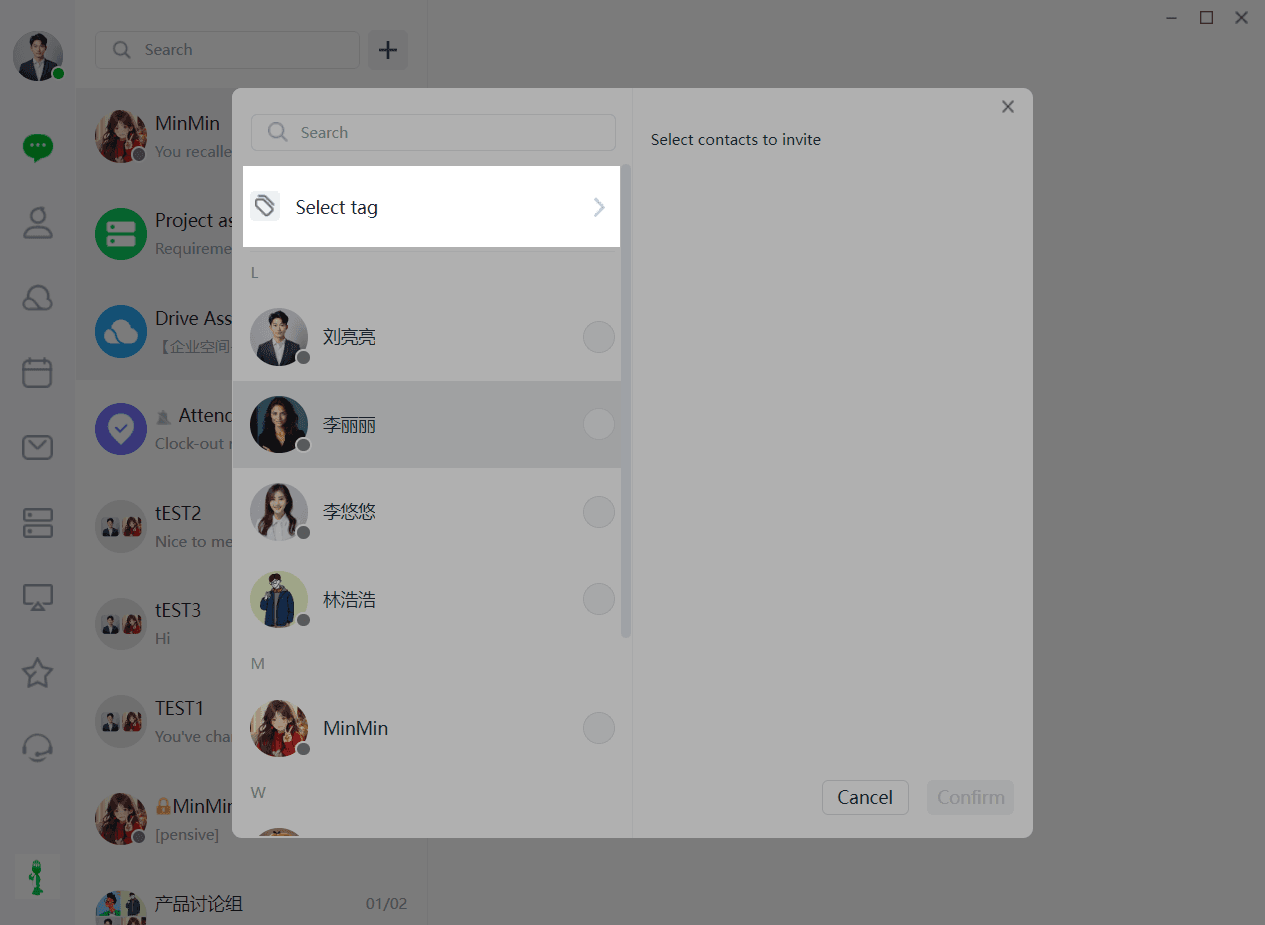
1.Tags
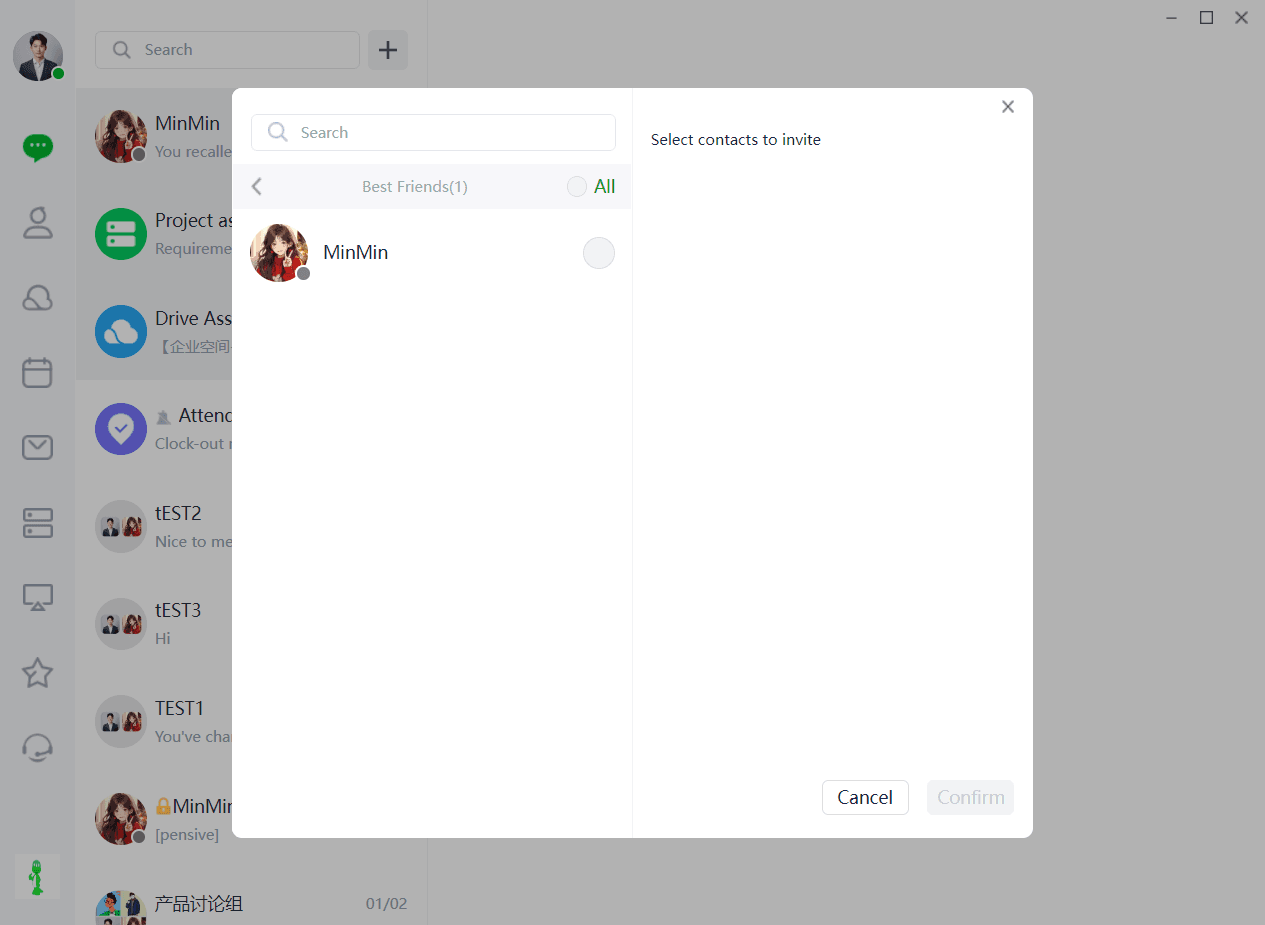
2.Search
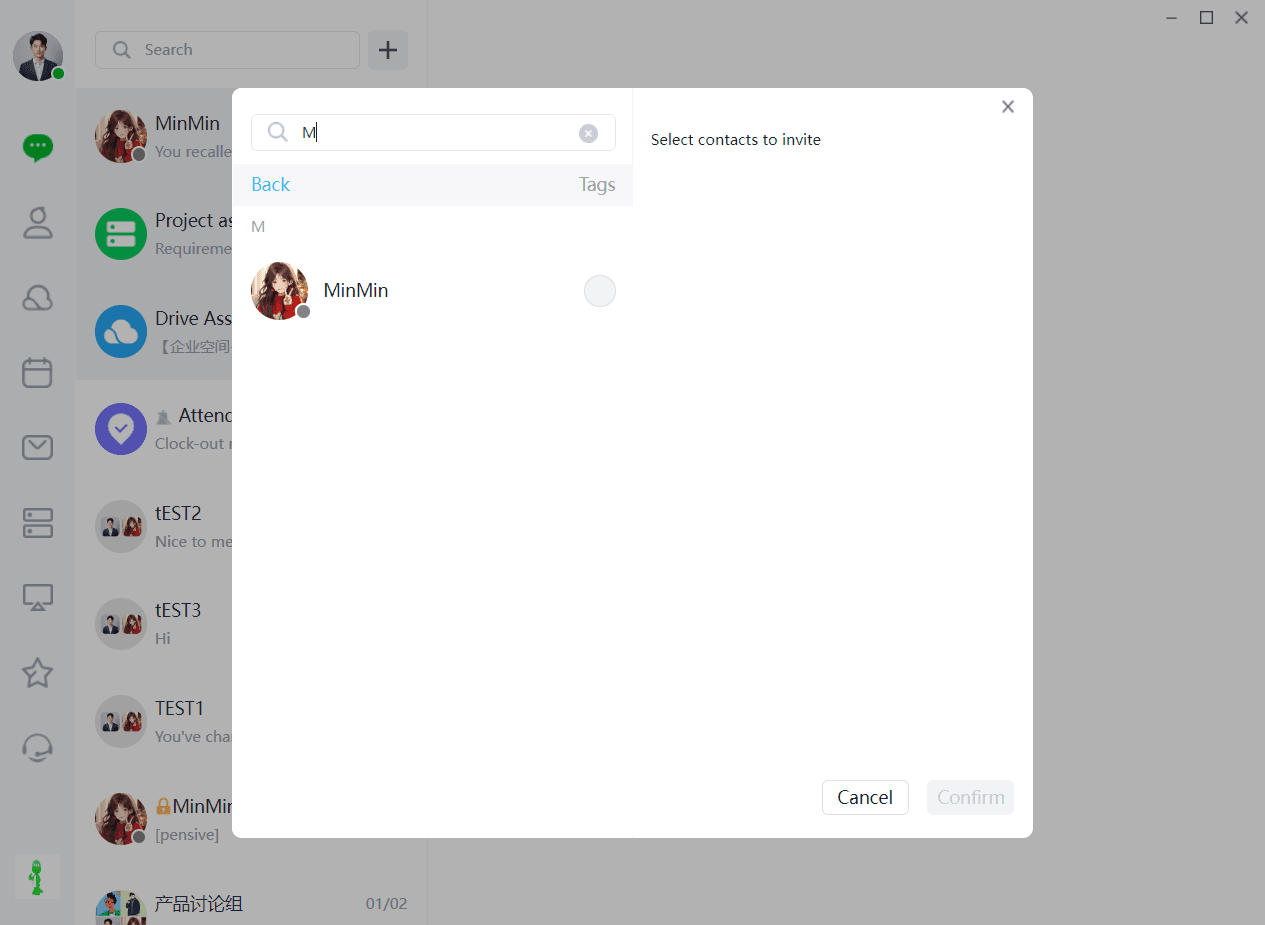
(3)After setting up, click "Create". Upon successful creation, the group name defaults to the names of the group members. When new members join, their names will be added to the group name. If members from different organizations join the same group, a multi-organization identifier will be added to the end of the group name (visible in the session list and at the top of the chat page).
1.2 Sharing a Group
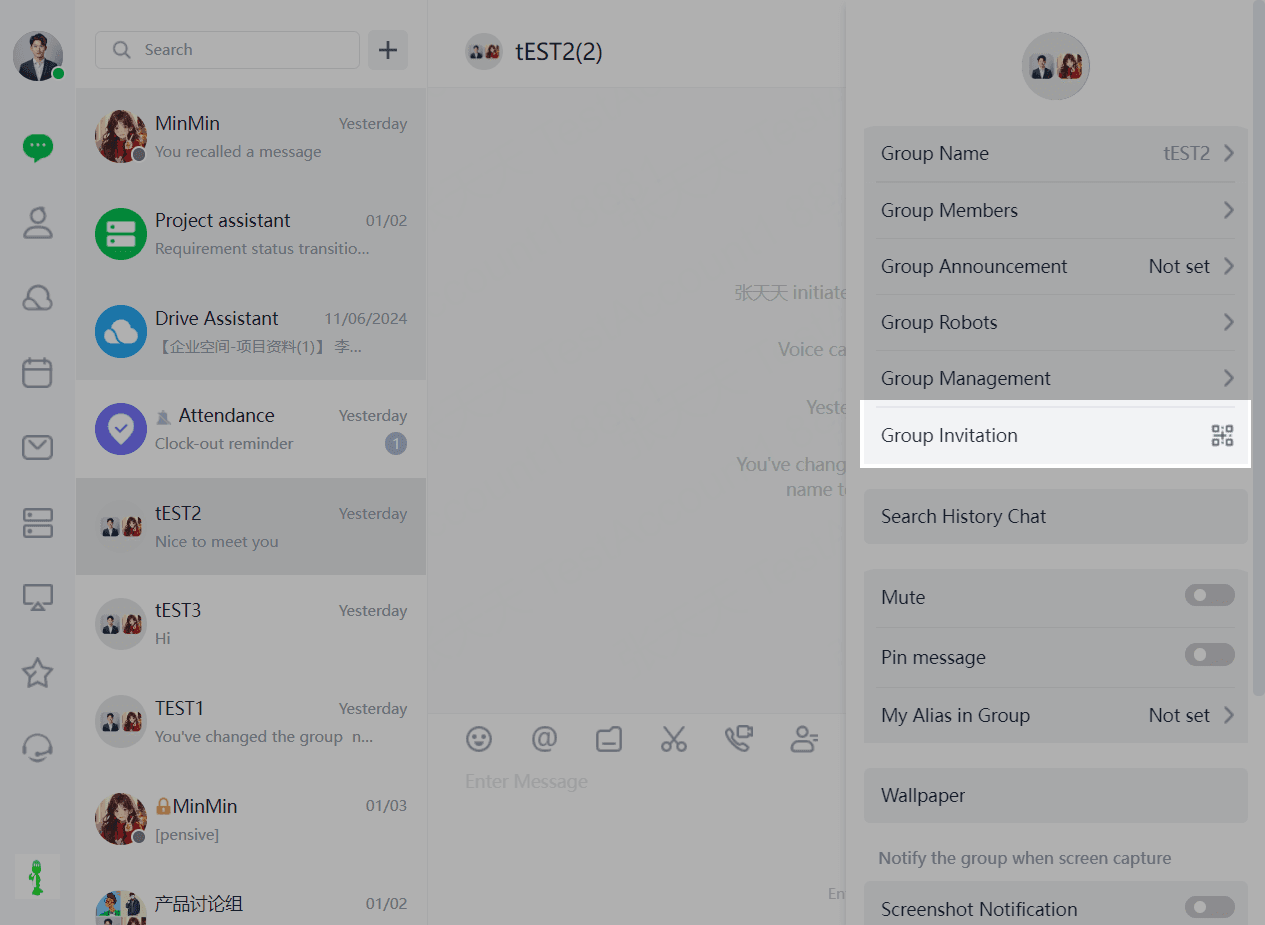
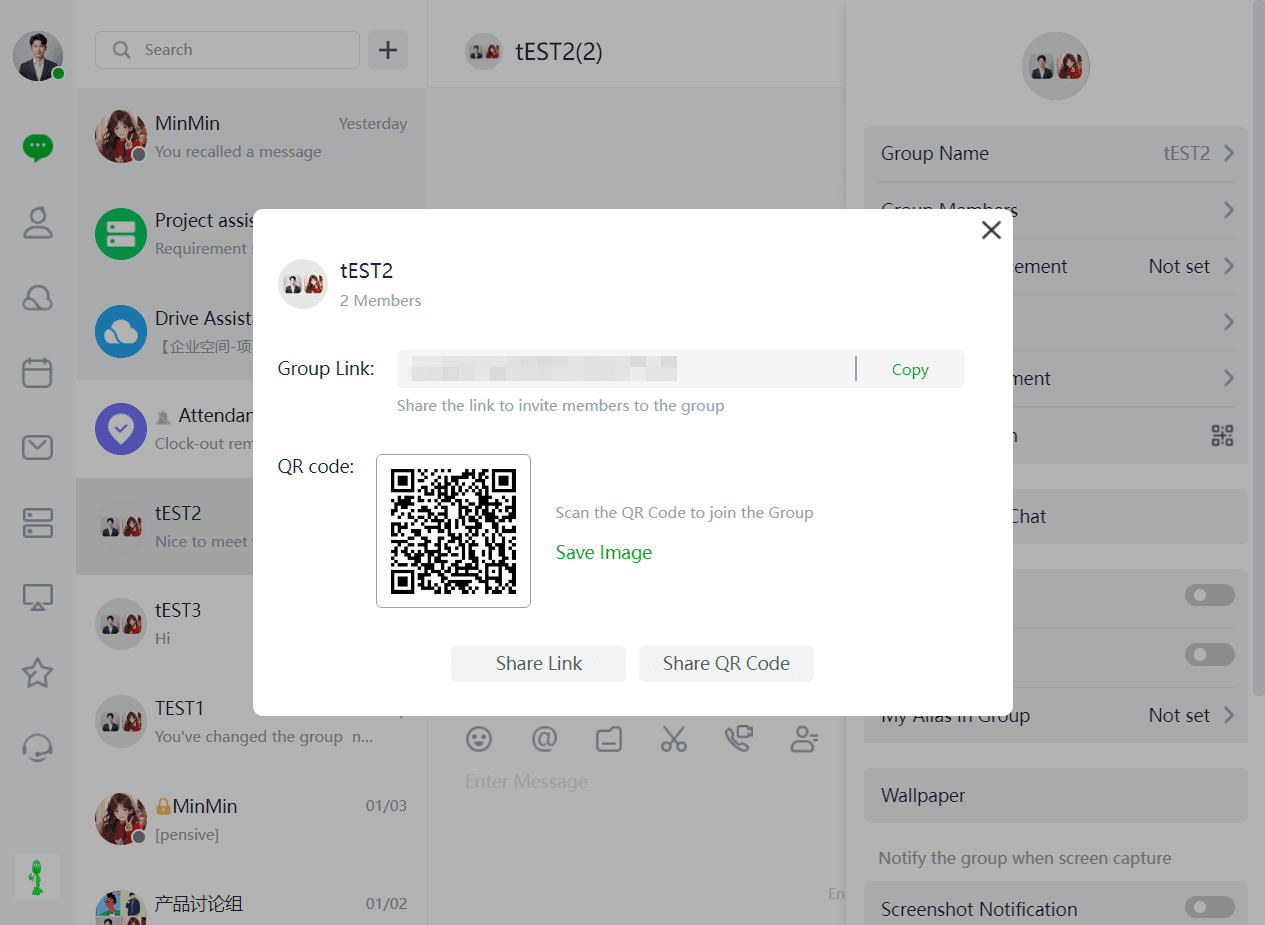
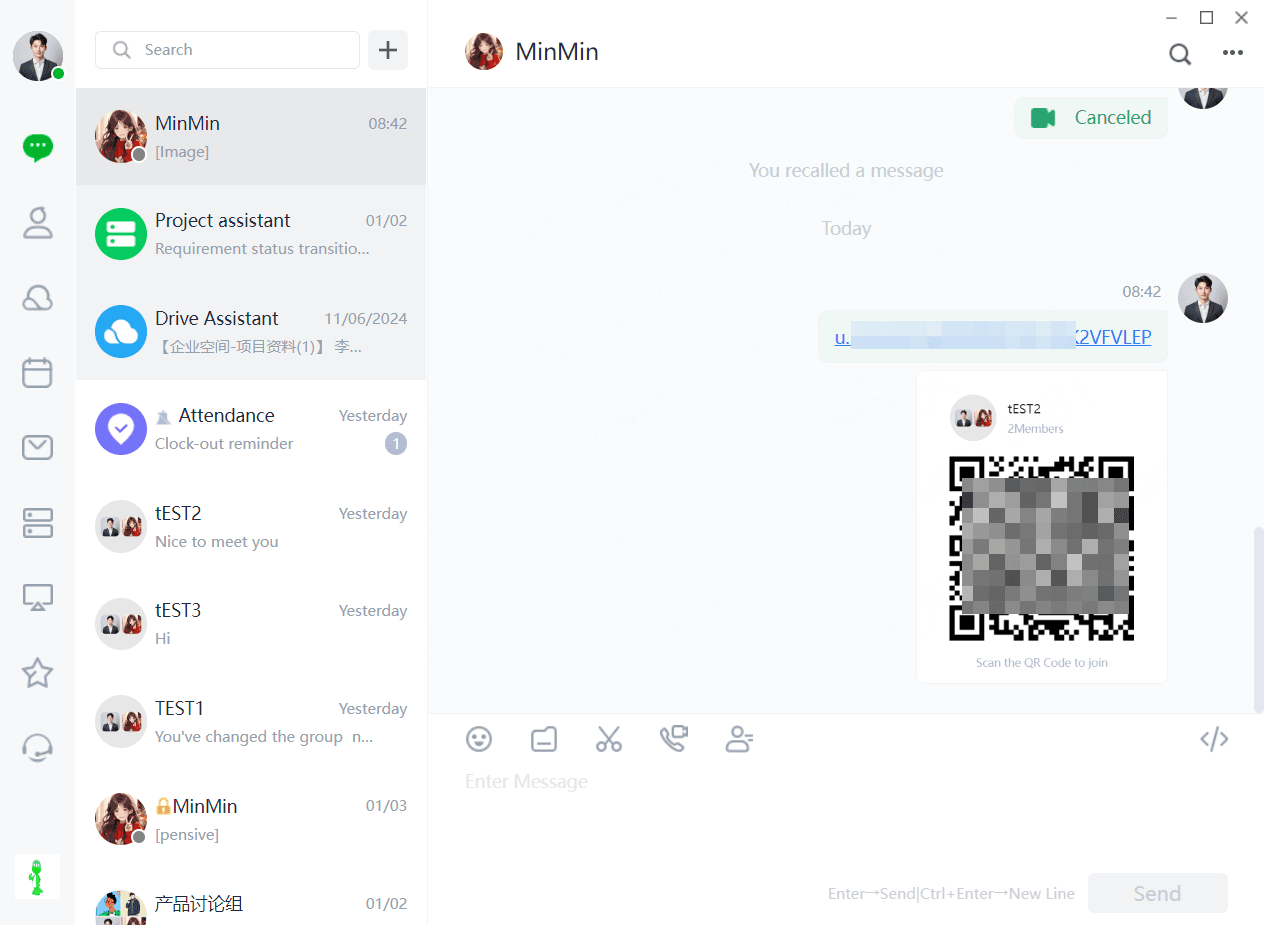
Users can invite other users to join an existing group by sharing a group link or group QR code. After the group owner enables "All group members can invite new members" in group management, group members will have the permission to share the group. Otherwise, only the group owner and administrators can share the group.Click the top right corner of the group chat page and select "Group QR Code" to generate the two sharing options.
1.3 Joining a Group
1.3.1 Joining via Link
After receiving a group link shared by another user, click the link to join the group.
1.3.2 Joining via QR Code
After receiving a group QR code shared by another user, you can use Duli to scan the QR code and join the group.
1.4 Sending Text Messages
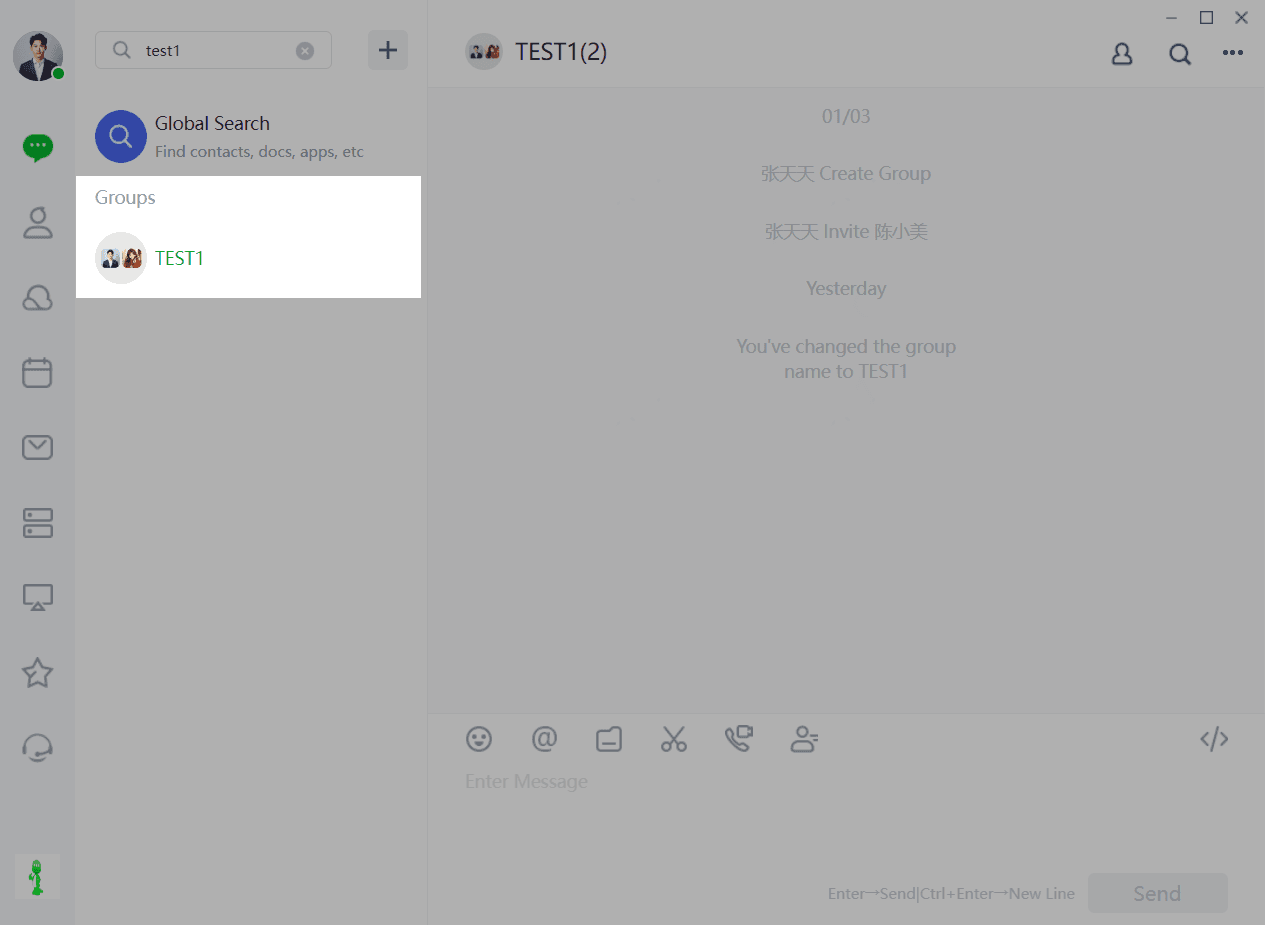
(1)Users can quickly find the group by entering the "group chat name" in the [Contacts] or [Chats] list and initiate a chat box to start chatting.
(2)Enter a message in the "text box" and press "Enter" to send or "Ctrl+Enter" to start a new line. Messages cannot be sent if the input is empty. Sent messages are delivered instantly and display the time when the user sent the message.
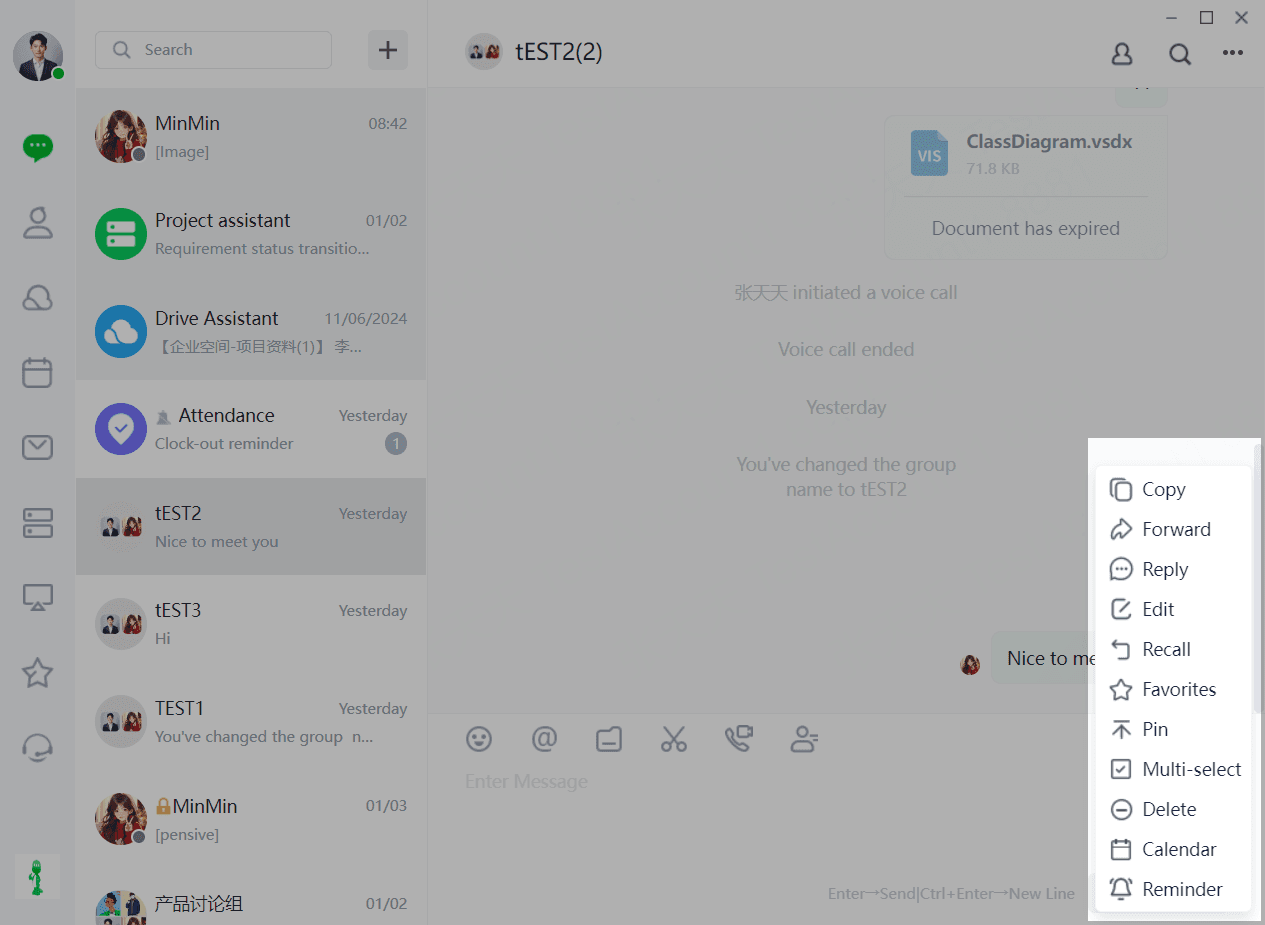
(3)For delivered messages, the sender can right-click the message to "Copy", "Forward", "Reply", "Edit", "Recall", "Favorite", "Pin", "Select Multiple", "Delete", "Add to Calendar", and "Add Reminder", among other options.
1.5 Sending Emojis
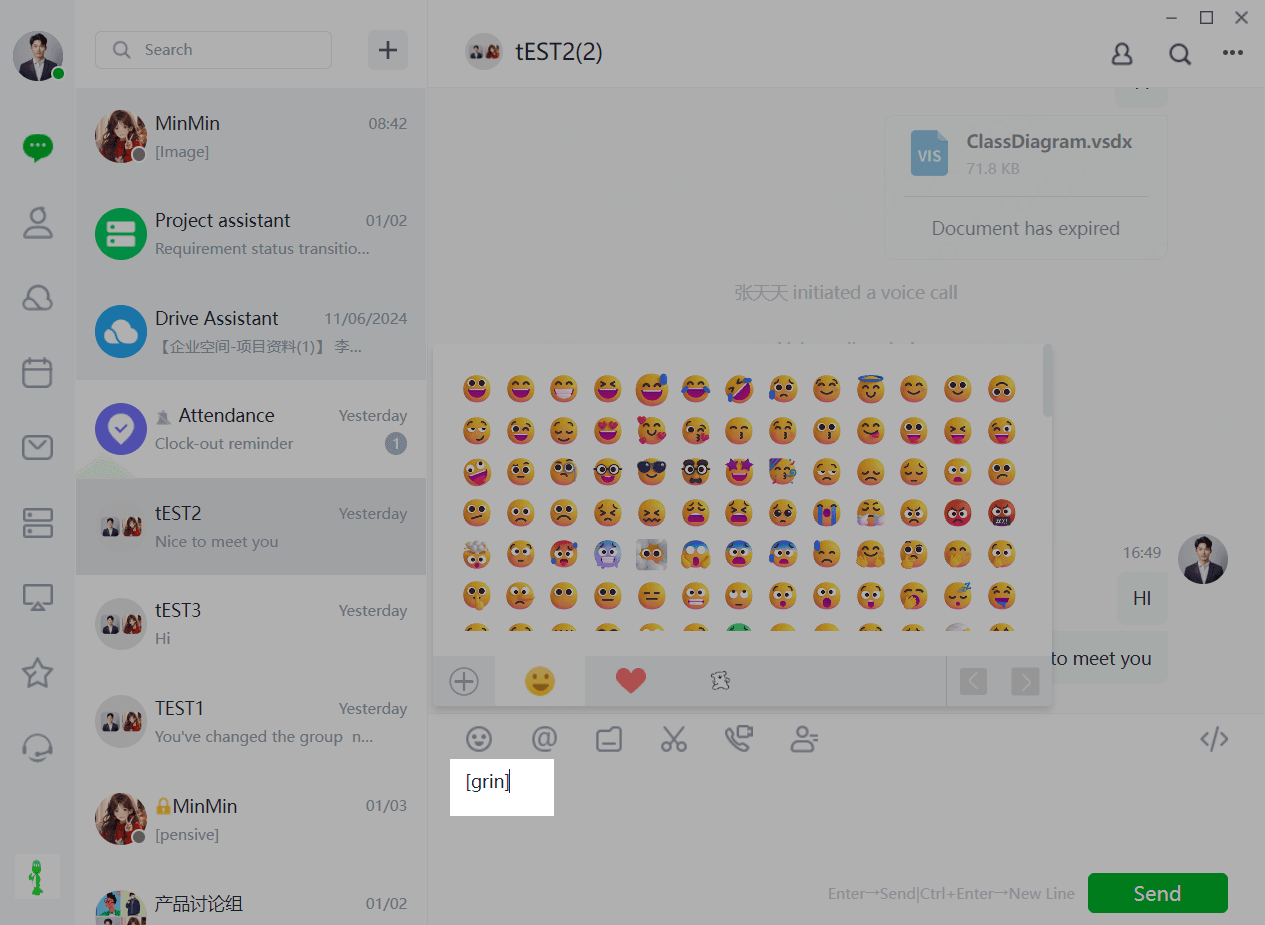
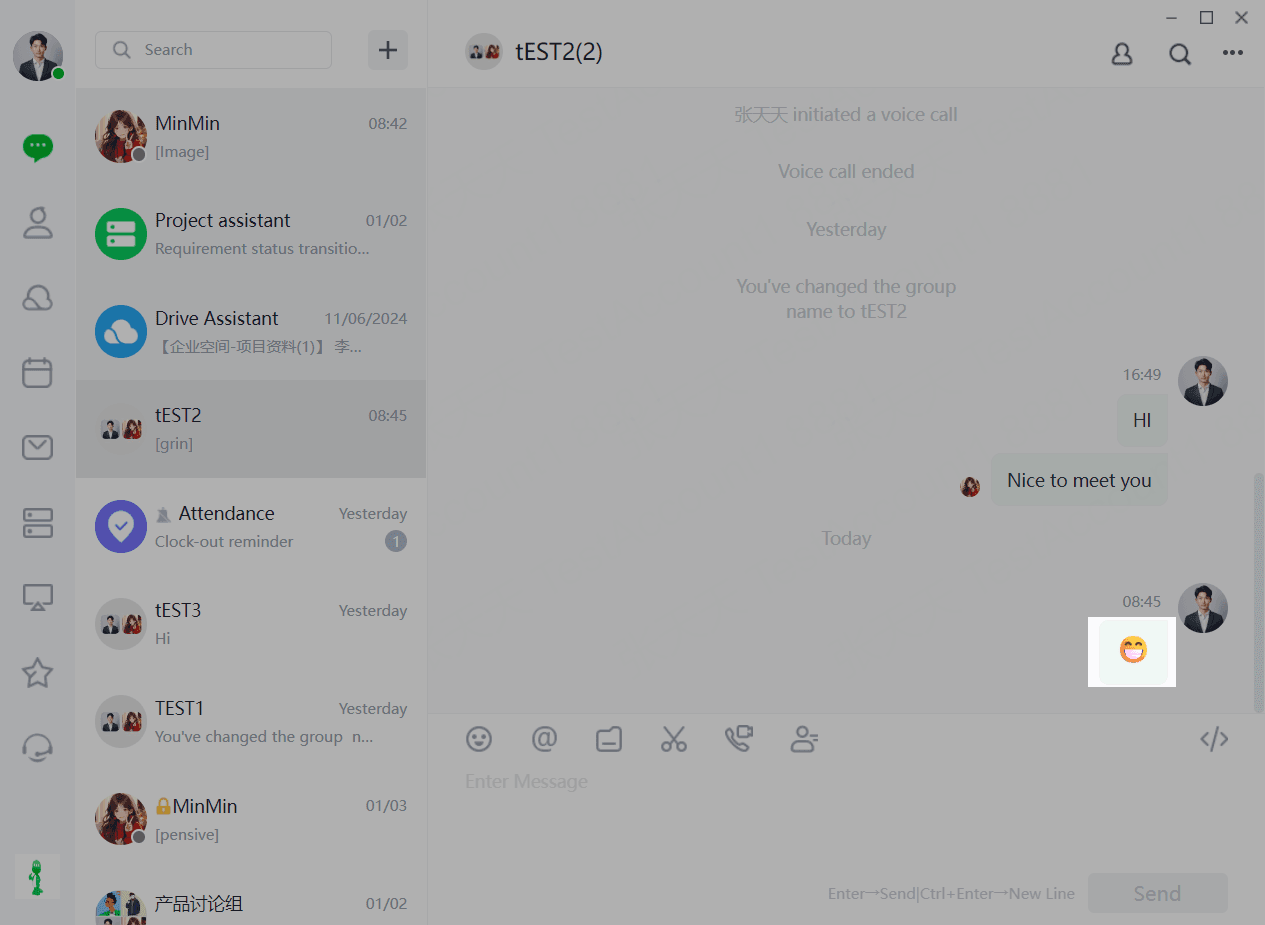
(1)Select an emoji in the "text box" and press "Enter" to send or "Ctrl+Enter" to start a new line. Emojis cannot be sent if the input is empty. Sent emojis are delivered instantly and display the time when the user sent the message.
(3)For delivered emojis, the sender can right-click the emoji to "Copy", "Forward", "Reply", "Edit", "Recall", "Favorite", "Select Multiple", "Delete", "Add to Calendar", and "Add Reminder", among other options.
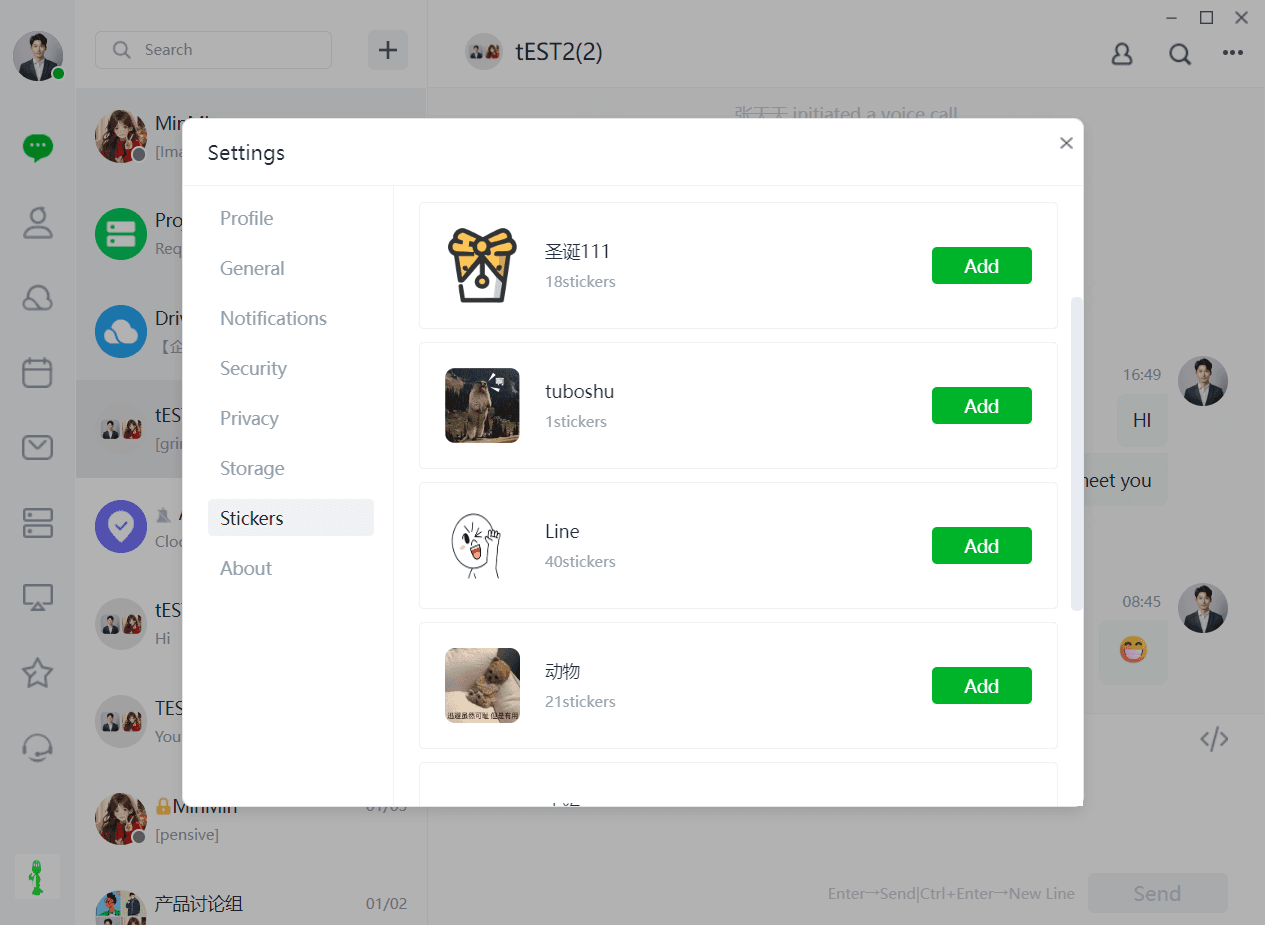
(4)Users can enrich their emoji library by clicking [Emoji - Add]. Click "Emoji" on the "Chat Box" page.
(5) After clicking "Emoji", click the "+" sign as shown in the figure below.
(6)Select "Emoji Library" and then click "Add" to successfully add emojis.
1.6 @Members
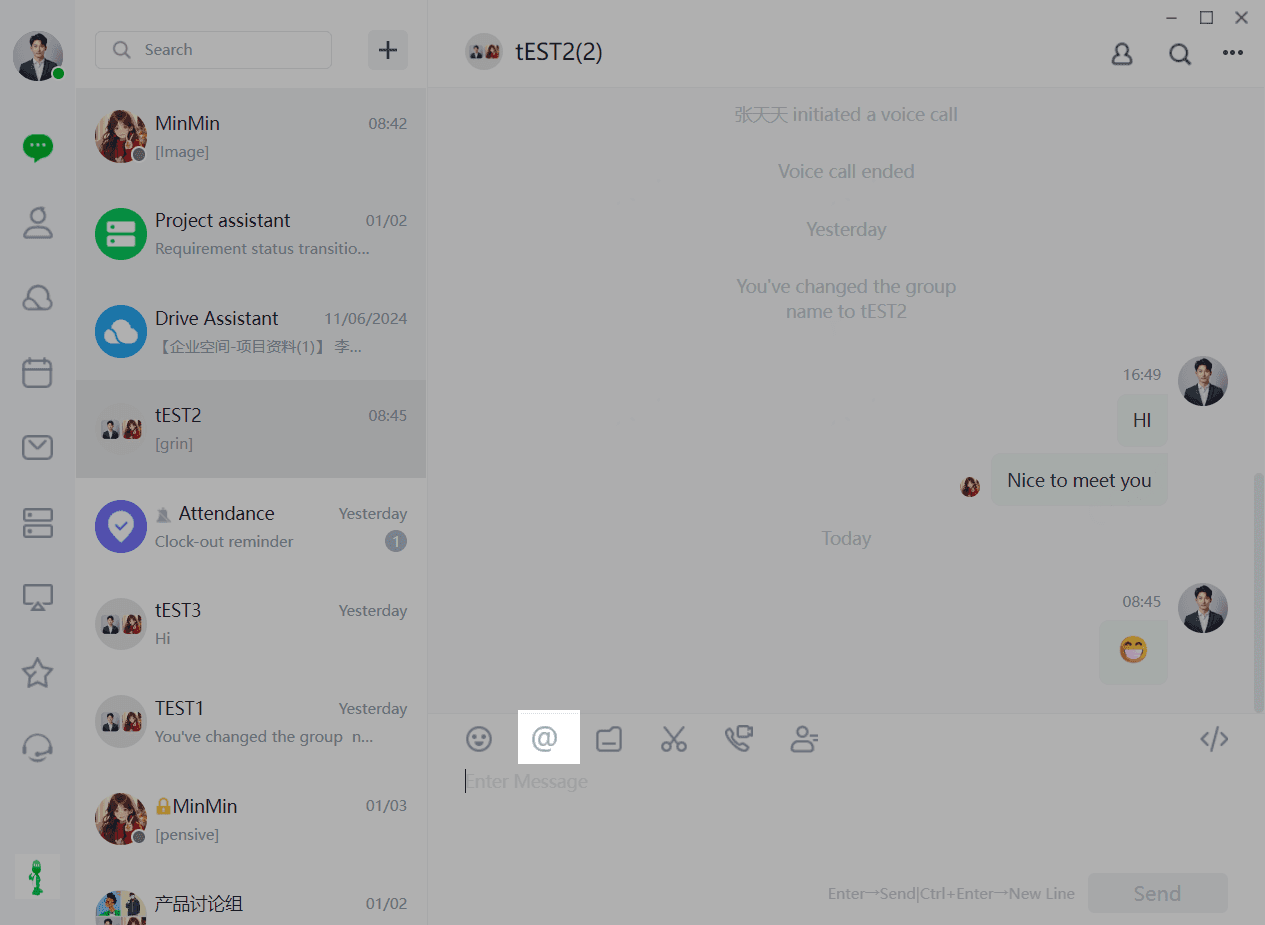
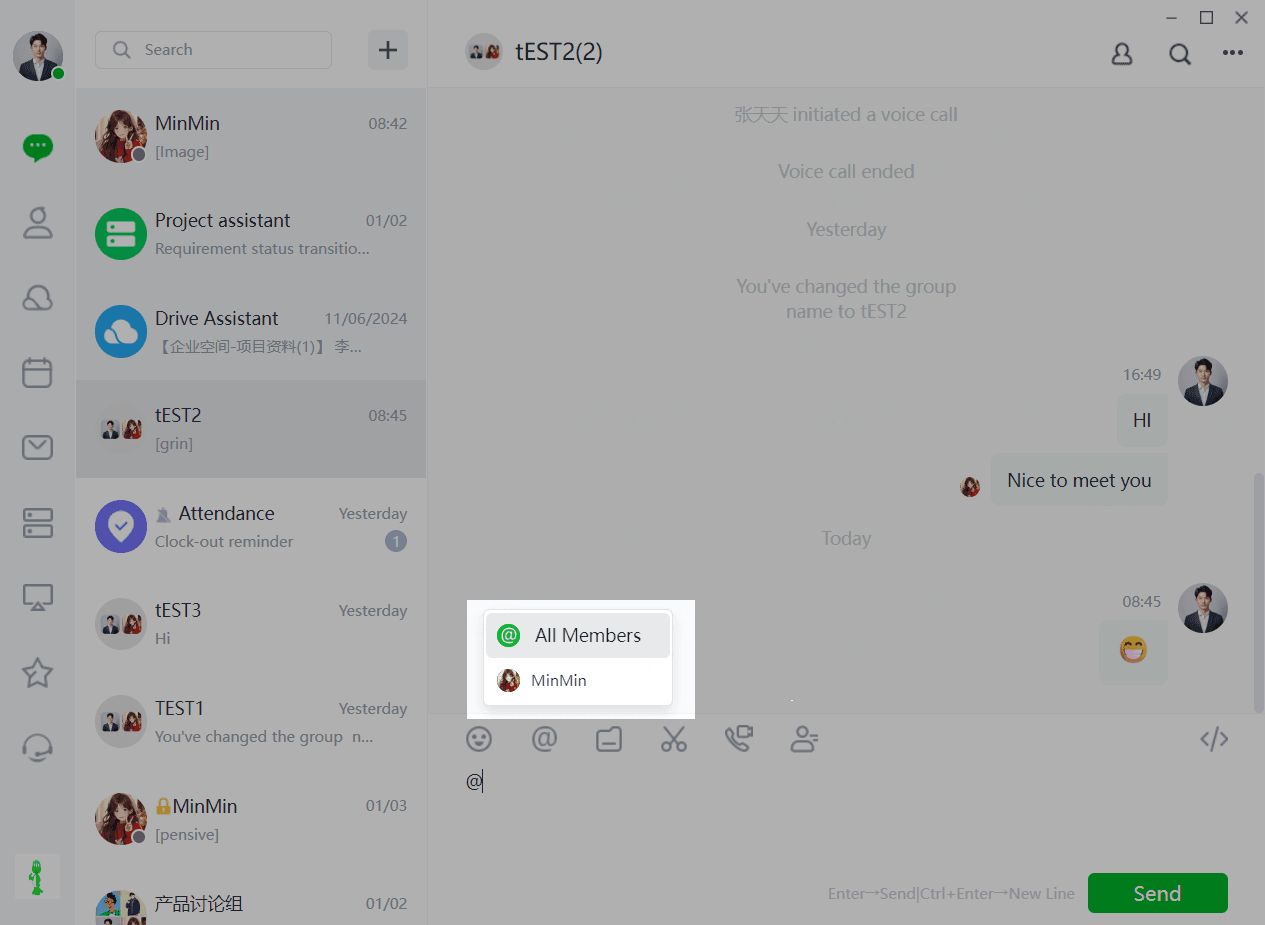
Users can click "@Members" to remind members. "@Members" includes @Single Member and @All Members.
1.7 Sending Files
(1)Users can send files by clicking "Chat Box - Files". Currently, Duli supports three ways to send files: "Send File", "Send Folder", and "Send Cloud File".
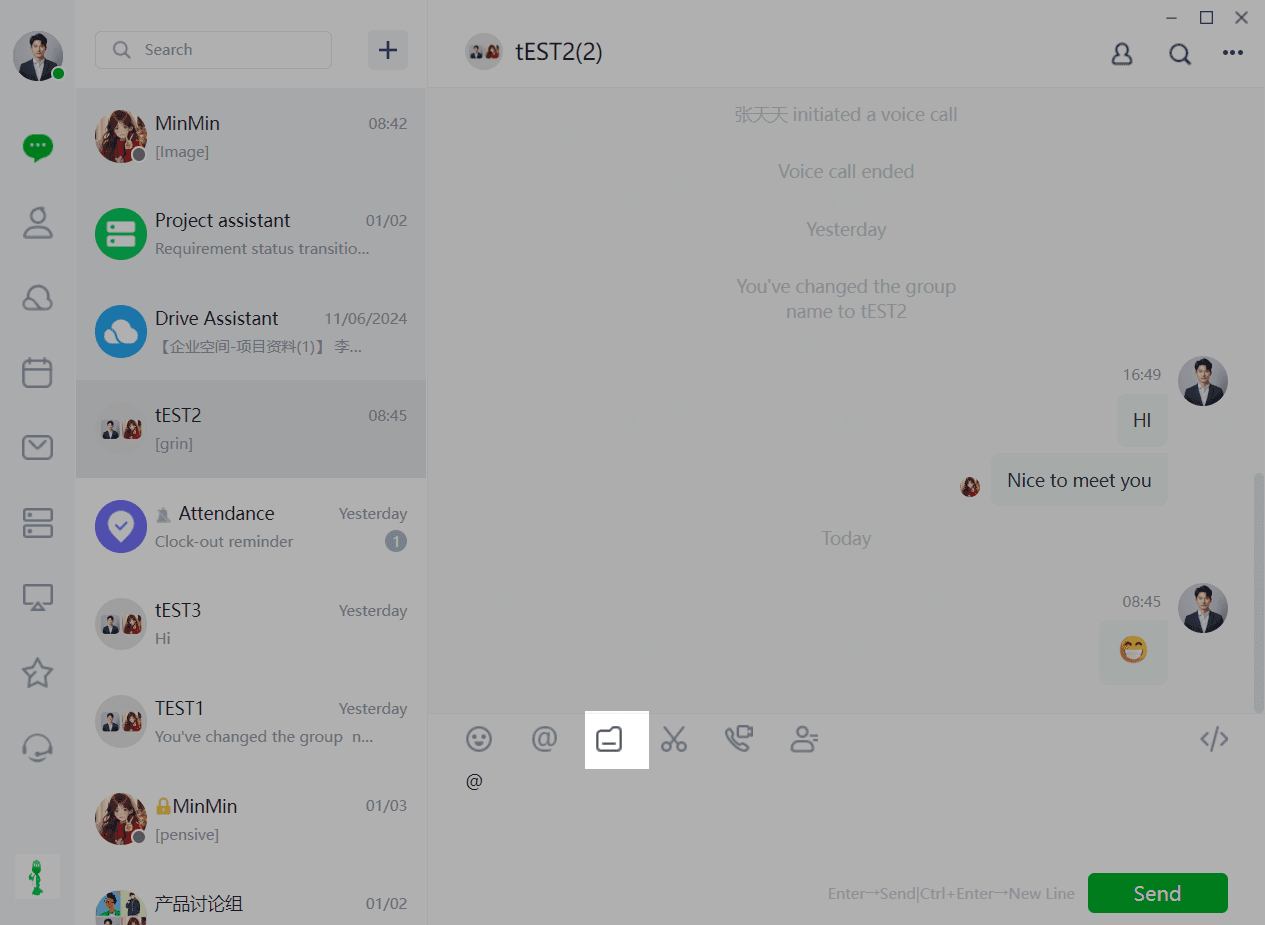
(2)Select the file format and location for sending.
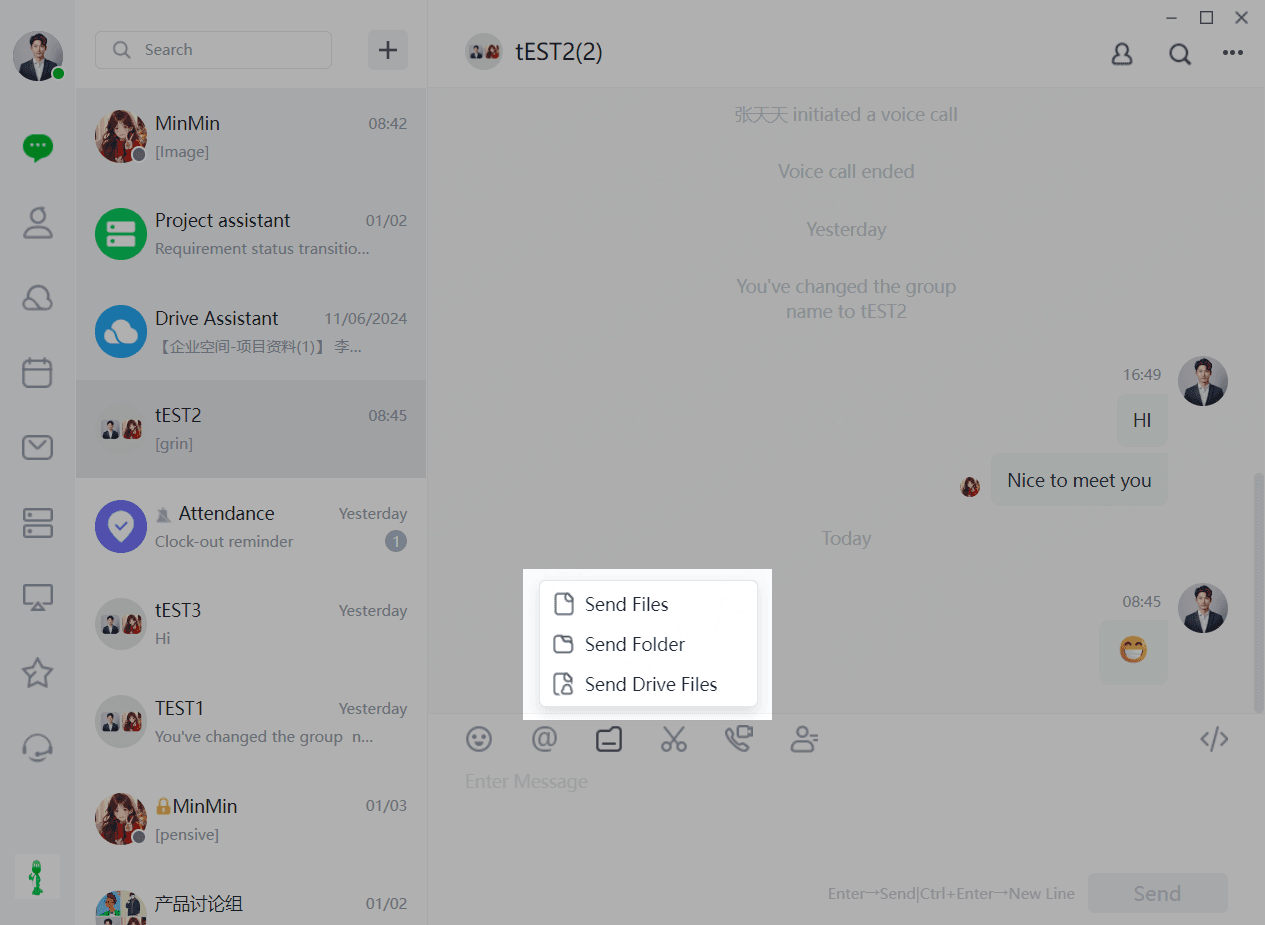
(3) Click [Send] to successfully send the file.
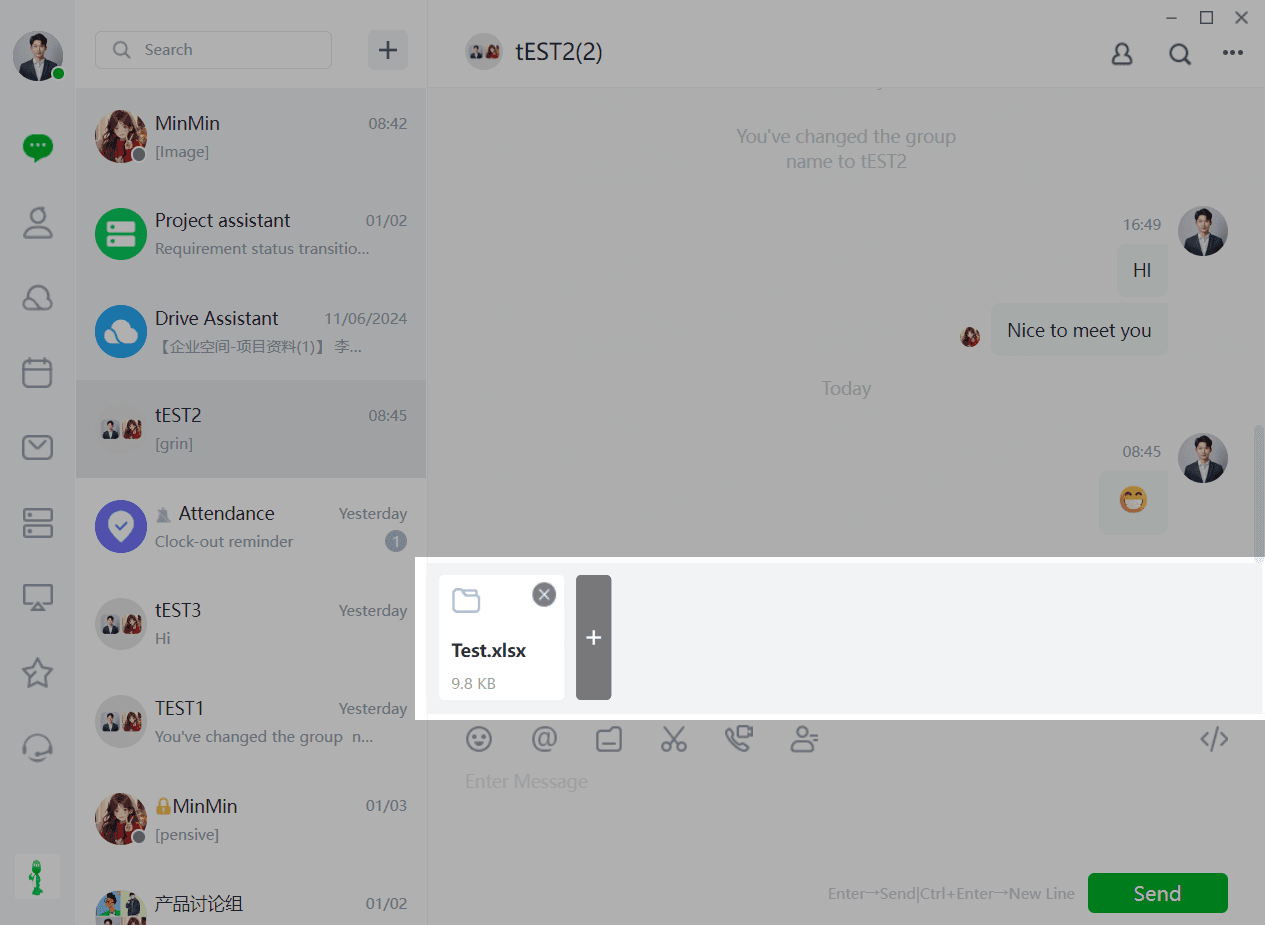
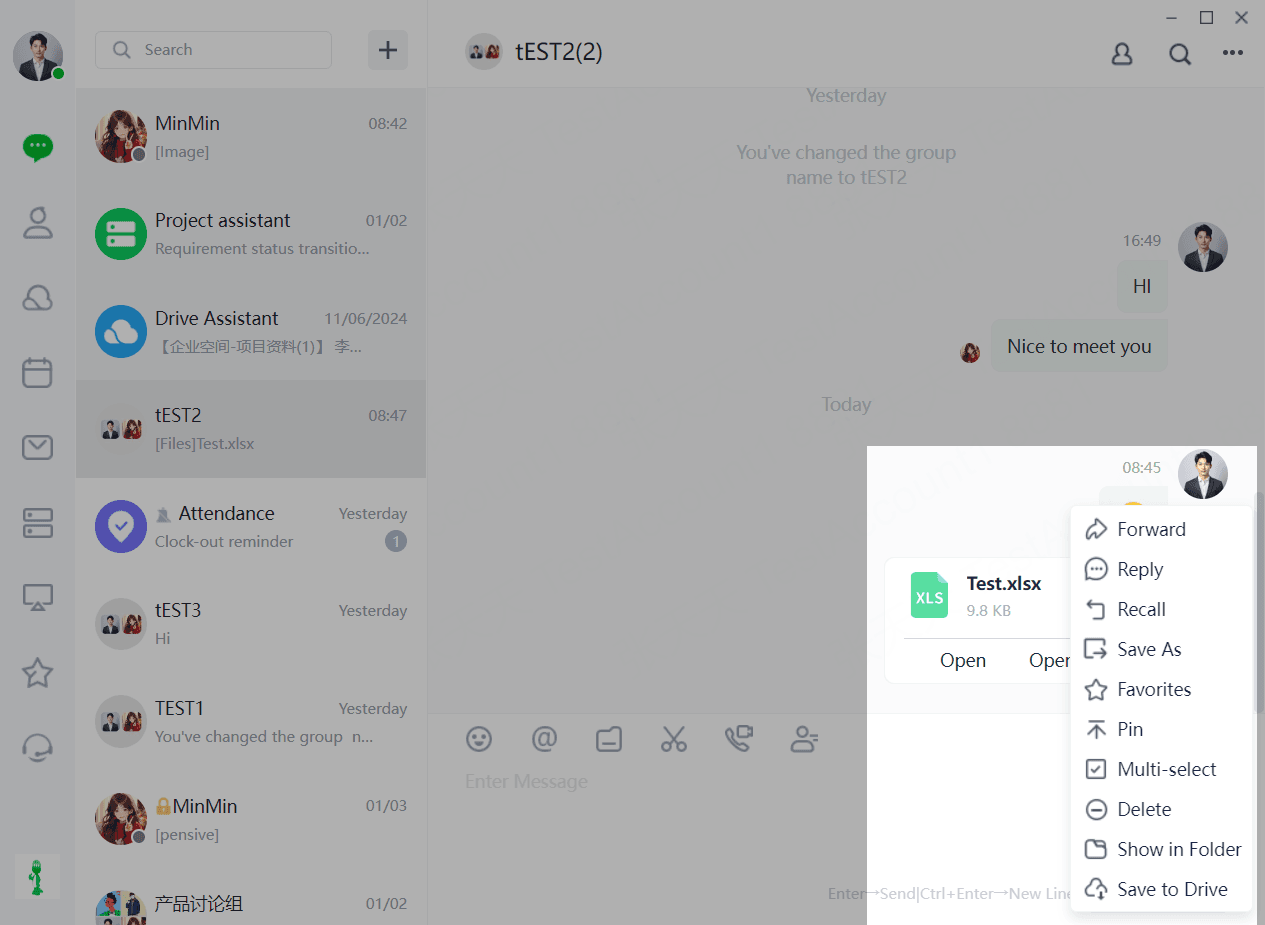
(4)For delivered files, the sender can "View" or "View Folder" on the right, or right-click to select options such as "Forward", "Reply", "Recall", "Save As", "Favorite", "Pin", "Select Multiple", "Delete", "Open Folder", and "Save to Cloud".
1.8 Screenshot
(1)Users can take screenshots by clicking the "Chat Box - Screenshot" function. Currently, Duli supports two screenshot methods: "Screen Capture" and "Screenshot and Hide Current Window". "Screen Capture" refers to taking a screenshot of the current screen content, or you can use the "Shift+Alt+A" shortcut (which can be modified in the general settings). "Screenshot and Hide Current Window" refers to hiding the current chat box interface to take a screenshot of the screen content.
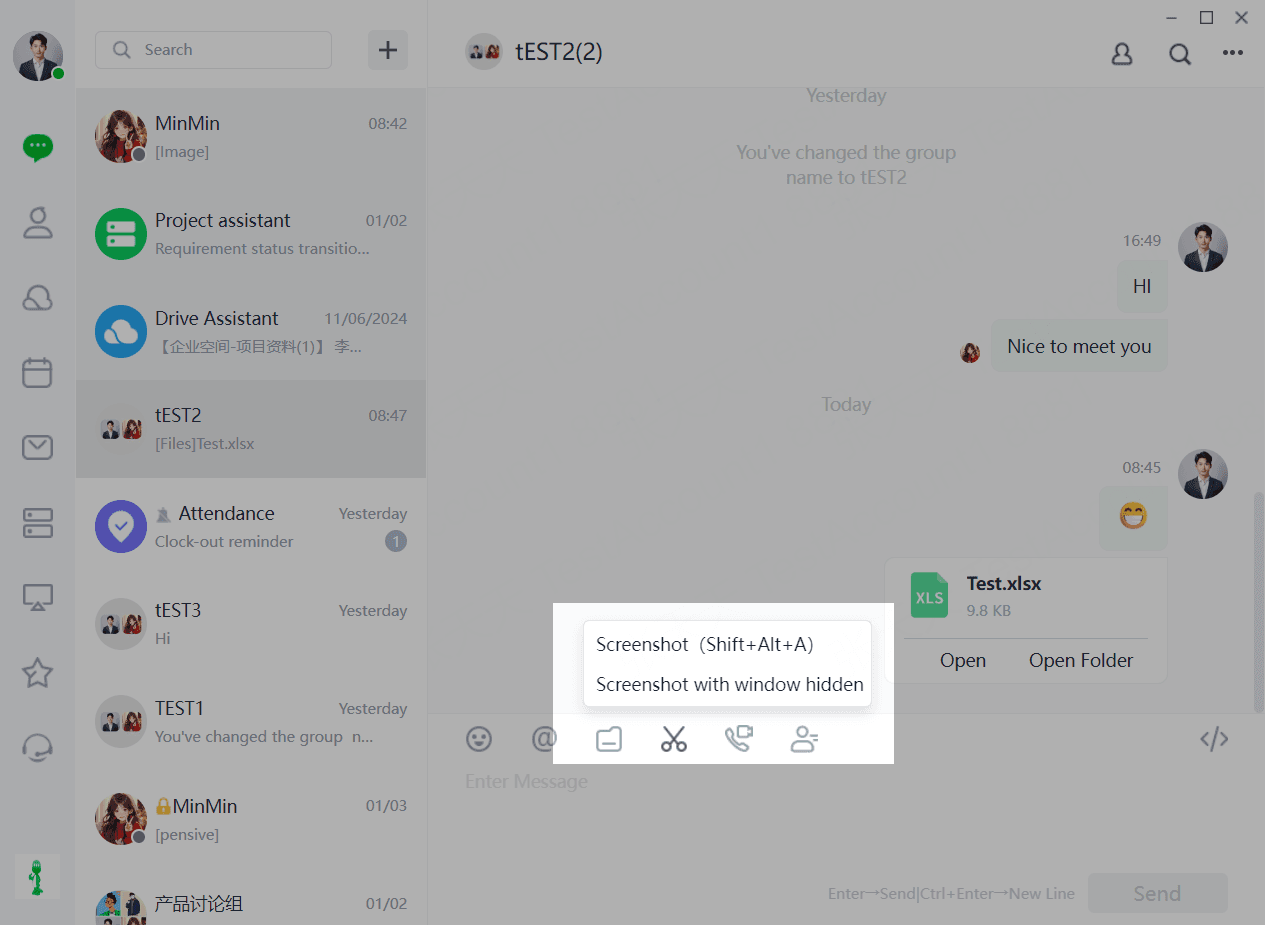
(2)You can perform secondary operations on the screenshot image, such as "Rectangle/Ellipse", "Polyline", "Pen", "Marker", "Mosaic/Blur", "Text", "Eraser", "Undo", "Regroup", "Exit Screenshot", "Paste on Screen", "Save to File", "Copy to Clipboard", "Screenshot", "Sticker" (can directly copy image text), "Long Screenshot", "OCR Text Recognition", "Annotate", "Animated Image (GIF/webp/mp4)", etc.
(3) Click [Send] to successfully send the screenshot.
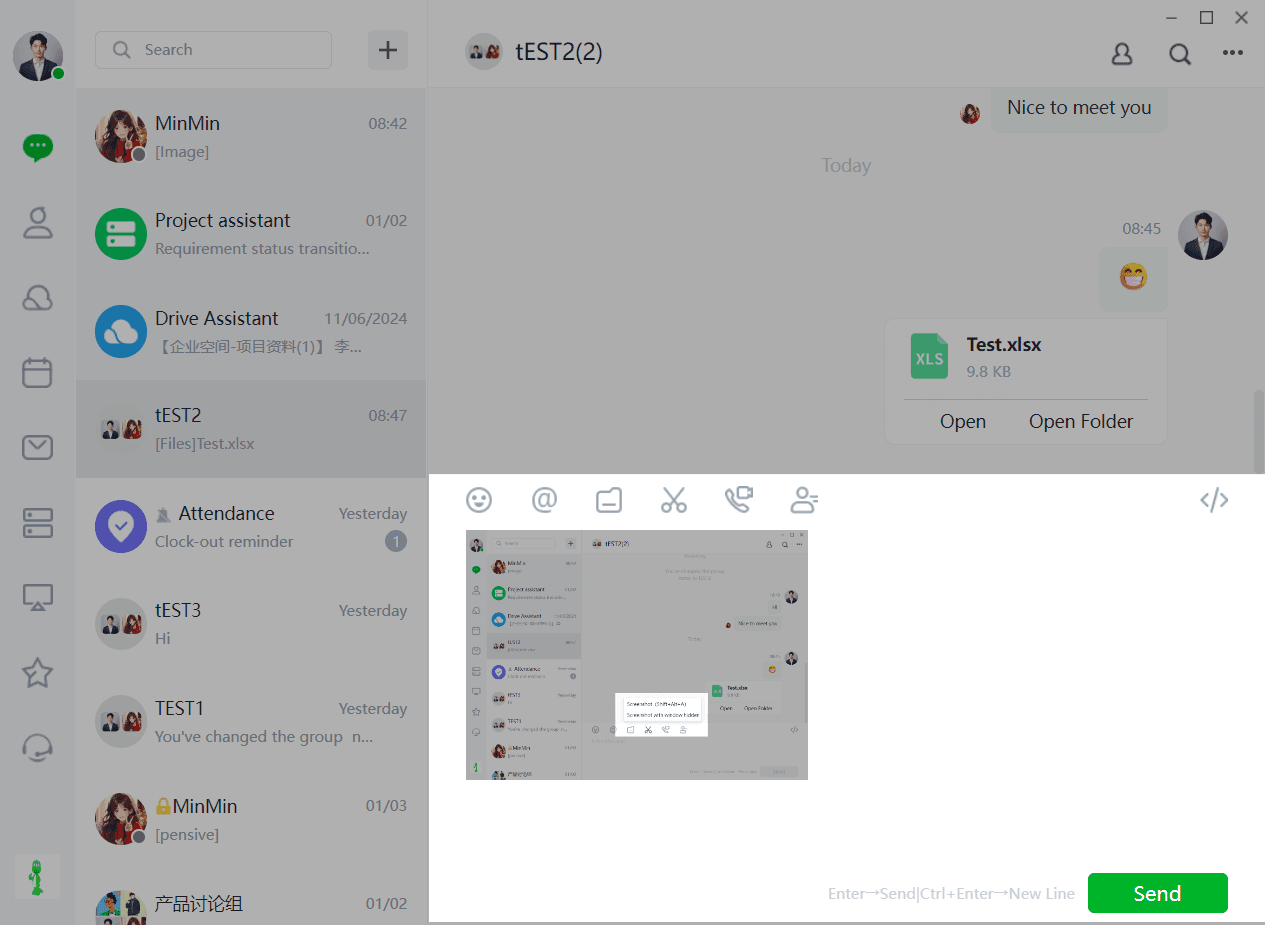
1.9 Audio/Video Calls
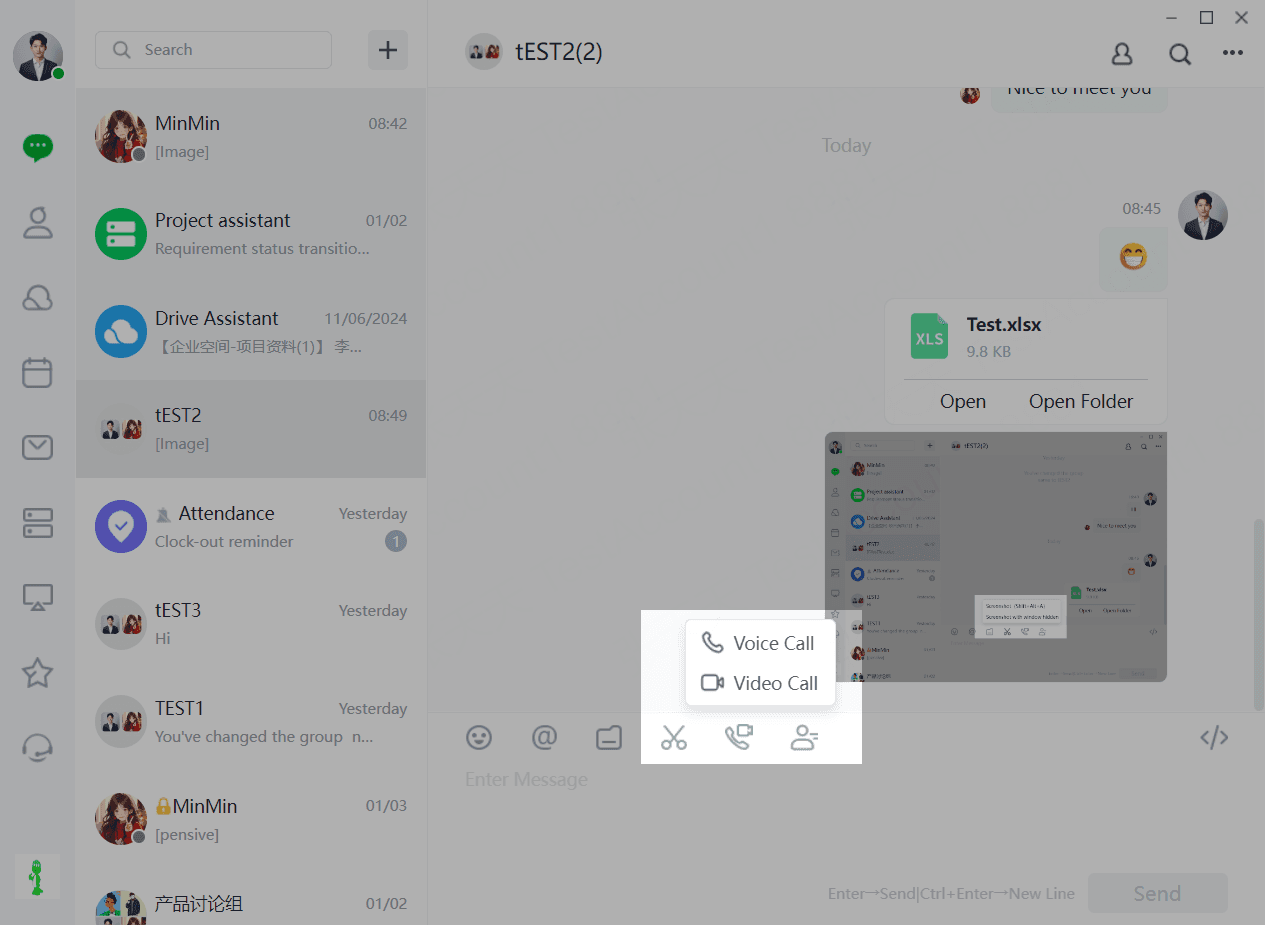
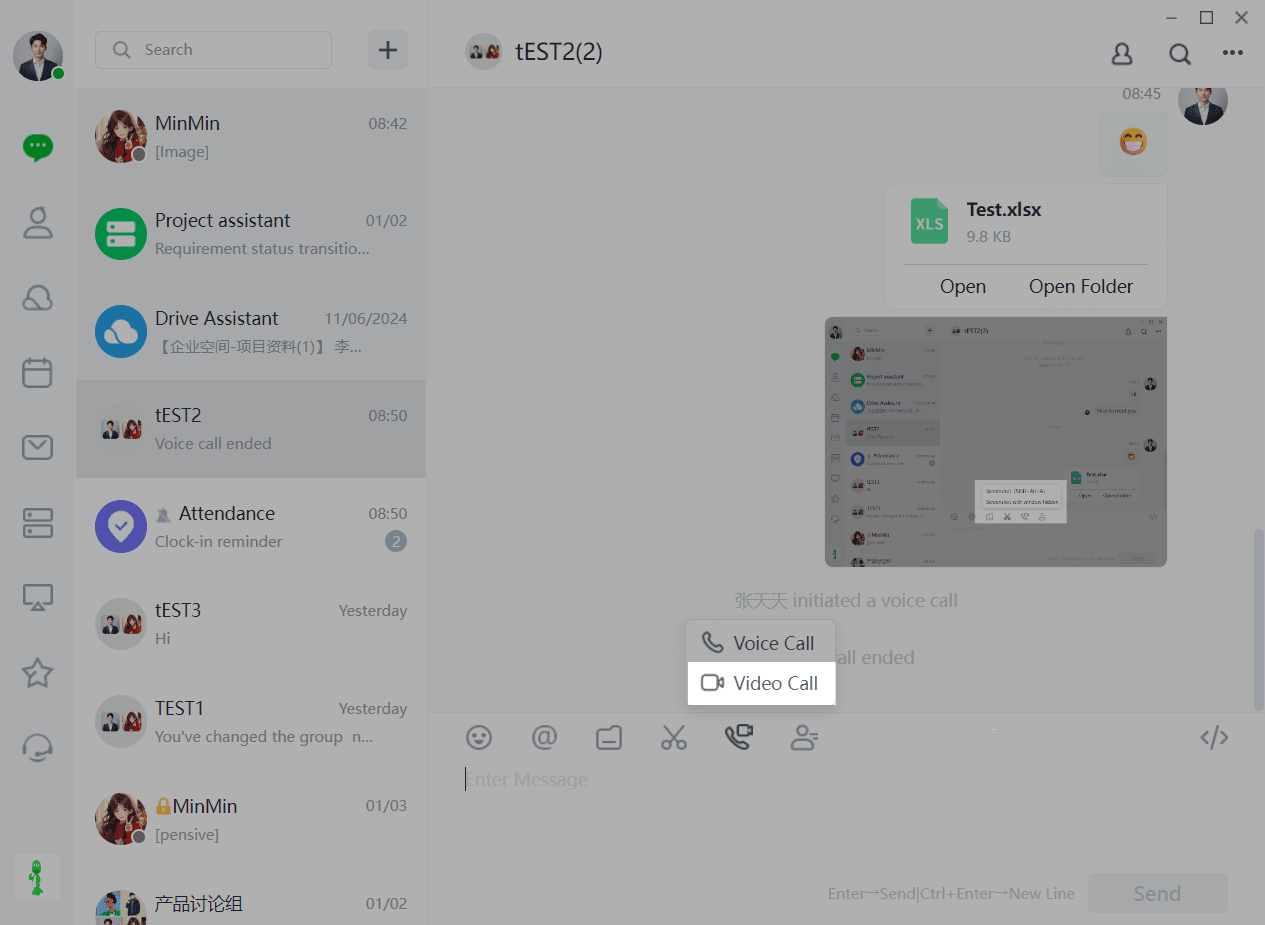
[Audio/Video Chat] includes "Voice call" and "Video call". "Voice call" provides high-quality voice call services to meet users' communication needs in different scenarios. "Video call" provides high-quality voice call services for face-to-face communication experiences.
1.9.1 Voice Call
(1)Click [Audio/Video Call], select "Voice Call" to initiate voice chat mode.
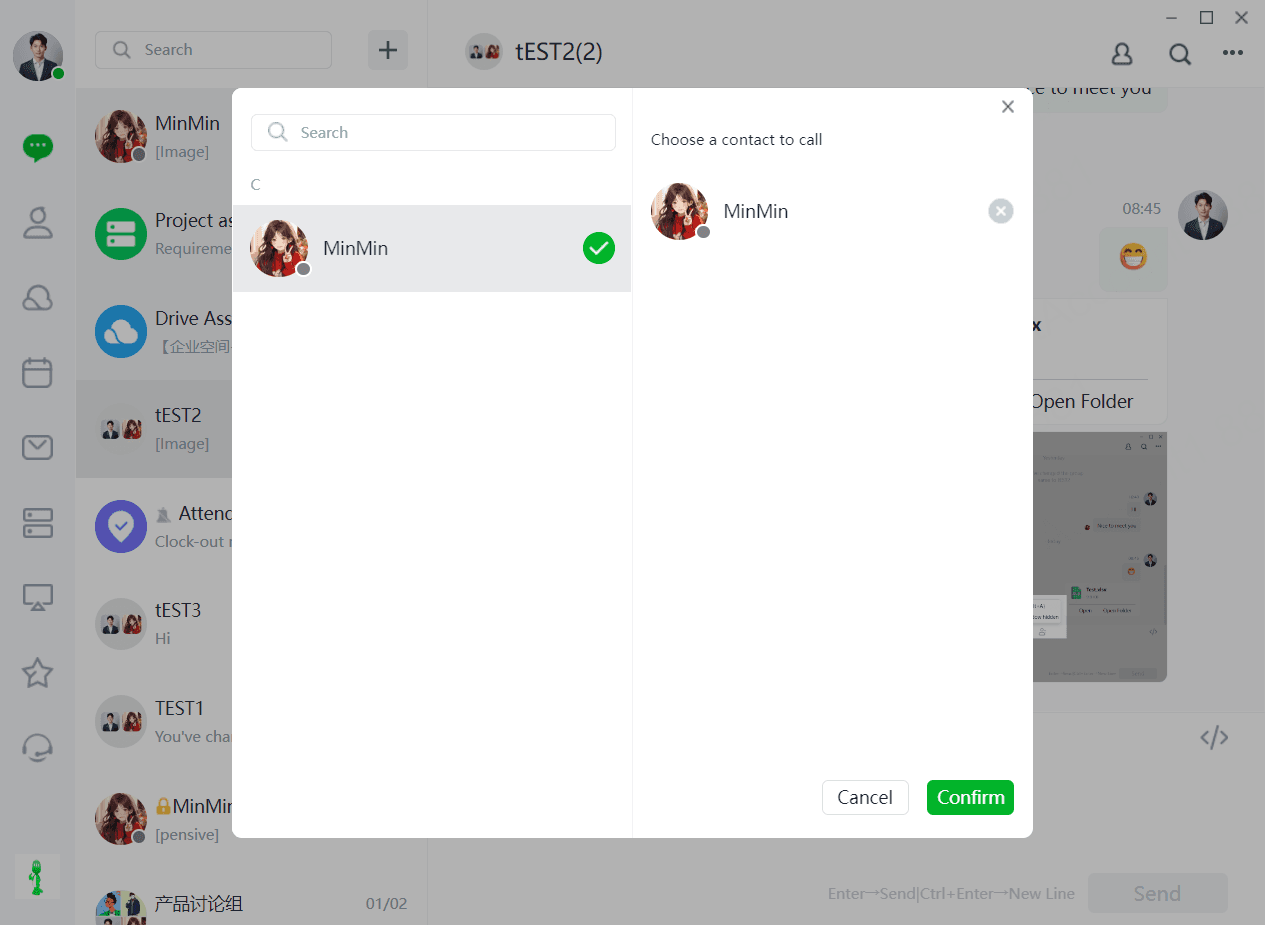
(2)Check the contacts you want to call to invite multiple participants.
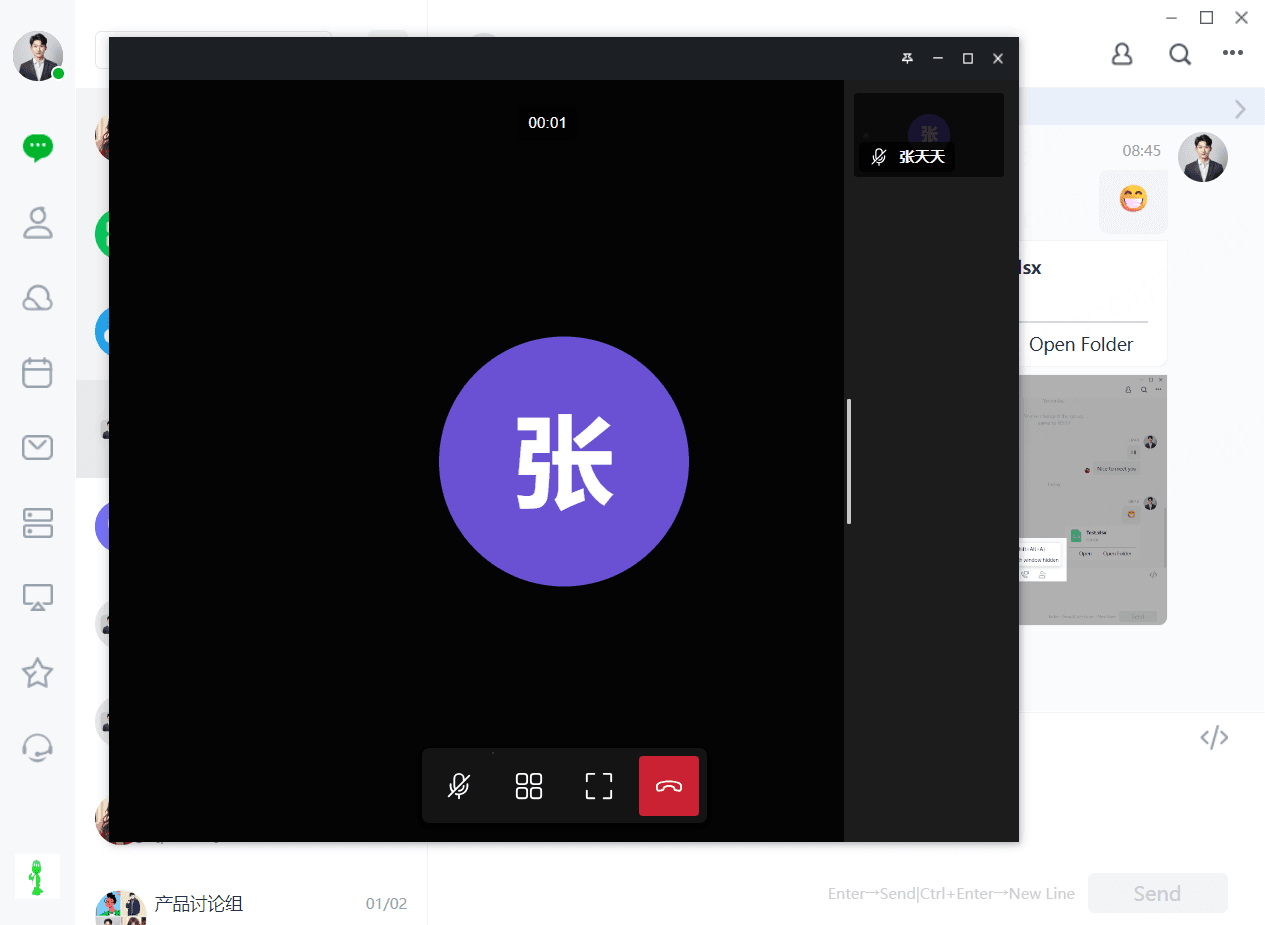
Click the "red" button to end the current call.
1.9.2 Video Call
(1) Click [Audio/Video Call], select "Video Call" to initiate video chat mode.
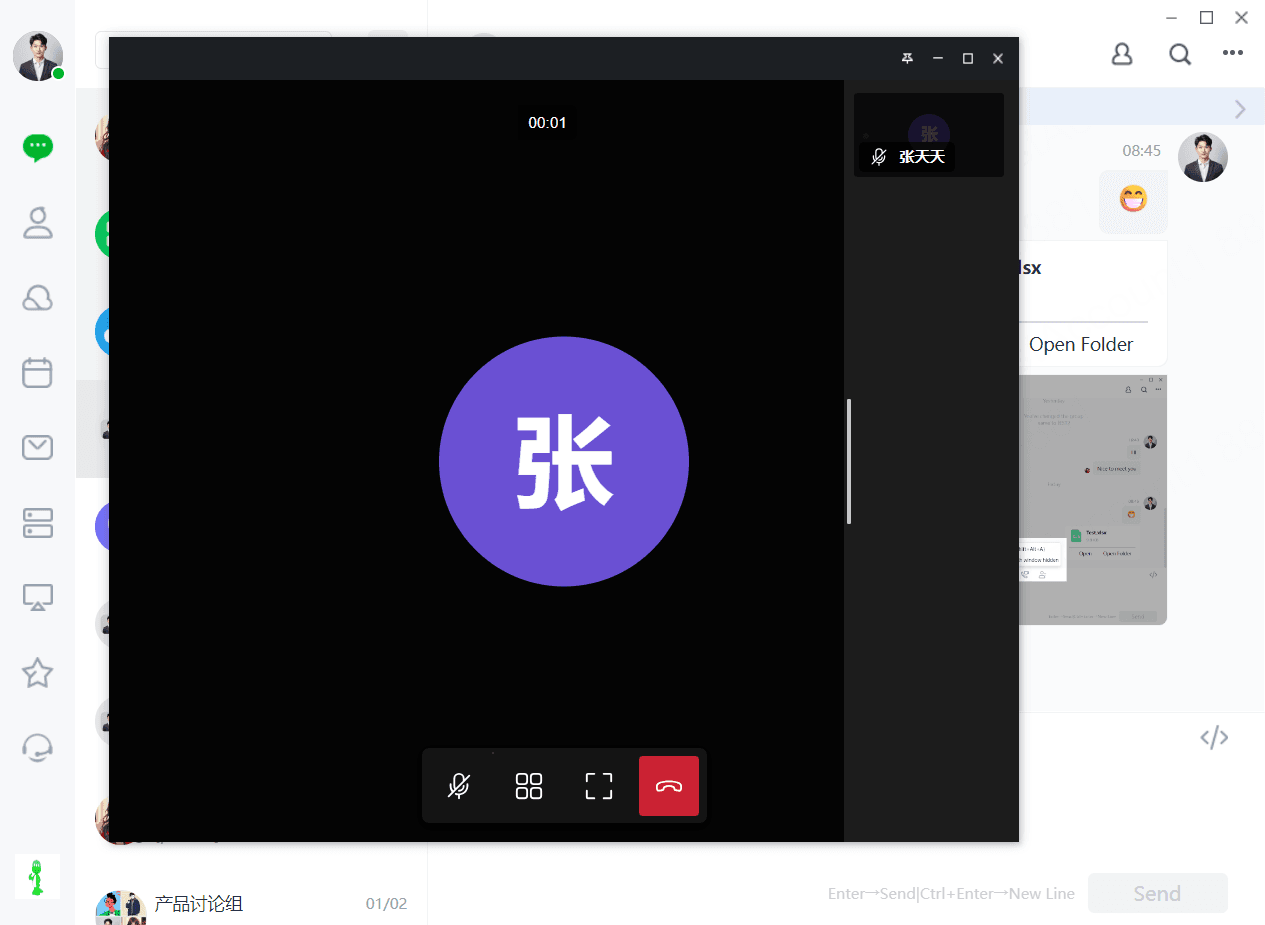
(2) Click the "red" button to end the current call.
1.10 Contact Cards
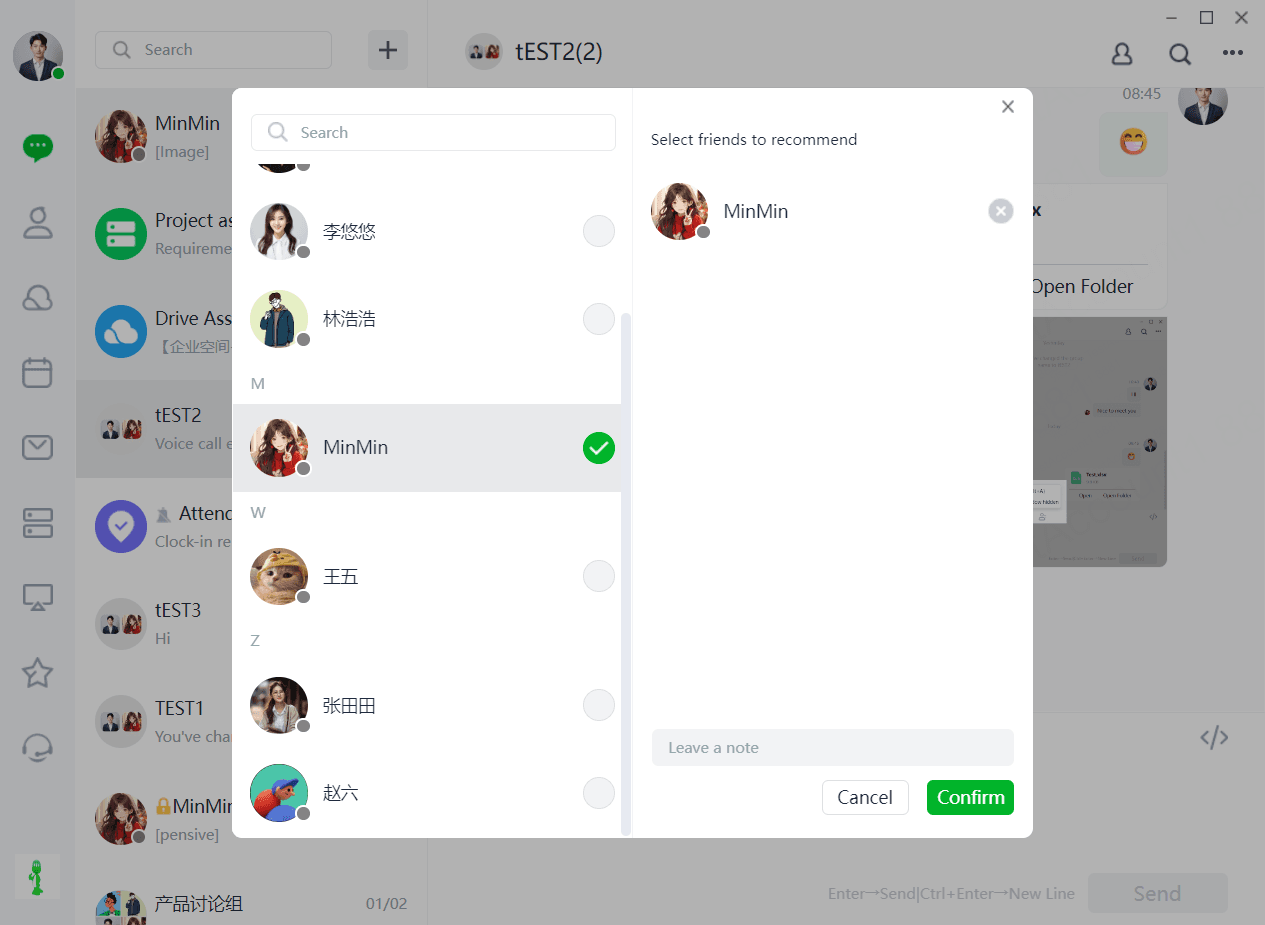
(1)Users can send other users' business cards to a group by clicking "Chat Box - Send Contact Card".
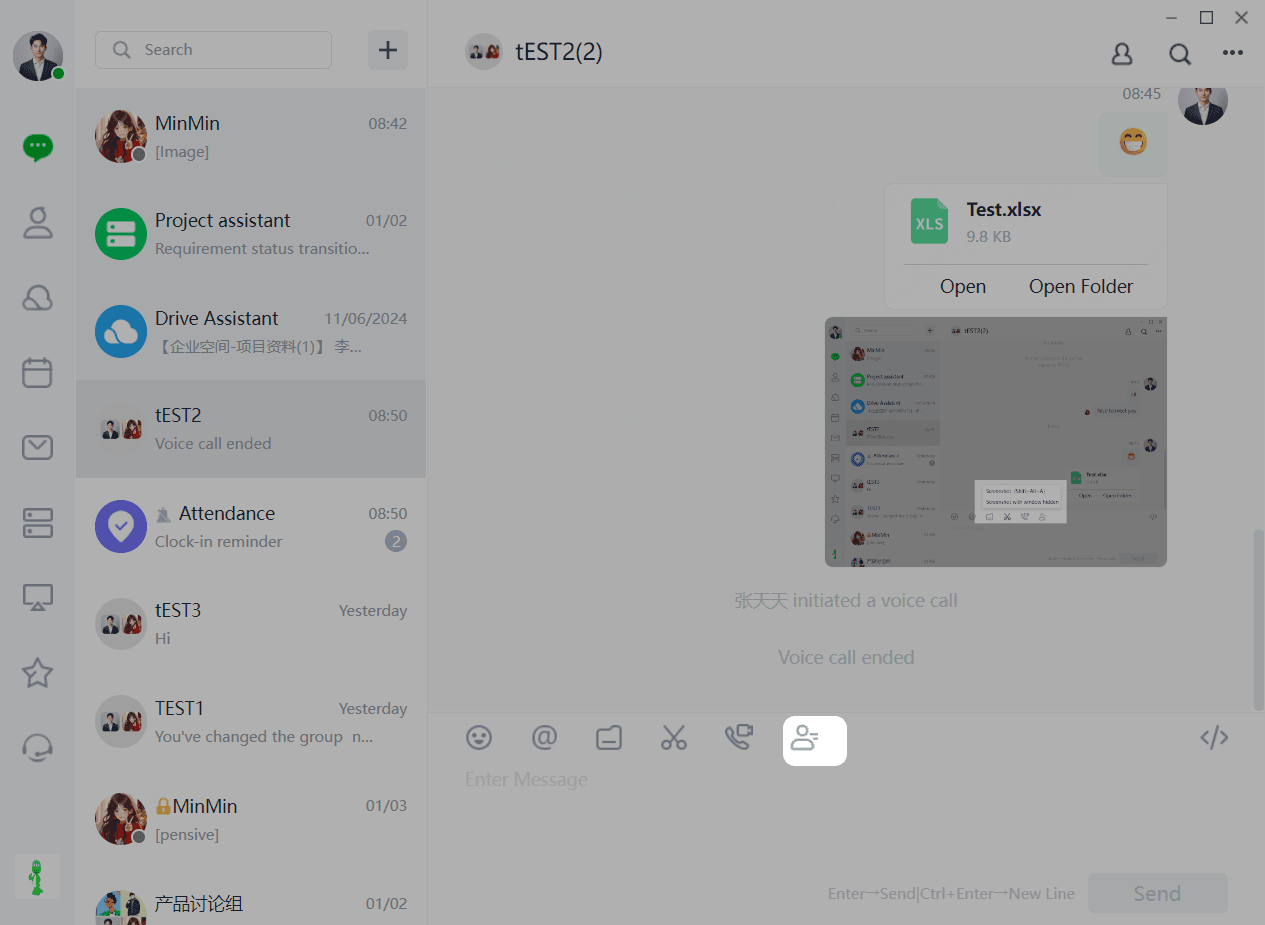
(2)Select the user to recommend, enter a "message", and click "Confirm" to send the contact card.
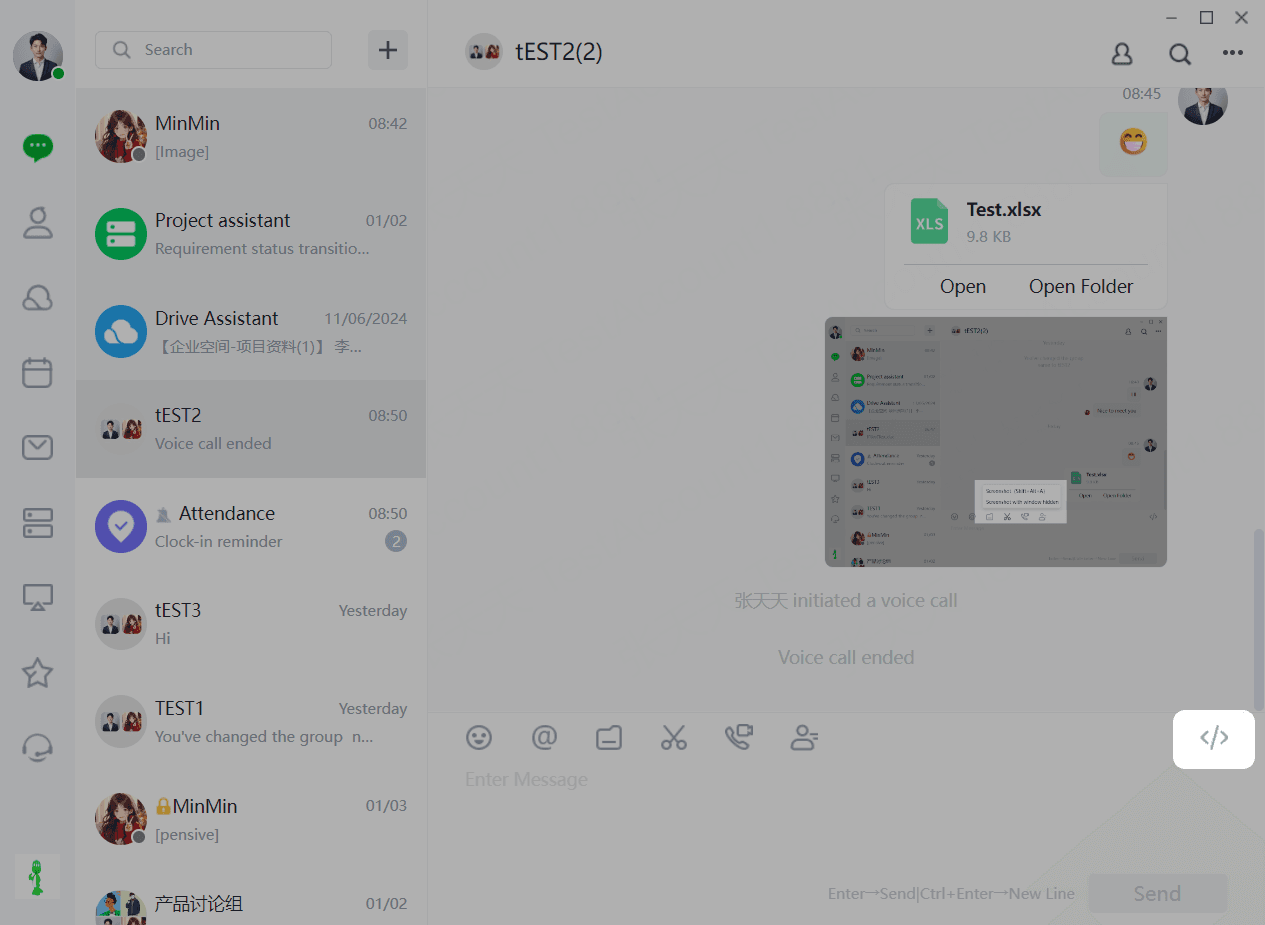
1.11 Code Block
(1)Users can send code to chat friends by clicking "Chat Box - Send Code Block".
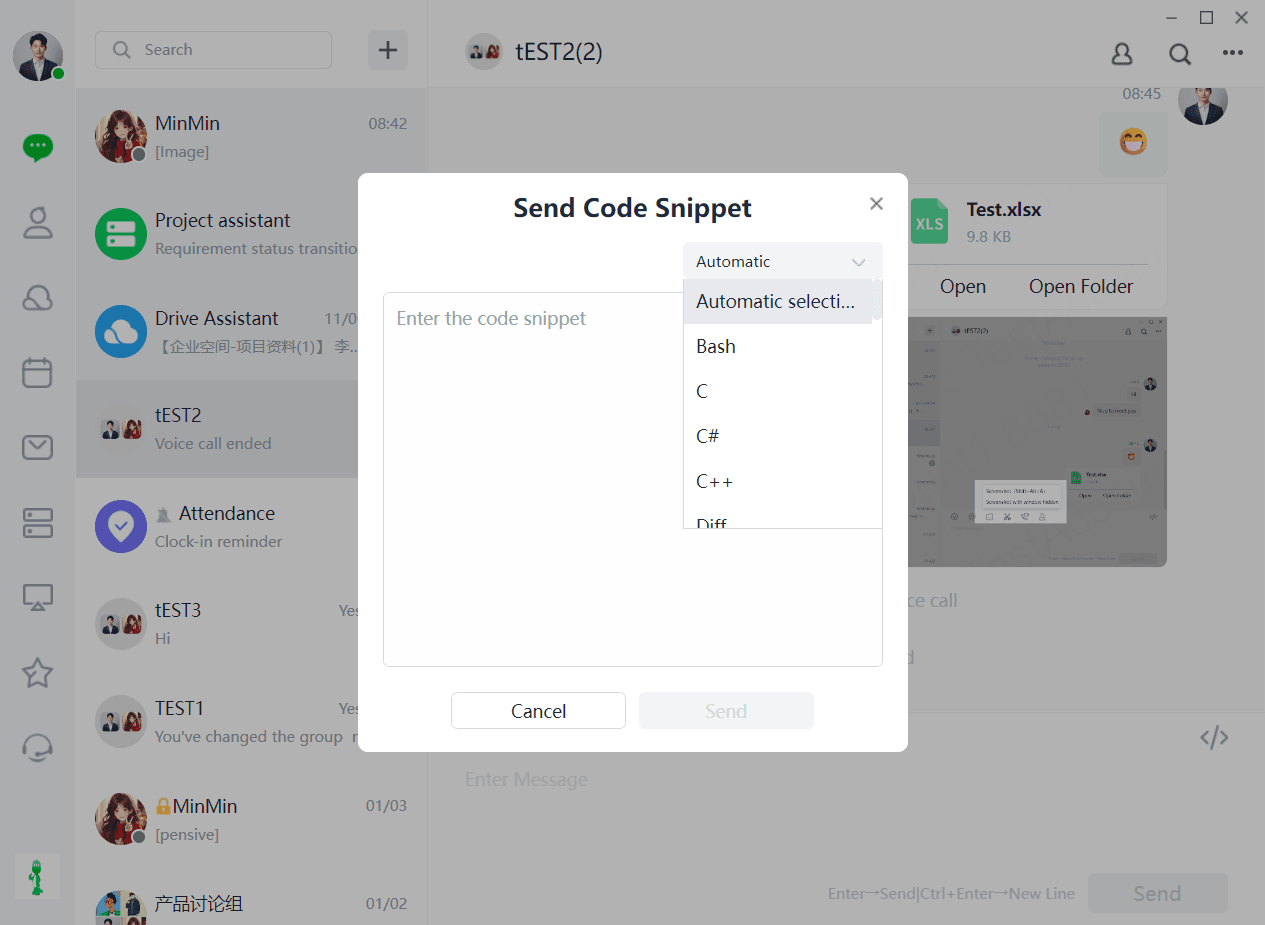
(2)Copy the code block into the text box, select the programming language, and the format will adjust automatically.
1.12 Message Read
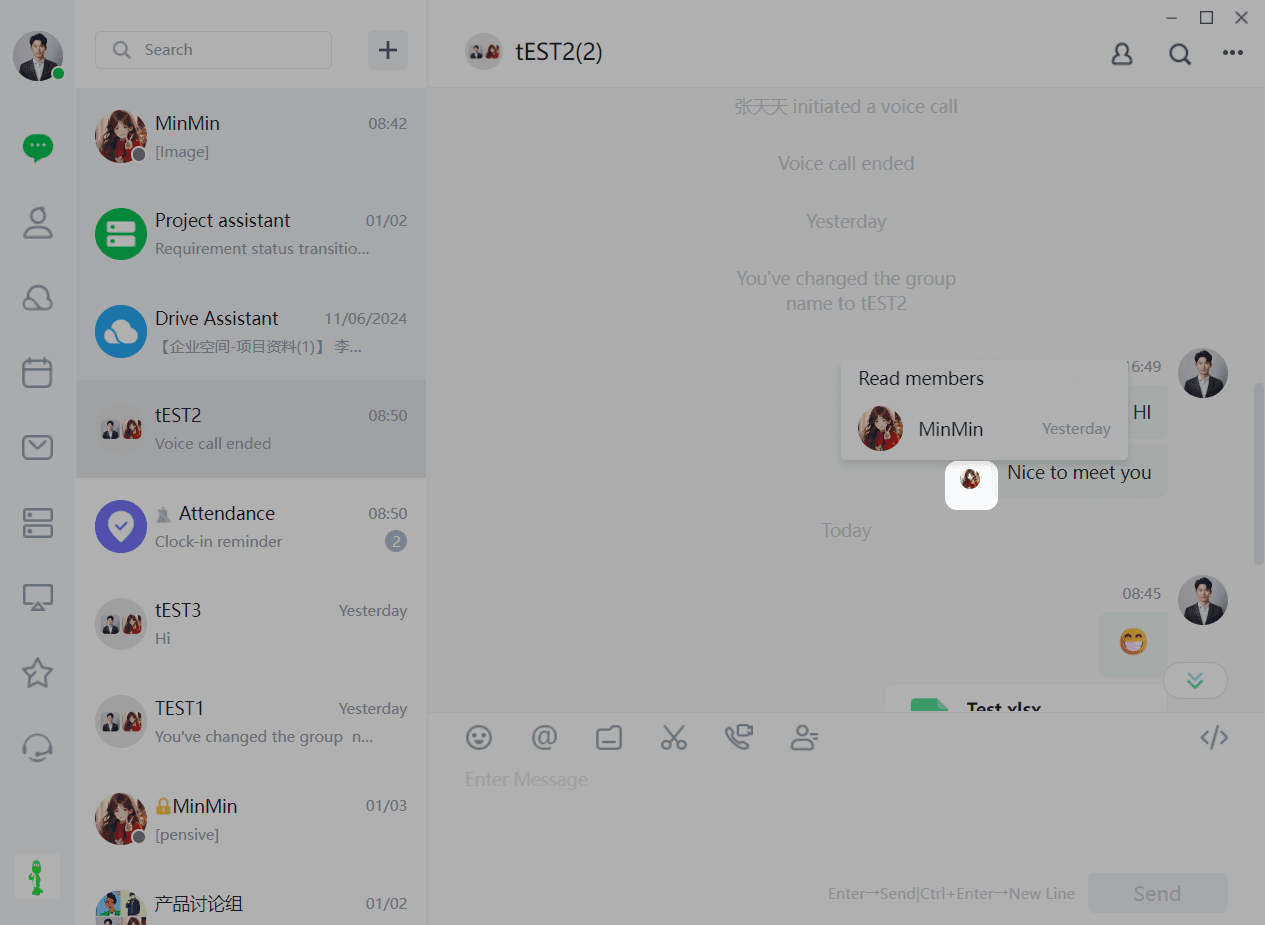
Check if messages have been read
Avatars of users who have read the message will appear on the right side of the sent message.
(1) Not displayed if all unread.
(2) Displays avatars of users who have read when partially read.
(3) Displays avatars in read order when all read; by default, shows three avatars. Click to view more readers.
1.13 Group Settings
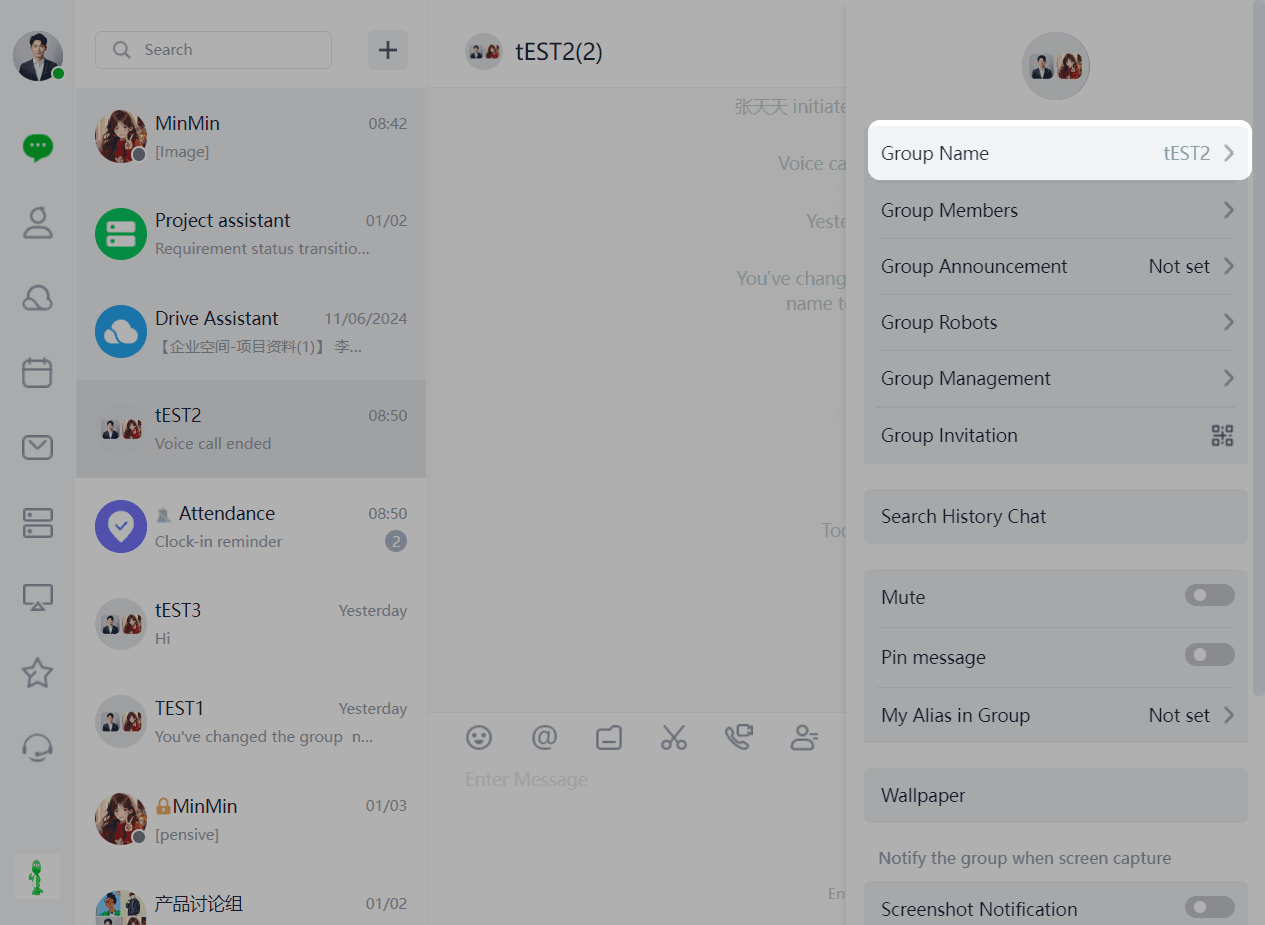
1.13.1 Edit Group Nickname
Users can set a nickname for the current group by clicking the top-right corner of the chat box and selecting "Edit Group Nickname".
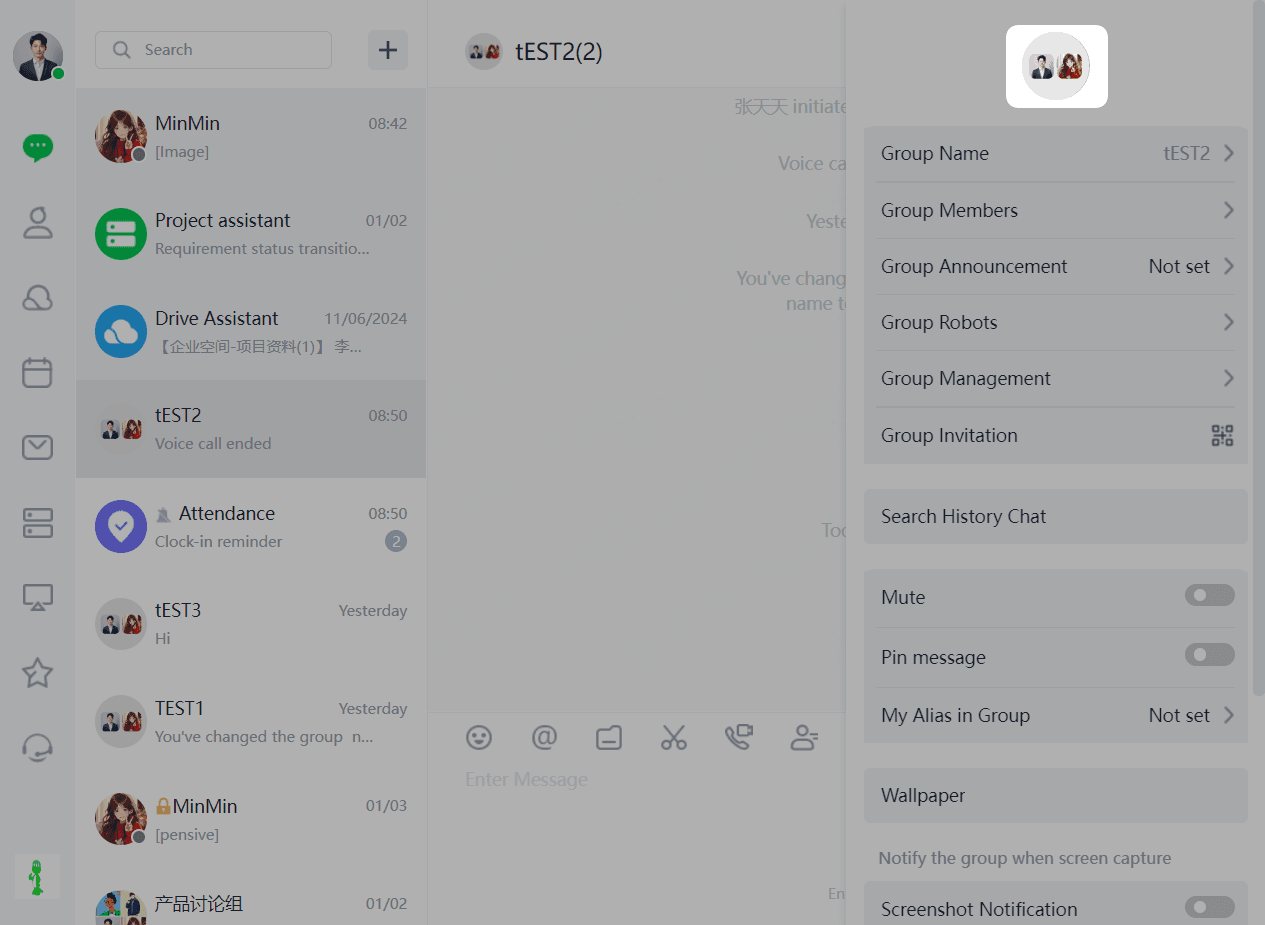
1.13.2 Edit Group Avatar
Users can replace the group avatar by clicking the top-right corner of the chat box and then clicking the group avatar.
1.13.3 Group Members
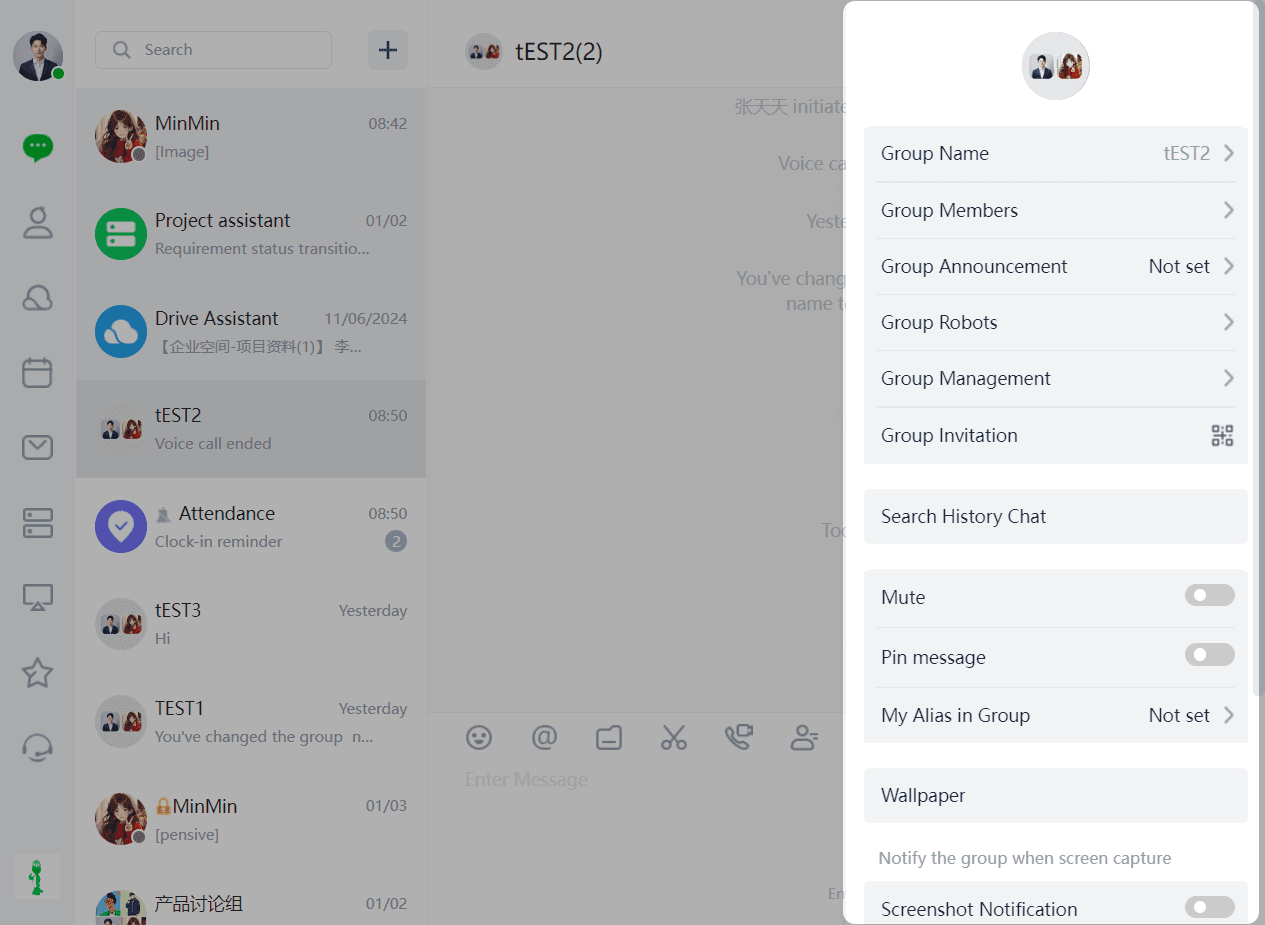
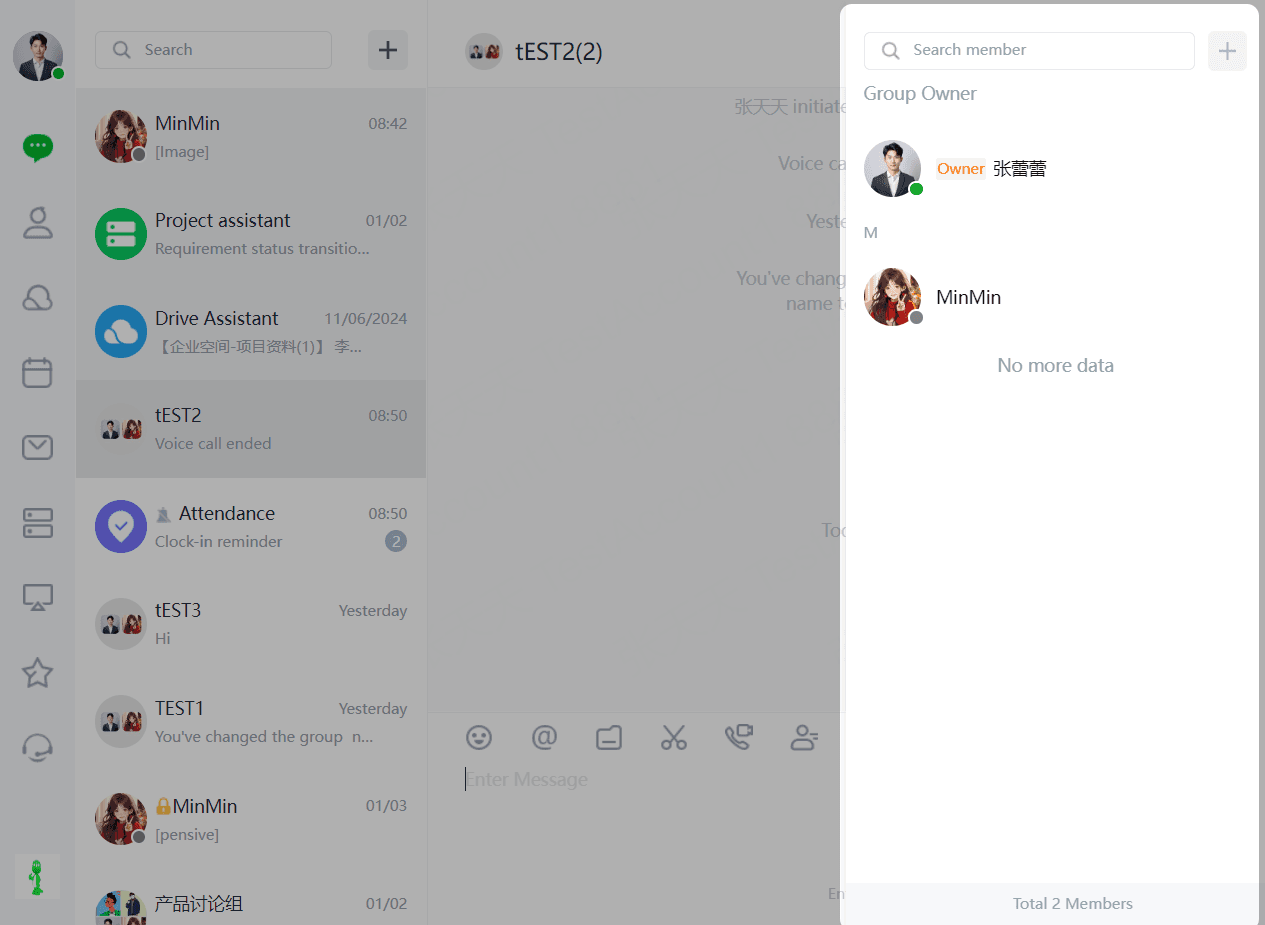
Manage group members through "Group Members", including searching, inviting, removing, and initiating chats.
(1)Click the top-right corner of the group chat box to enter "Group Members" management.
(2)Search for users or click "+" to invite them to the group.
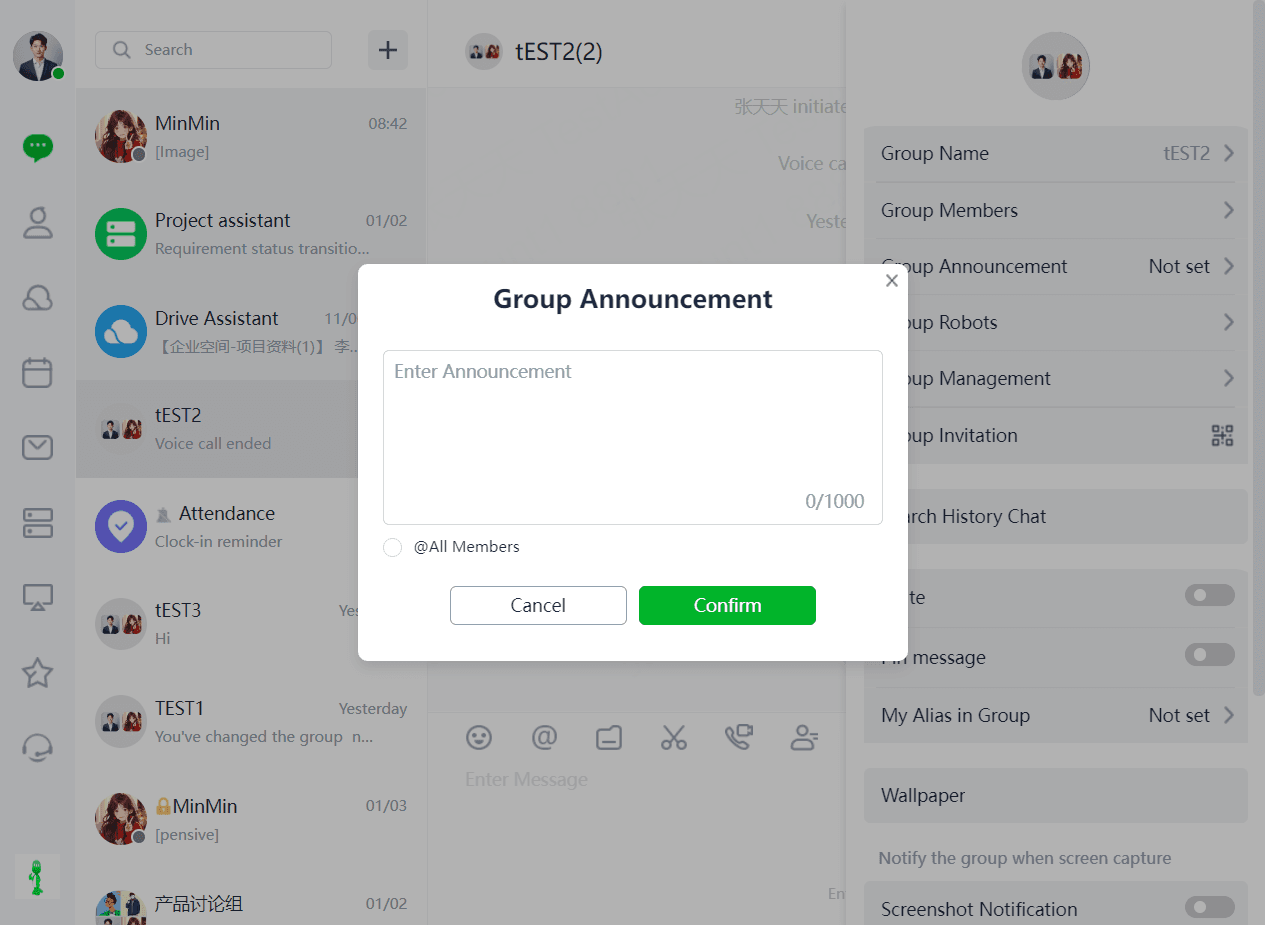
1.13.4 Group Announcement
(1)Click "..." in the top-right corner of the group chat box and select "Group Announcement".
(2)Enter the "announcement content" and click "OK" to save the announcement.
1.13.5 Group Bot
(1)Click the ... icon in the top-right corner > Group Bot.
1.13.5 Group Management
(1)Click the ... icon in the top-right corner > Group Management.
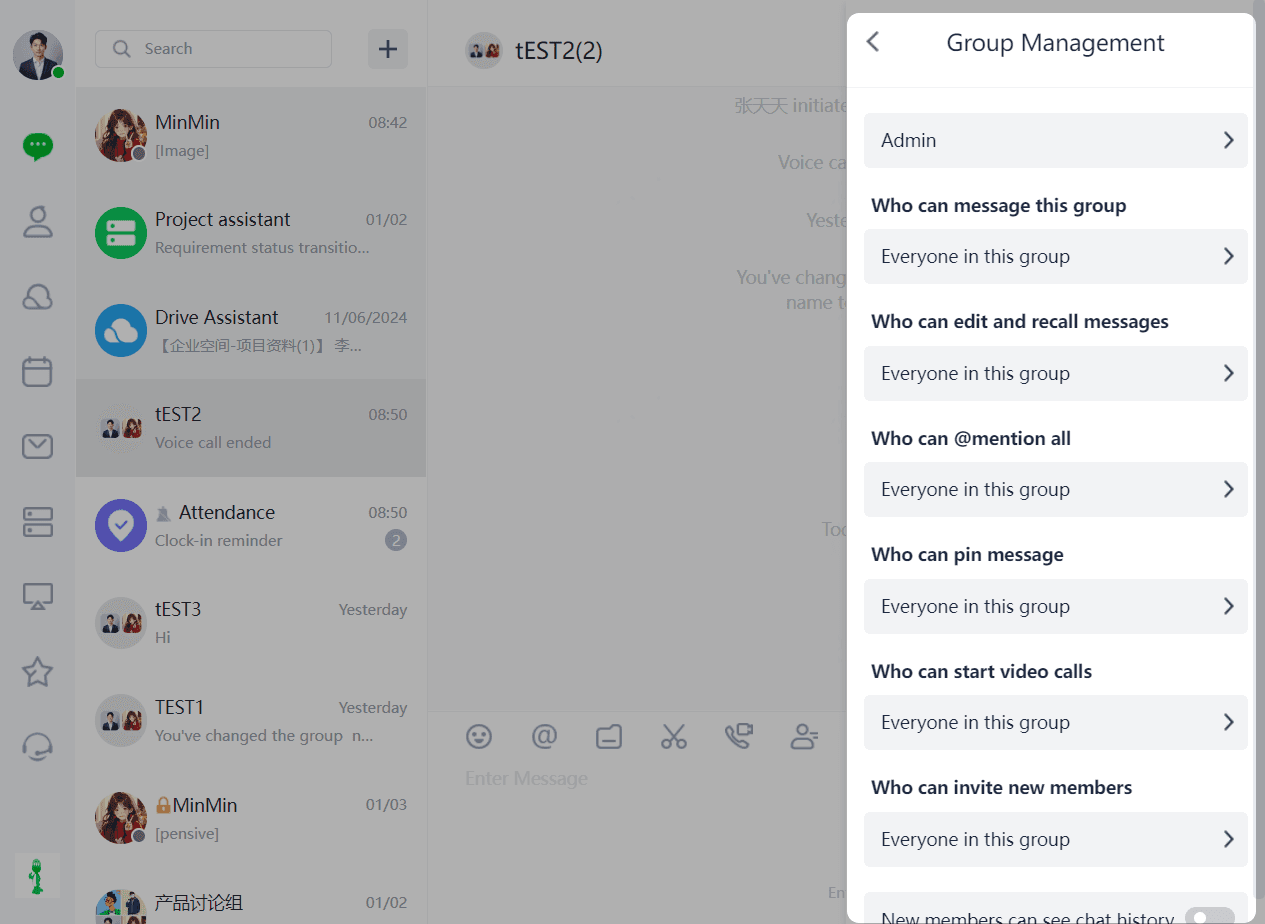
Group Admin Settings
(2)Click "Admins" > "Add Admin", select the admin you want to add, and add them.
(3)To remove an admin, go to Group Management > Admin List, select the admin to remove, and click "Remove".
Who Can Speak in This Group
Admins can set who can speak in the group. Currently supports "All Group Members", "Only Group Admins", and "Specified Members". Select the group chat box, click "...", choose Group Management, and select the allowed speakers.
Who Can Edit or Recall Group Messages
Admins can set who can edit or recall group messages. Options are the same as above.
Who Can @Everyone
Admins can set who can @everyone. Options are the same as above.
Who Can Pin Group Messages
Admins can set who can pin group messages. Options are the same as above.
Who Can Initiate Audio/Video Calls
Admins can set who can initiate audio/video calls. Options are the same as above.
Who Can Invite New Members
Admins can set who can invite new members. Options are the same as above.
Whether New Members Can View Historical Chat Records
2.13.6 Group QR Code
Select a group, click "...", and choose "Group QR Code" to share. Sharing methods include link and QR code. Share directly in the group chat via link or QR code.
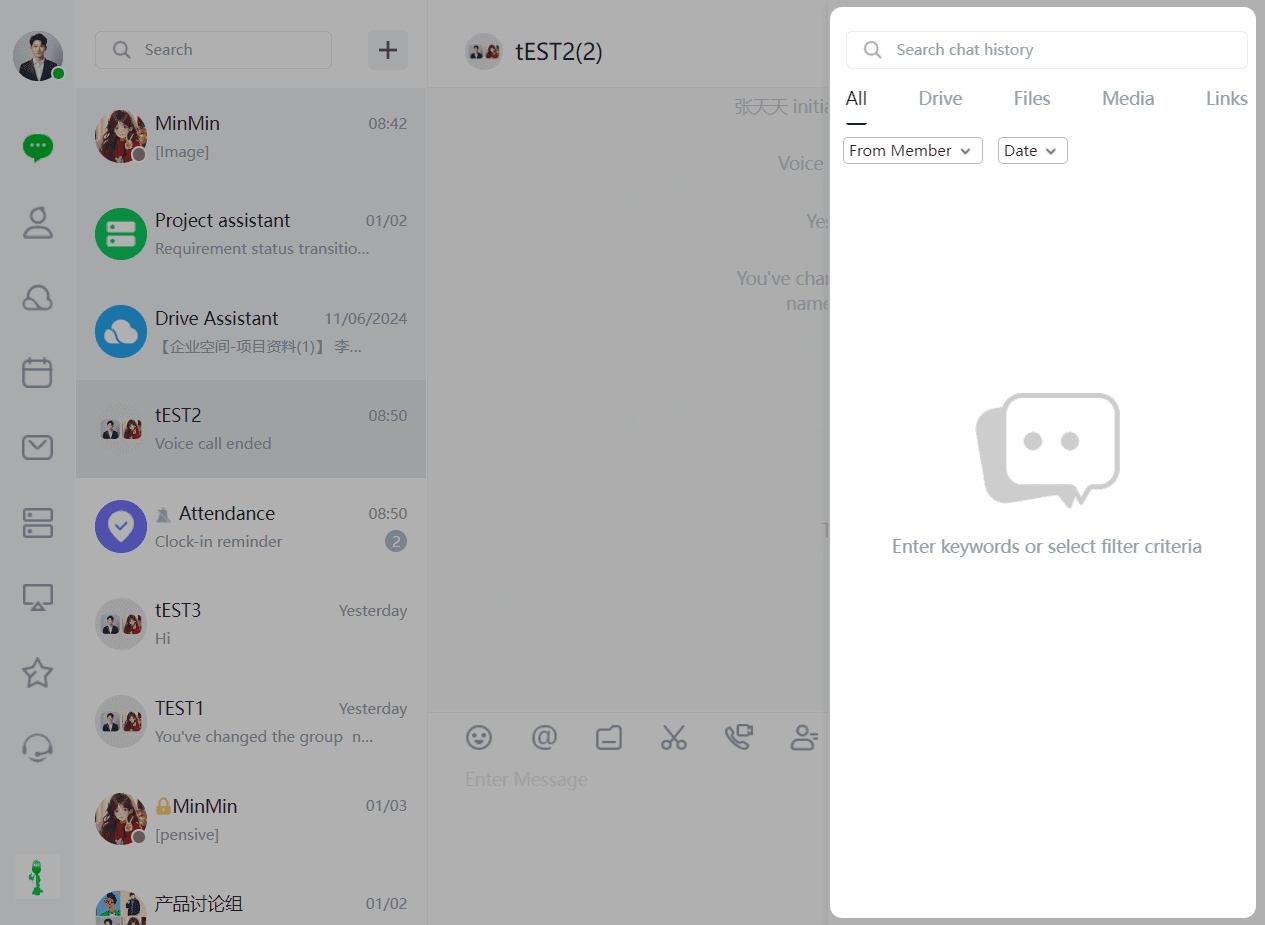
2.13.7 Search Chat
(1)Users can click "..." in the top-right corner of the chat box and select "Search Chat Content" to query.
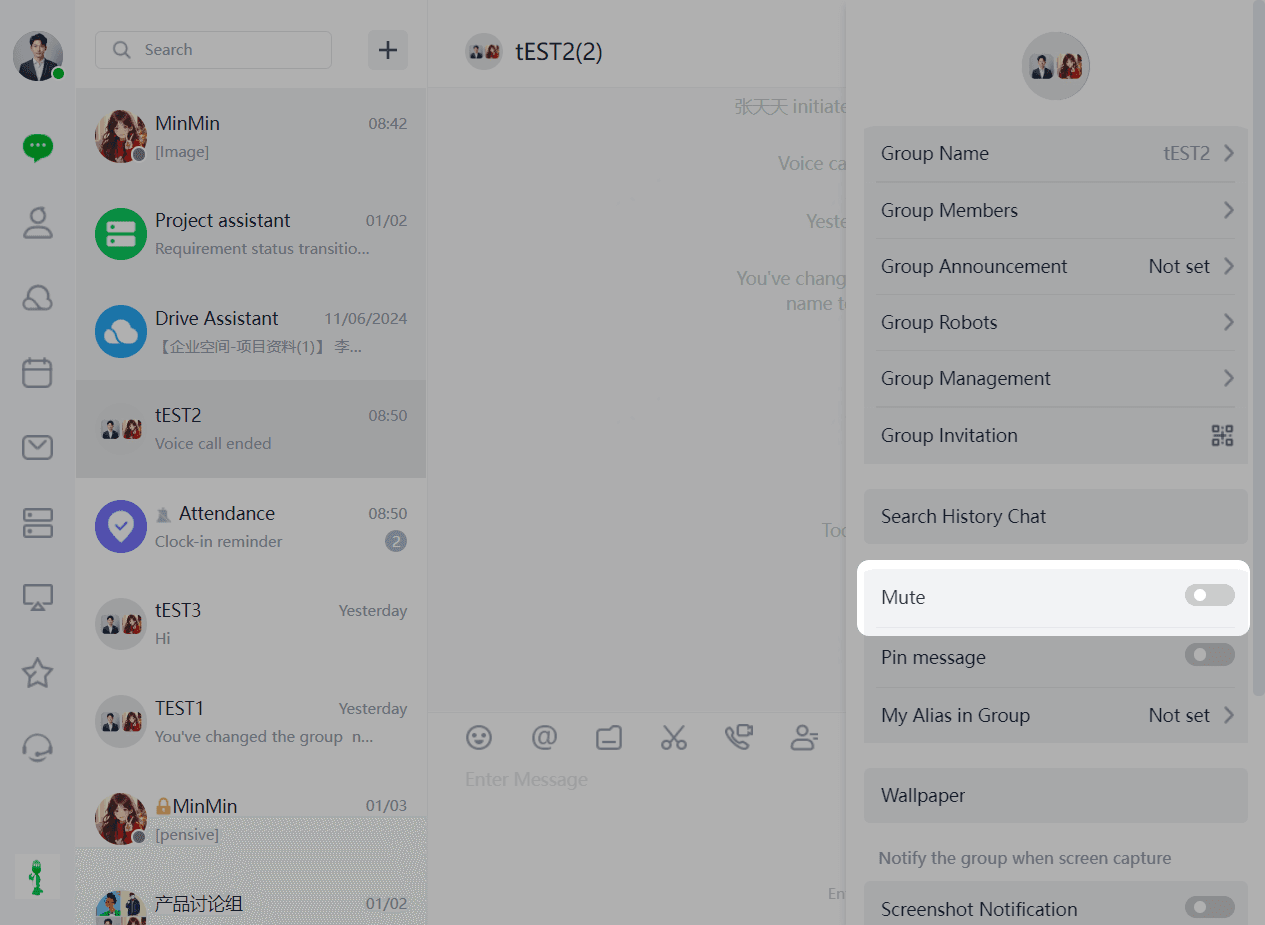
2.13.8 Message Mute
(1)Users can click the top-right corner of the chat box to enable or disable message mute for the current group.
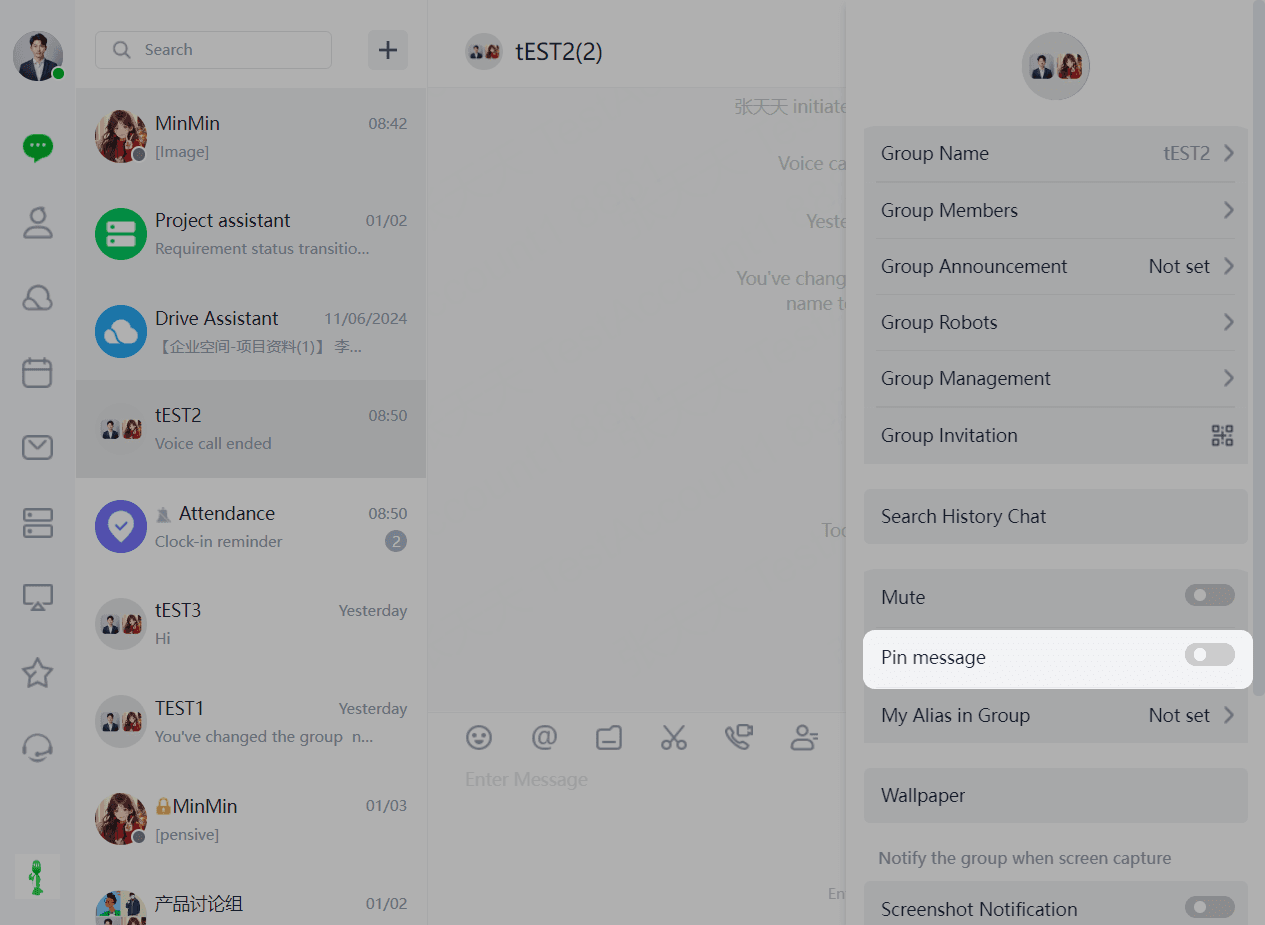
2.13.9 Pin Chat
(1)Users can pin chats by clicking the top-right corner of the chat box or right-clicking a chat group in the chat list.
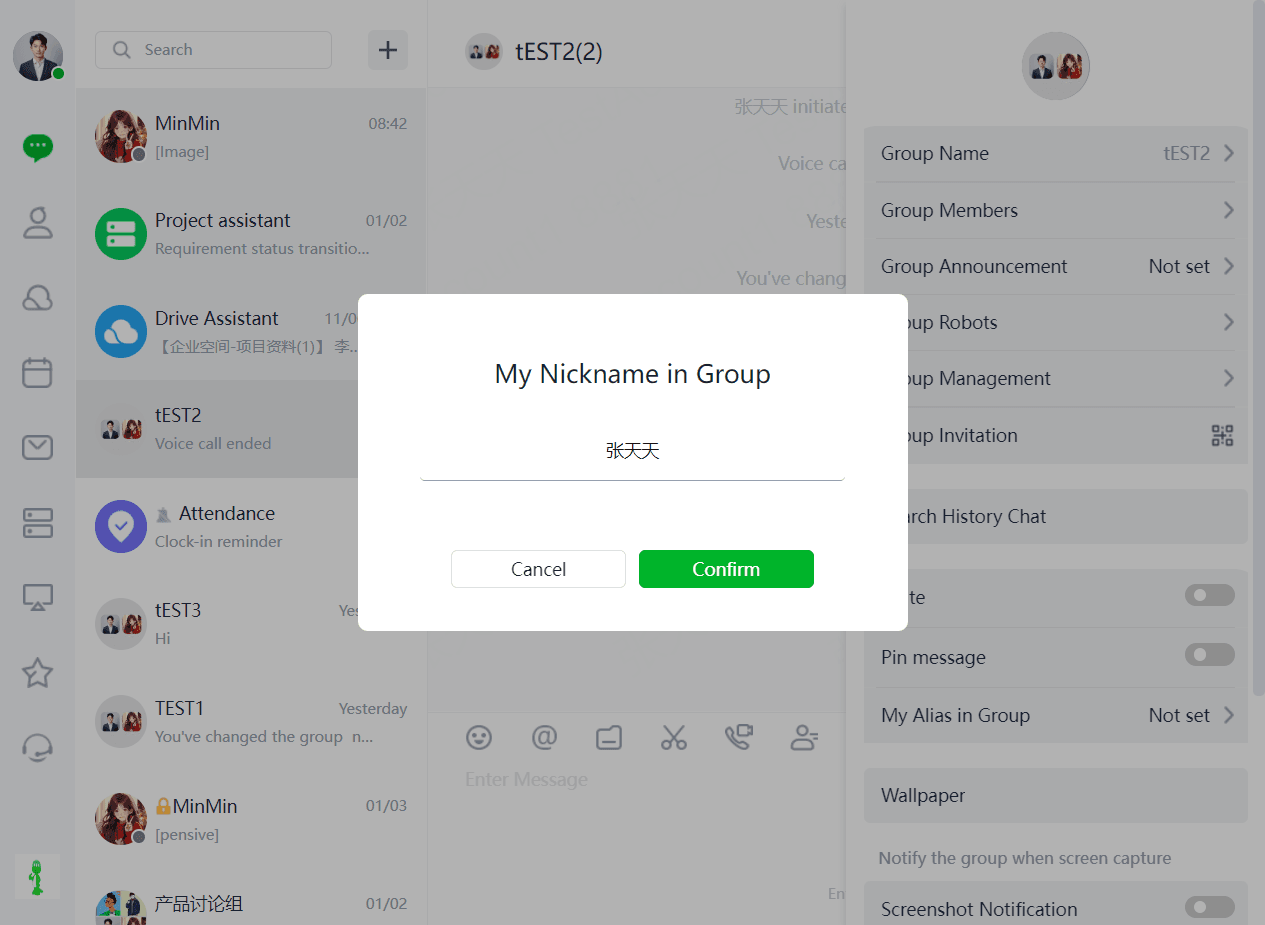
2.13.10 Nickname in Group
(1)Users can set their nickname in the current group by clicking the top-right corner of the chat box.
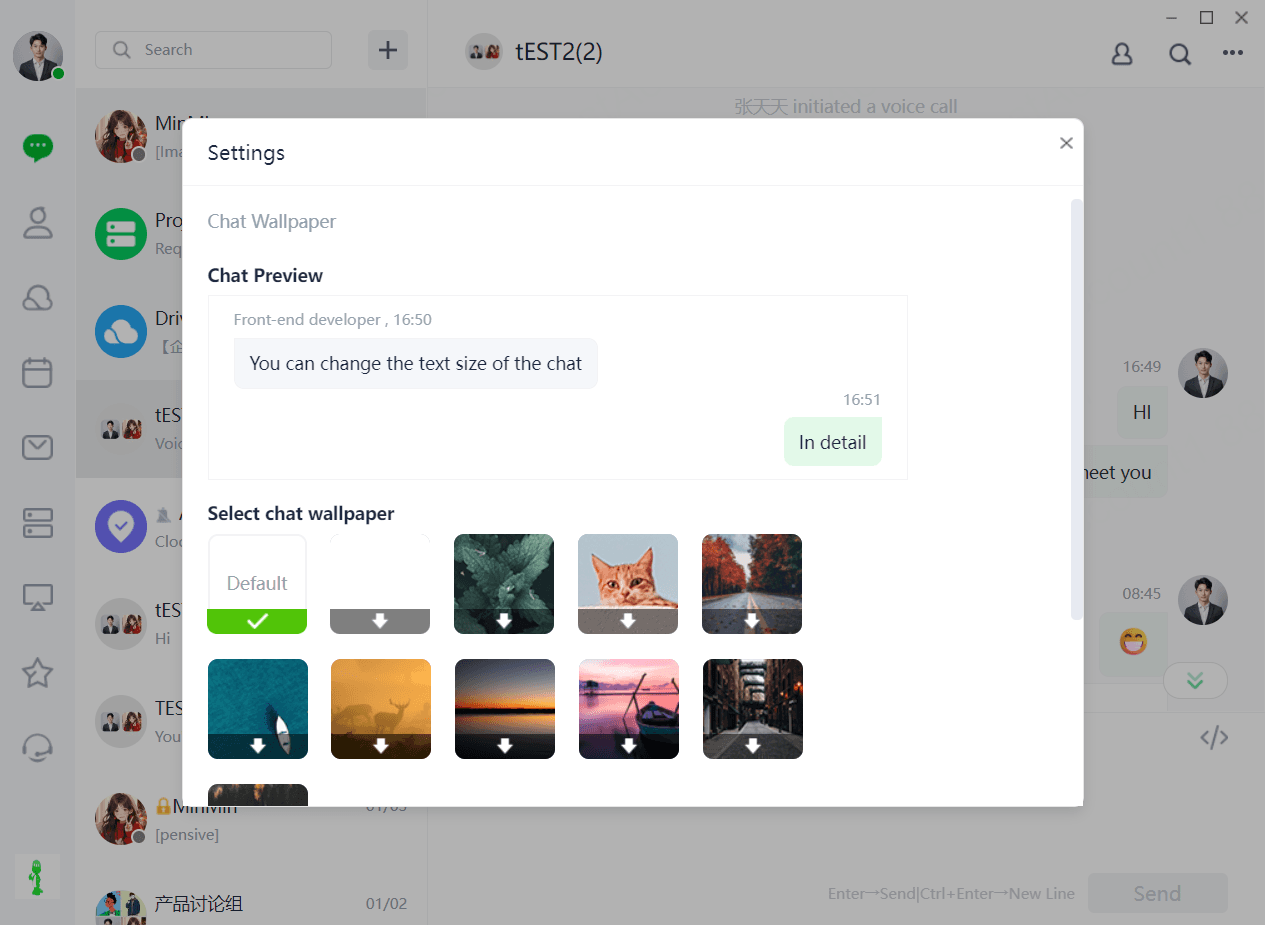
2.13.11 Chat Background
(1)Users can set the chat background by clicking "Set Current Chat Background" in the top-right corner of the chat box.
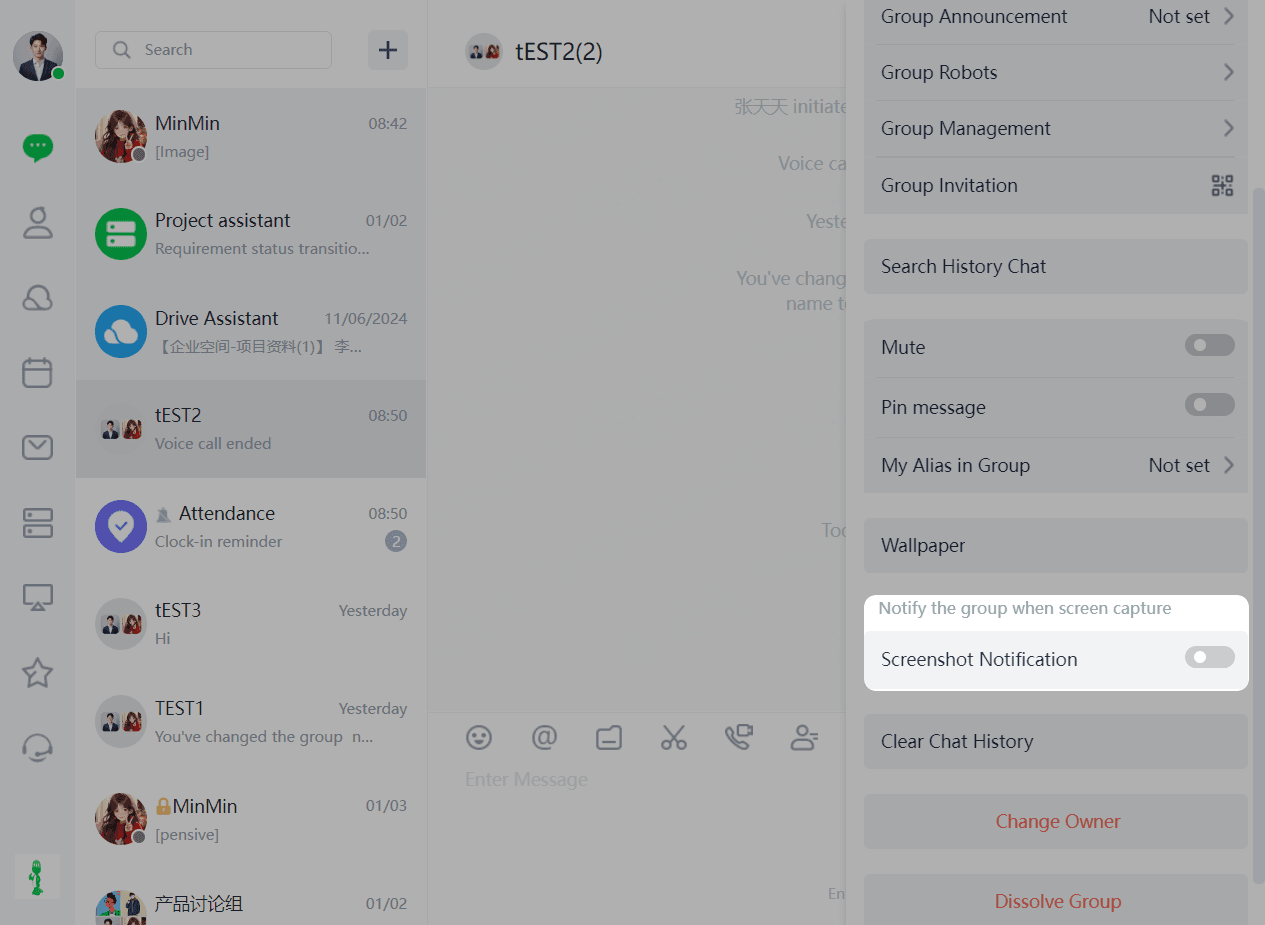
2.13.12 Screenshot Notification
(1)Users can enable or disable screenshot notifications for the current group by clicking the top-right corner of the chat box.
2.13.13 Clear Chat History
(1)Users can clear chat history by clicking "Clear Chat History" in the top-right corner of the chat box. Once cleared, it cannot be retrieved.
2.13.14 Transfer Group Owner
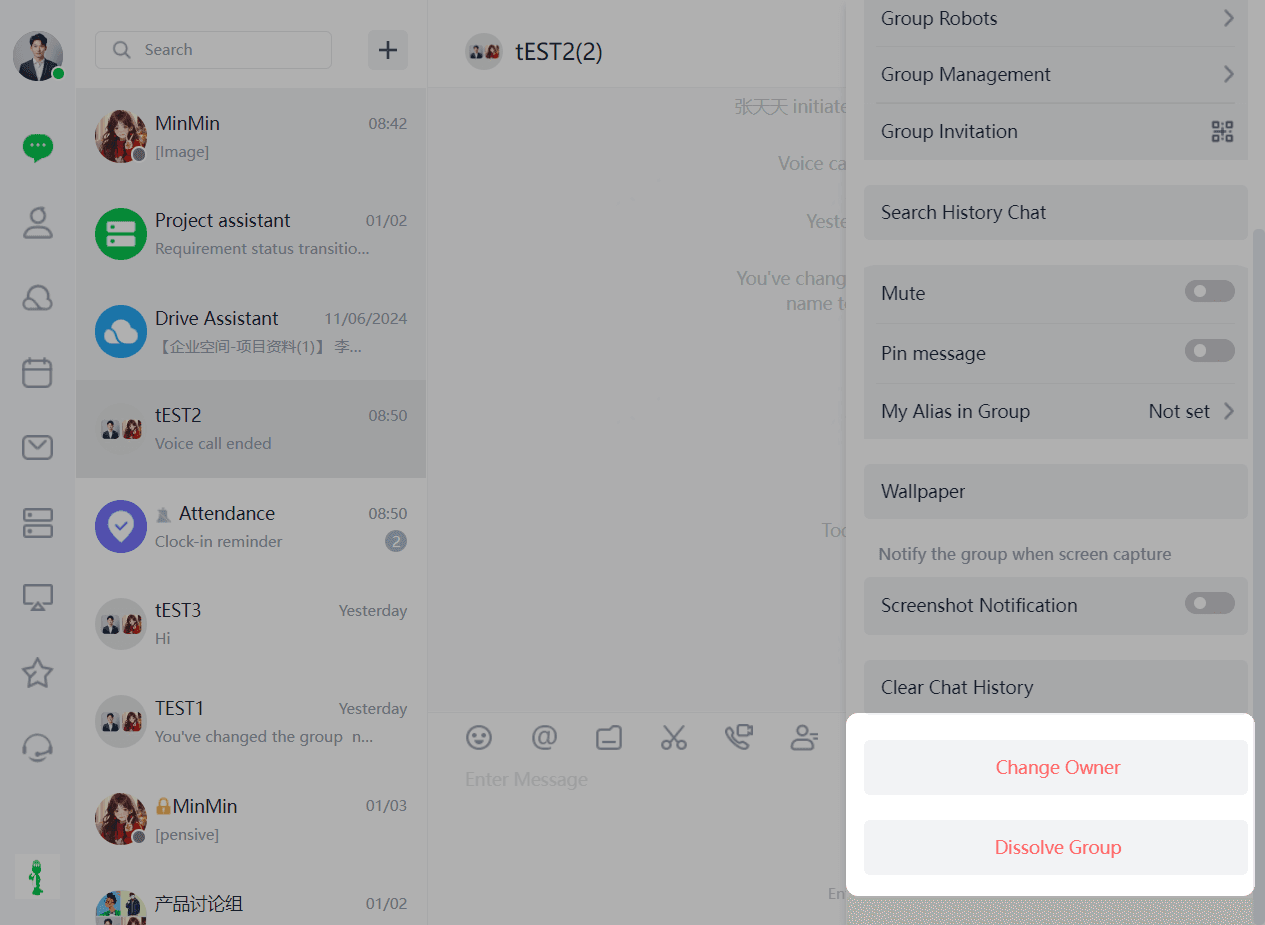
(1) Click ... in the top-right corner of the group.
(2)Click "Transfer Group Owner" at the bottom of the page, select the member to transfer to, and click "OK" (only members from the same department can be selected).
(3)After transferring, a success message will be displayed, and a notification will be sent to the group, visible to all members.
2.13.15 Dissolve Group
(1)Click ... in the top-right corner of the group.
(2)Click "Dissolve Group" at the bottom of the page.
(3)Dissolving the group will clear all chat history, which cannot be recovered.